1. Decide if you want to charge for appointments
If you do not want to charge for appointments or cancellations you can skip this step.
If you want to charge for appointments or save customer card details at the point of booking online you will need to complete this step. Saving customer card details allows you to apply a charge at the click of a button if your customer does not turn up or cancels short notice.
This can be done by going to settings > integrations and clicking 'connect' to Stripe. Follow the steps Stripe walks you through. This will need to be completed on a laptop or desktop computer not a tablet.
For further information click here.
2. Set your diary 'defaults'
Go to settings > defaults > diary and add your appointment types, appointment booking types and appointment groups.
The system may come preloaded with some standard bridal industry options but you can delete these by clicking on each one or edit their name to suit your business. If you have done any imports of data these may have pre-populated some of the defaults such as appointment type names.
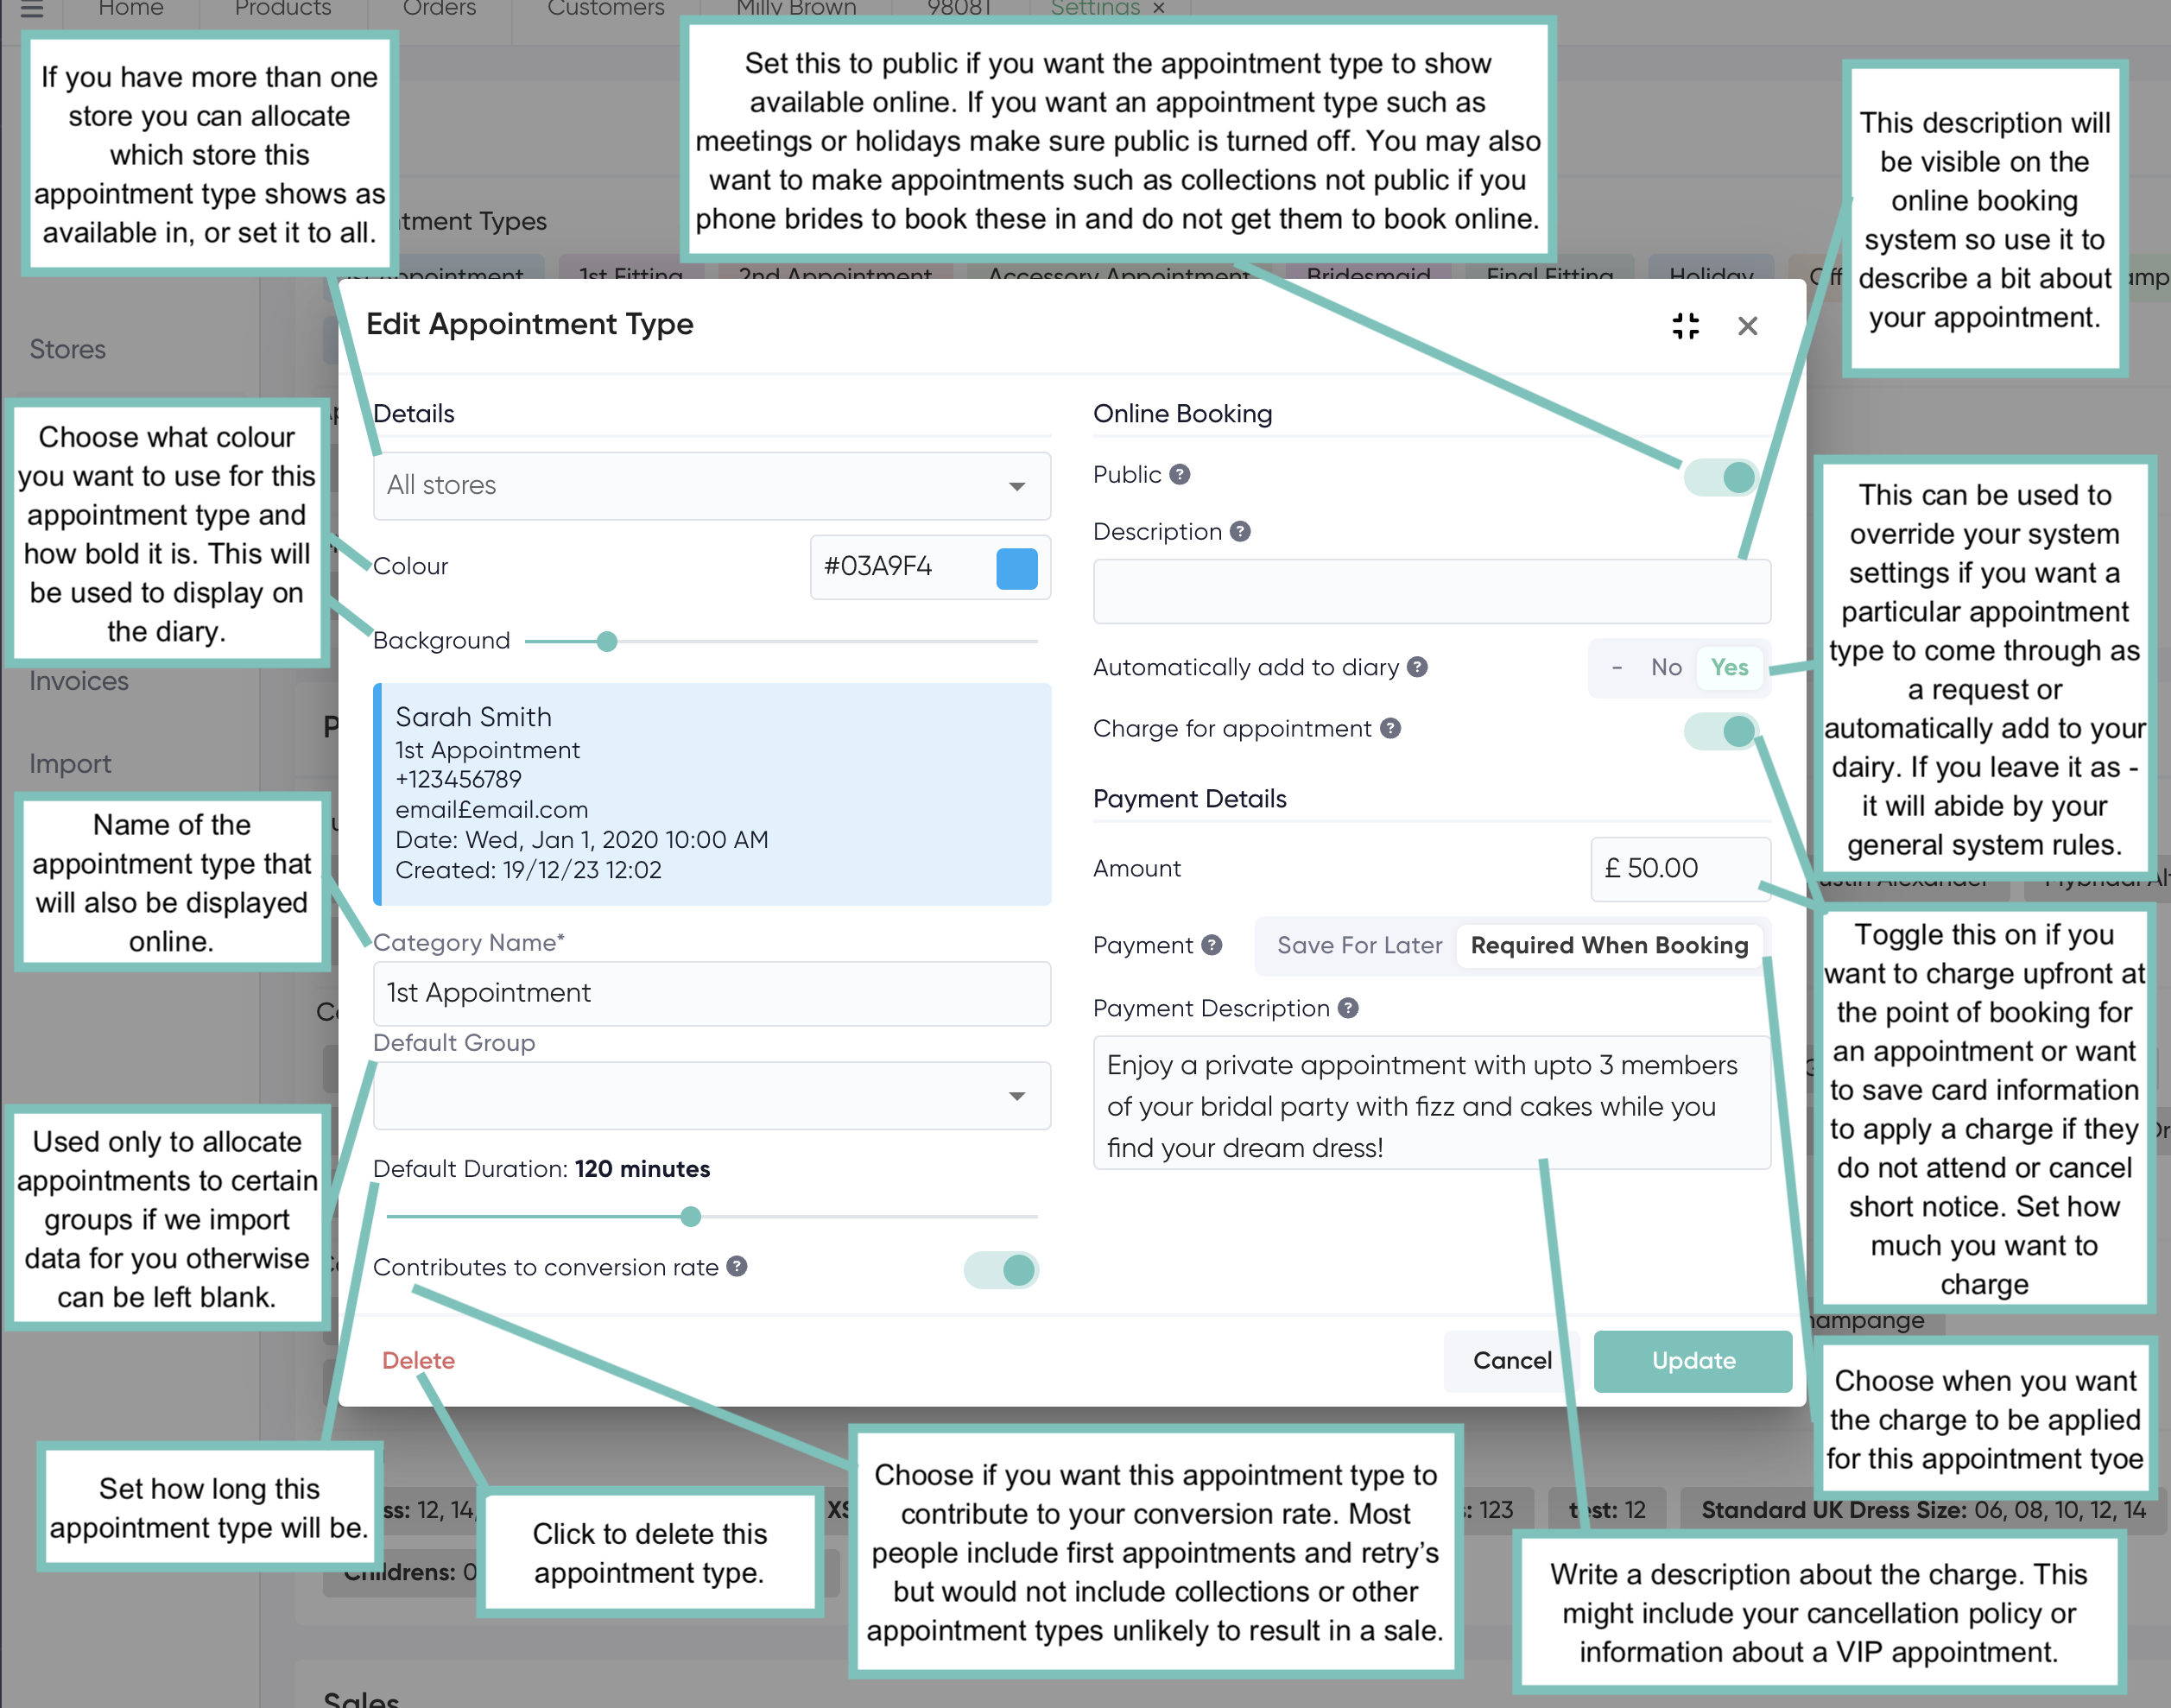
Appointment Types
Add all the appointment types you want customers to be able to book online or for you to manually book in-store.
The image below talks through the appointment type settings.
Appointment Booking Types
Add any booking types you want to be able to choose such as online, phone, in-store etc.
Appointment Groups
These are commonly used to organise your diary into fitting rooms so example groups may be 'fitting room one' and 'fitting room two'. If you just have one fitting room you can add one group called fitting room one or call it the name of your boutique. This is later used to create your online booking system.
3. Set up your availability for your online booking system
You can set up your appointment availability by visiting tools > booking config. This allows you to set up exactly what appointment types you want available when. You can also create custom configurations for selected dates such as trunk shows or sale weekends.
Don't forget to use the preview tool to check your settings!
For more information about how to do this click here.
4. Set up any additional booking system settings
You can configure how the booking system will look by going to settings > account > booking system settings (3 dots to the right of your booking system URL > settings.) This will open a preview of how your booking system will look once embedded into your website.
You can choose your colours and fonts for the booking system here. You can also test your appointment availability here and see how your booking form will look.
Click here for more information.
5. Customise your booking form
You can edit the booking form that is visible when customers book an appointment to ask any questions you want. You can also make any question mandatory.
Learn how to customise this form here.
6. Set up message templates
Go to Automations > templates. You can set up or copy our existing templates for email and SMS messages which can then be set to automatically send with autoflows (next step). These are perfect for appointment confirmation messages when appointments are booked and appointment reminder messages 24-48 hours before the appointments!
For more information click here.
7. Schedule when you want the messages to send
Go to Automations > Autoflows to set up your autoflows which will use triggers to work out when messages should send automatically.
Fore more information click here.
8. Check your diary settings
You can access these by going to diary > three dots in the top right > diary settings.
Your open / closed time are used to show your working hours on your diary and interval minutes / height change the look of your diary. This is just for you to view, not your customers so is worth having a play around with to see what you like.
'Show all diary groups?' will show all available groups on the group view even if no-one is booked in. If you have more than one fitting room we recommend this is turned on.

The bottom options in the 'customer appointment link' section all refer to the page customers are directed too when they go to confirm their appointment on their appointment reminder message.
There are options for if you want your customers to be able to add an enquiry form (additional data gathering pre appointment), if you want enquiry form completion to be mandatory and if you want your customers to be able to confirm or cancel appointments. To learn about these in more detail visit this guide.
9. Embed the booking system in your website
You are now ready to embed the online booking system in your website and to go live!
To learn more about how to do this click here.
You can also use your unique booking system URL (found in settings > account > copy URL) to link to your booking system from social media.