This guide will talk you through what templates are, how you can amend existing ones or create your own for emails and SMS texts.
Templates have been created in order to send customers communication and are divided into two types, email and SMS. These can be sent to customers as a one off message, or can be combined with an autoflow to create rules which schedule them to be sent by certain triggering events at time frames set by yourself.
You can find templates by using the side bar to click on 'Automation' and then 'Templates'.
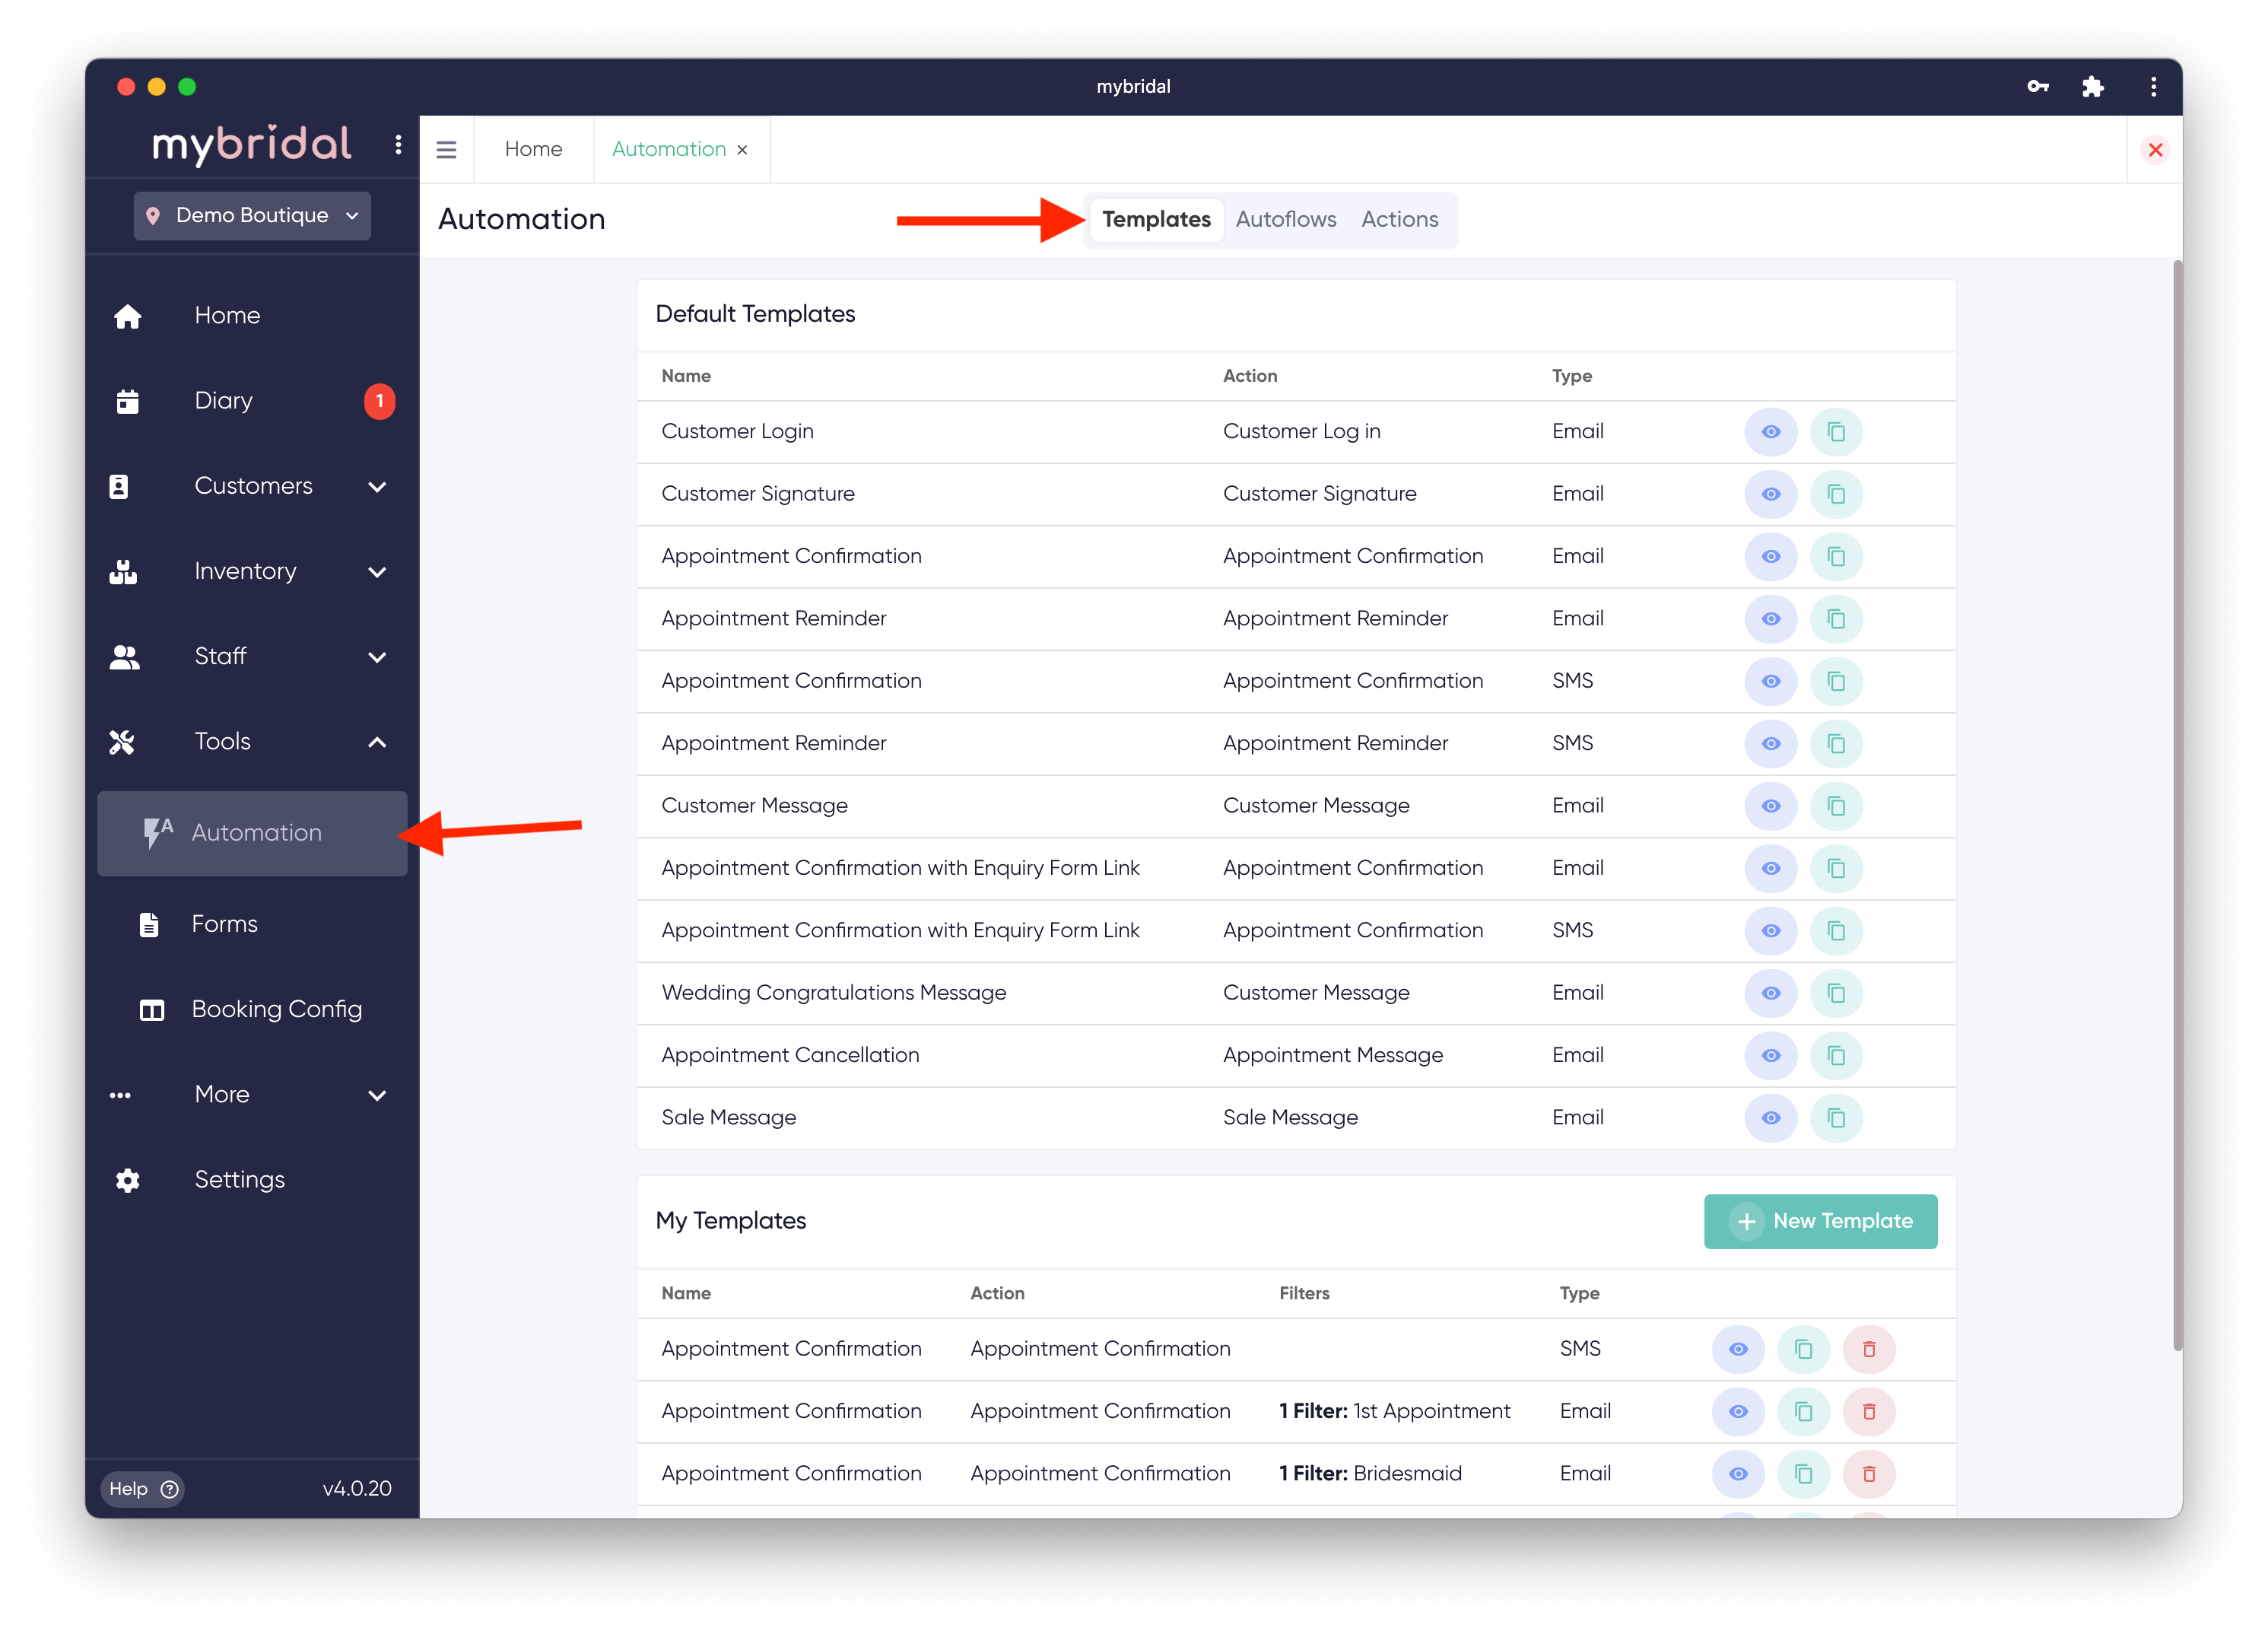
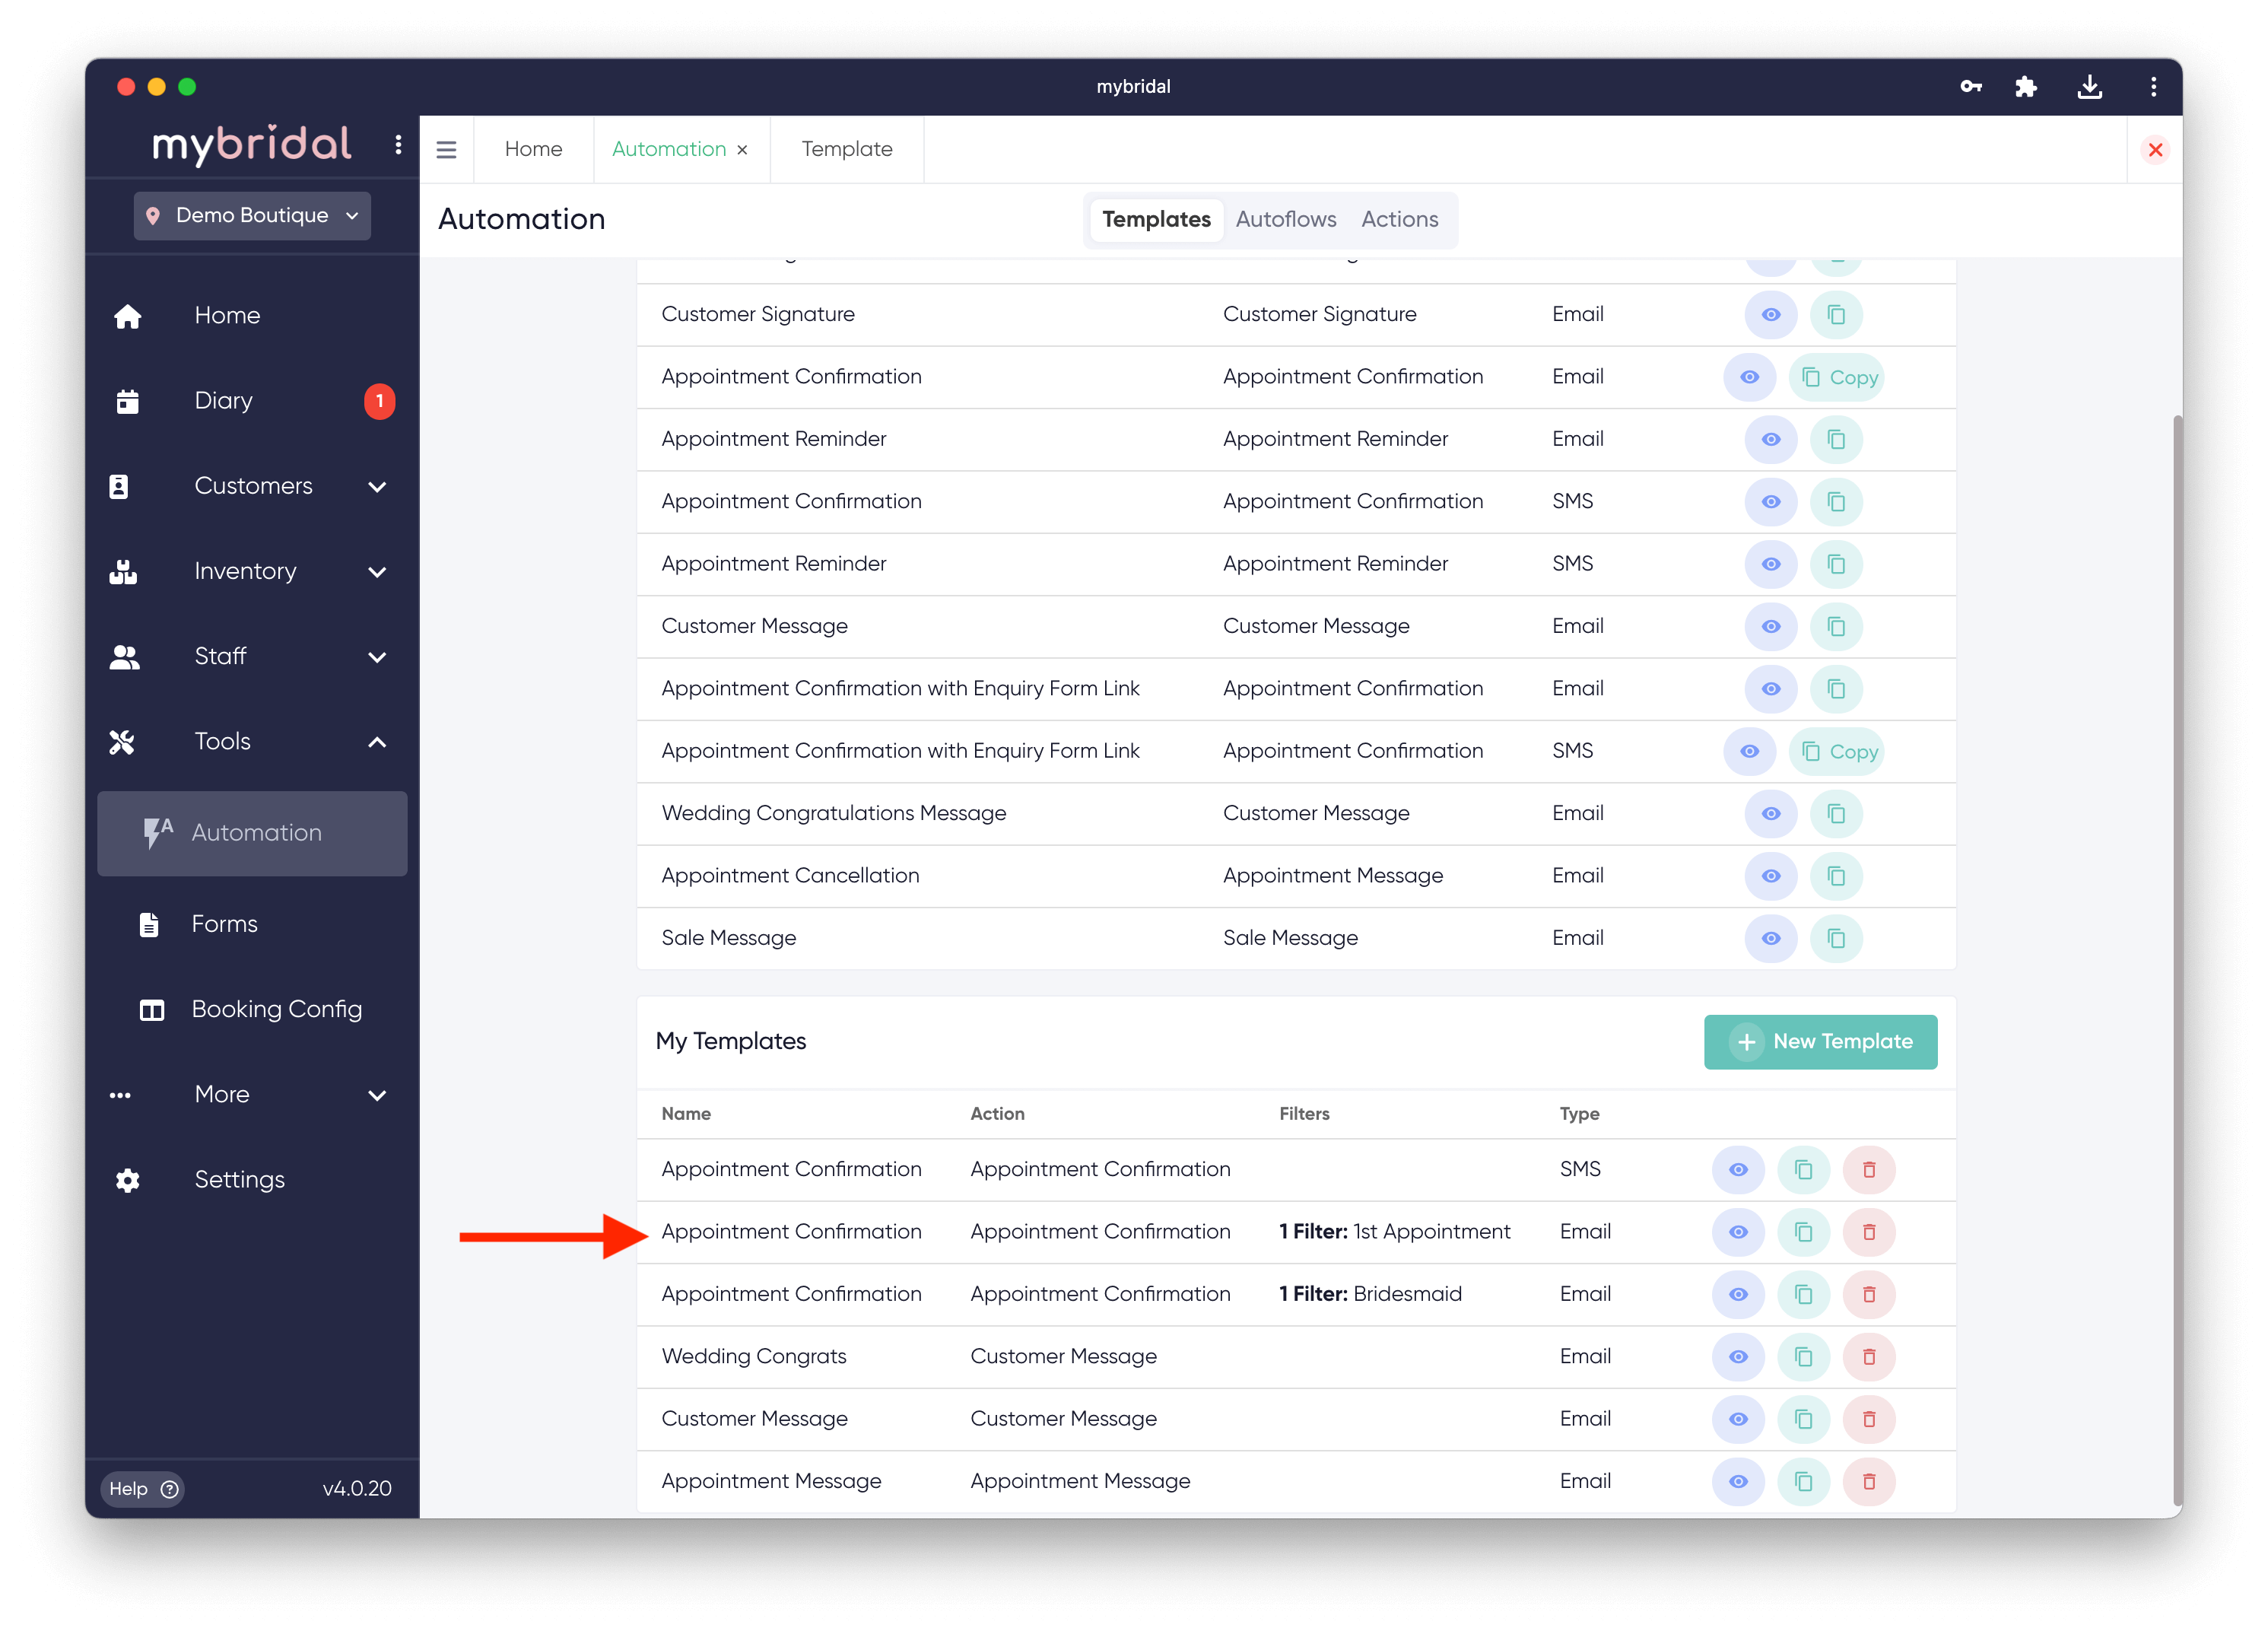
We have created several default templates which are commonly used in the bridal industry. You can view these by clicking the blue eye symbol located to the right side of each template. You can use these templates as they are, you can create your own from scratch by clicking '+ new template' or you can copy and edit an existing template by clicking on the copy icon. If you edit a template or create your own it will appear in the 'My Templates' area.
How to edit an existing template or create your own from scratch.
1.
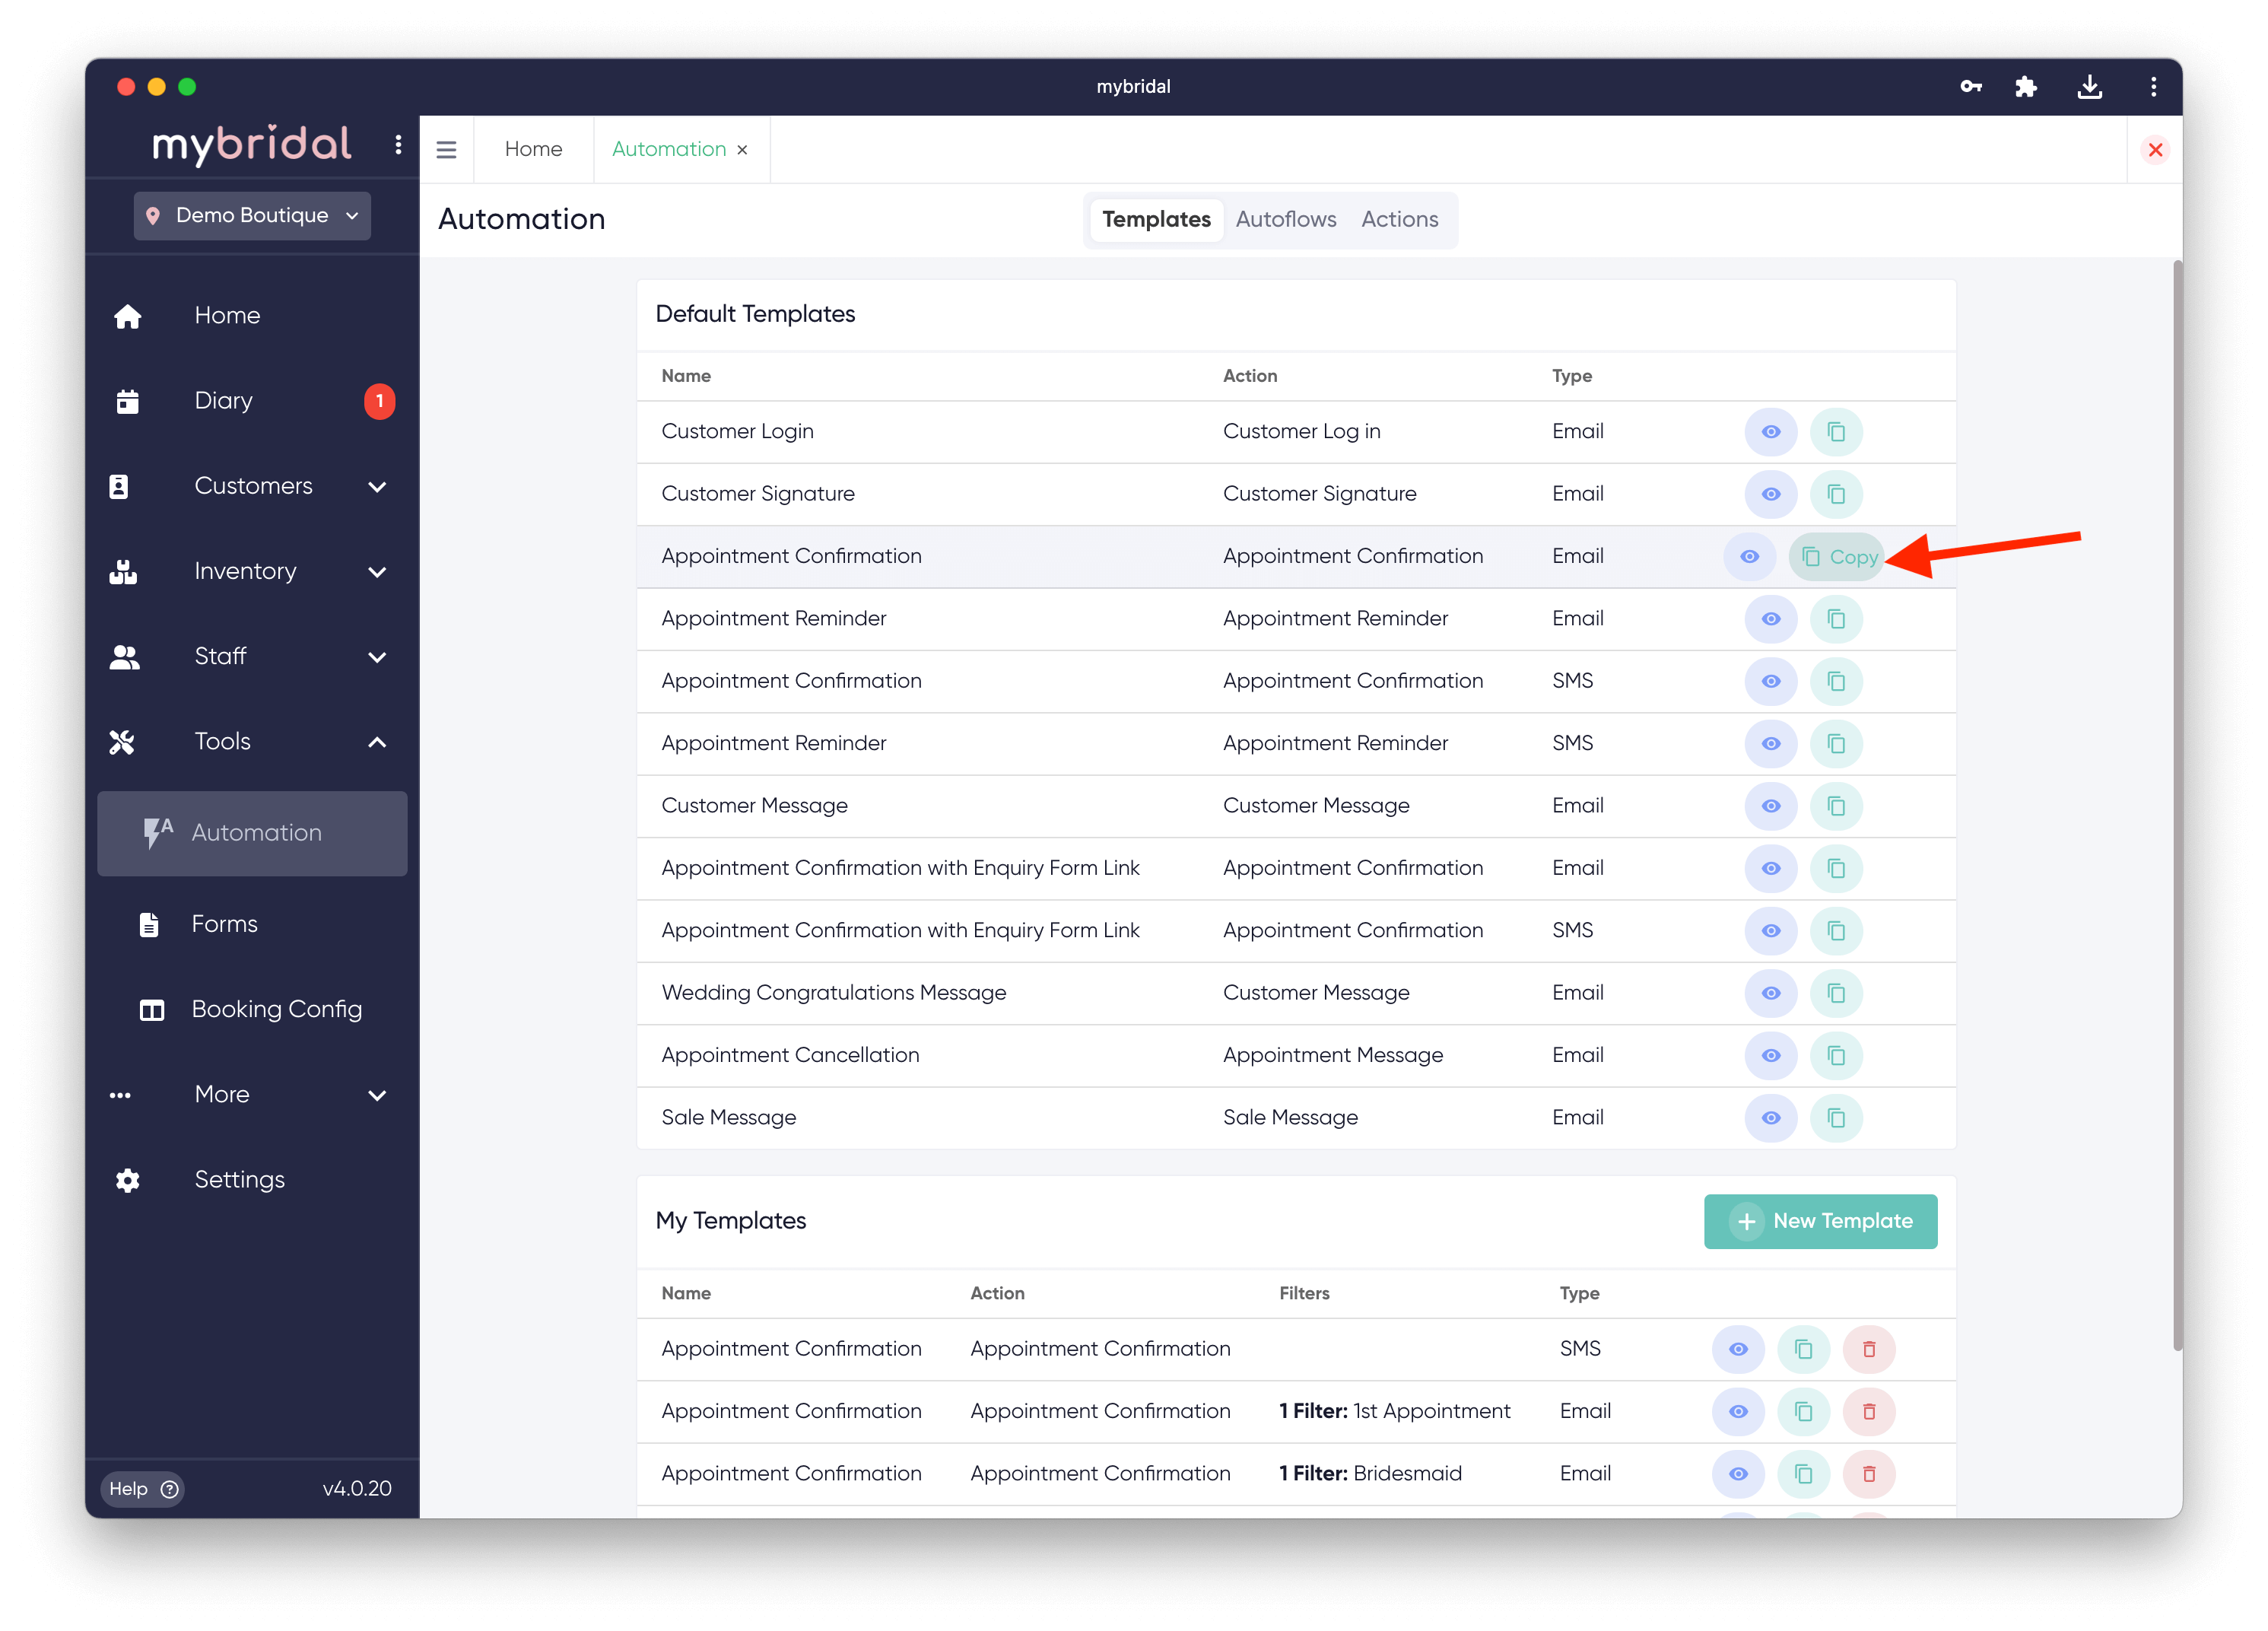
Open the editor.
To edit an existing template click the 'Copy Template' button which will open up the templates builder. If you can, it is generally easier to edit existing templates than to create a new one, but if you want to create a template with completely new content then you can do so by clicking the new template button.
2.
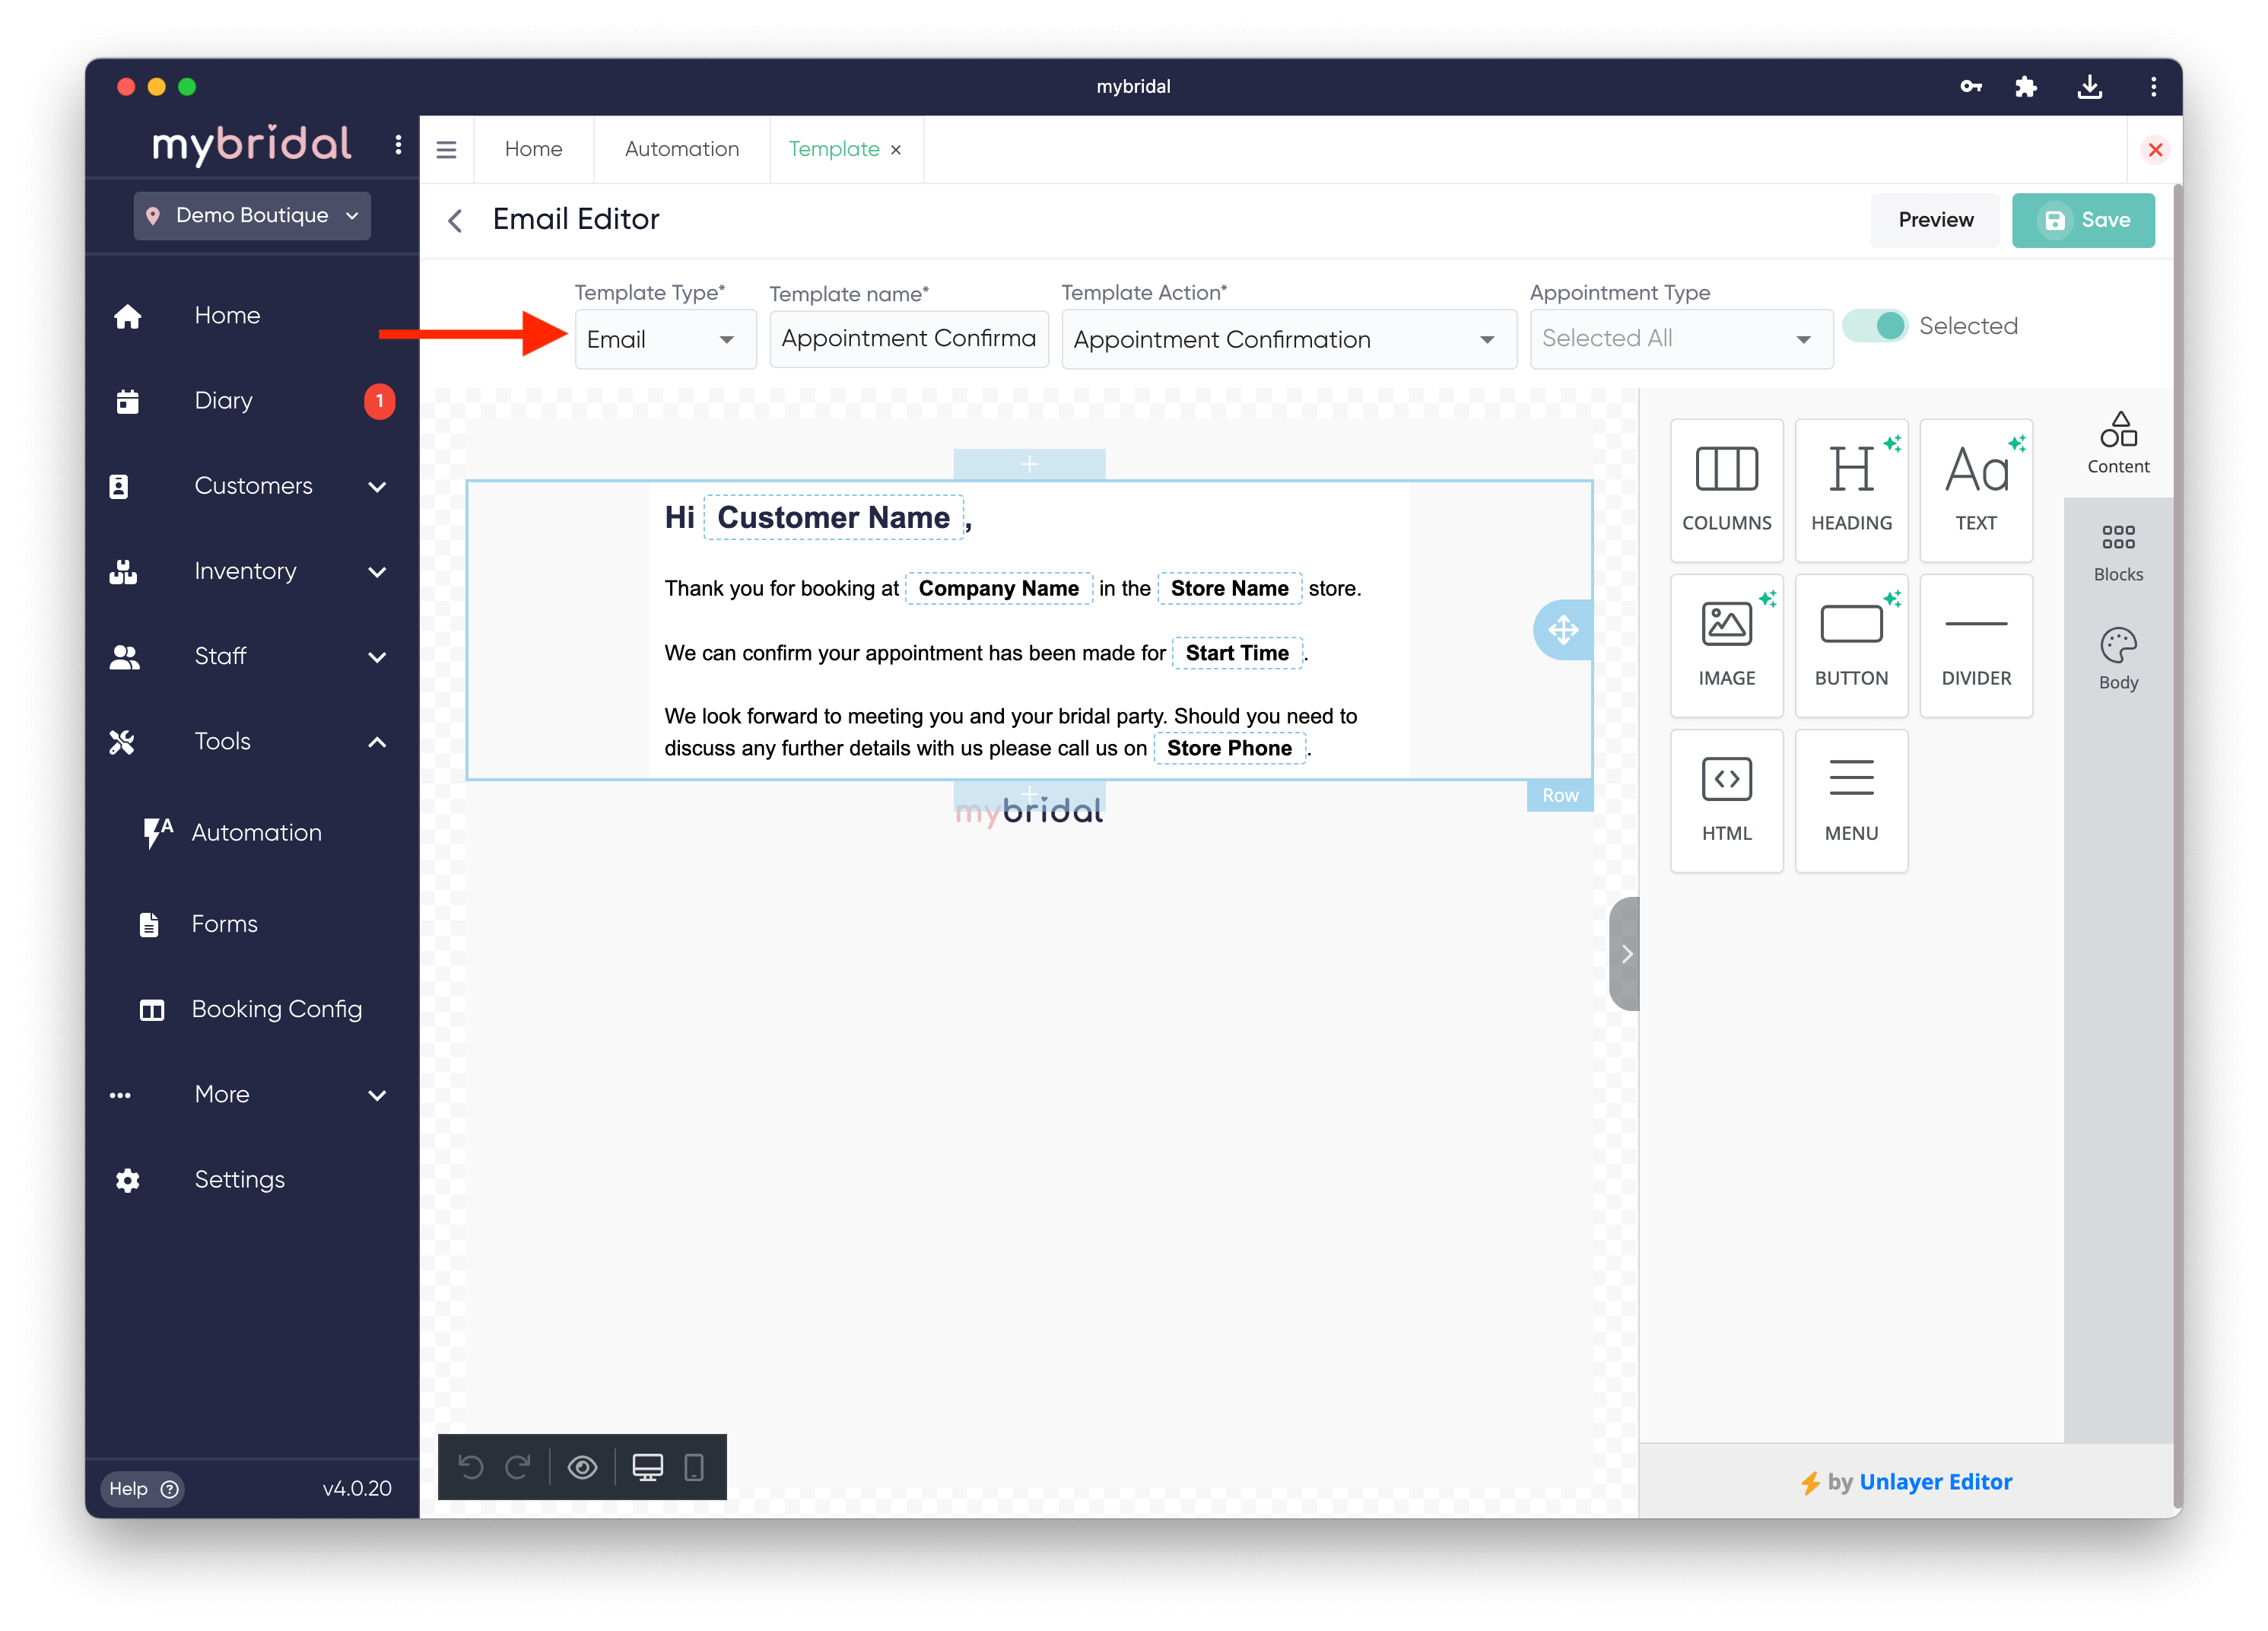
Select your options for the top row.
The first option is whether you want this to be an email or SMS template.
The next is to choose a name for the template. You should use something that clearly identifies that template, for example: Appointment Confirmation Bridal Appointments. This name will be used to select the message from a drop down menu later.
The next step is 'template action'. This determines what type of message is being sent and generates what options this message could contain such as appointment or sale information. There are several options:
Appointment Confirmation - The message that will be sent to the customer when an appointment is first booked. You many want to include an enquiry form link in this for the customer to complete an enquiry form prior to their appointment.
Appointment Message - This can be used if you want to send the customer any additional information about their appointment, such as what to wear and what to expect. This can be sent a certain amount of time before or after an appointment. This can also be used to write cancelation templates for if you or the bride cancels the appointment.
Appointment Reminder - A message you will send the customer to remind them of their upcoming appointment. This normally contains the ability for them to confirm if they will be attending or to cancel their appointment.
Customer Message - You can use this option for any customised message you want to send the customer. It may be a message to say thank you for purchasing, it could be a congratulations message on their wedding day or it could be an information message about what happens after they purchase a dress.
Customer Signature - Used to send your customers a link to sign the sales receipt electronically.
Sale Message - Used to send your customer a message every time a sale is added. This is not just the first time they make a purchase, it is every time you add a sale against the same customer. For example if a bride purchased a dress and 6 months later a veil, this message would be sent both times. It is normally used to say something simple like 'thank you for your purchase. Click the link to view your sales receipt'.
For any of the options relating to appointments, you will then also have the option to apply this template to all appointments or for certain appointments only. For example you may want to use a certain template for a 1st bridal appointment, and then a different one for an alterations appointment due to the different information required. You can select what appointment types) you want this message to send to by using the 'appointment type' drop down.
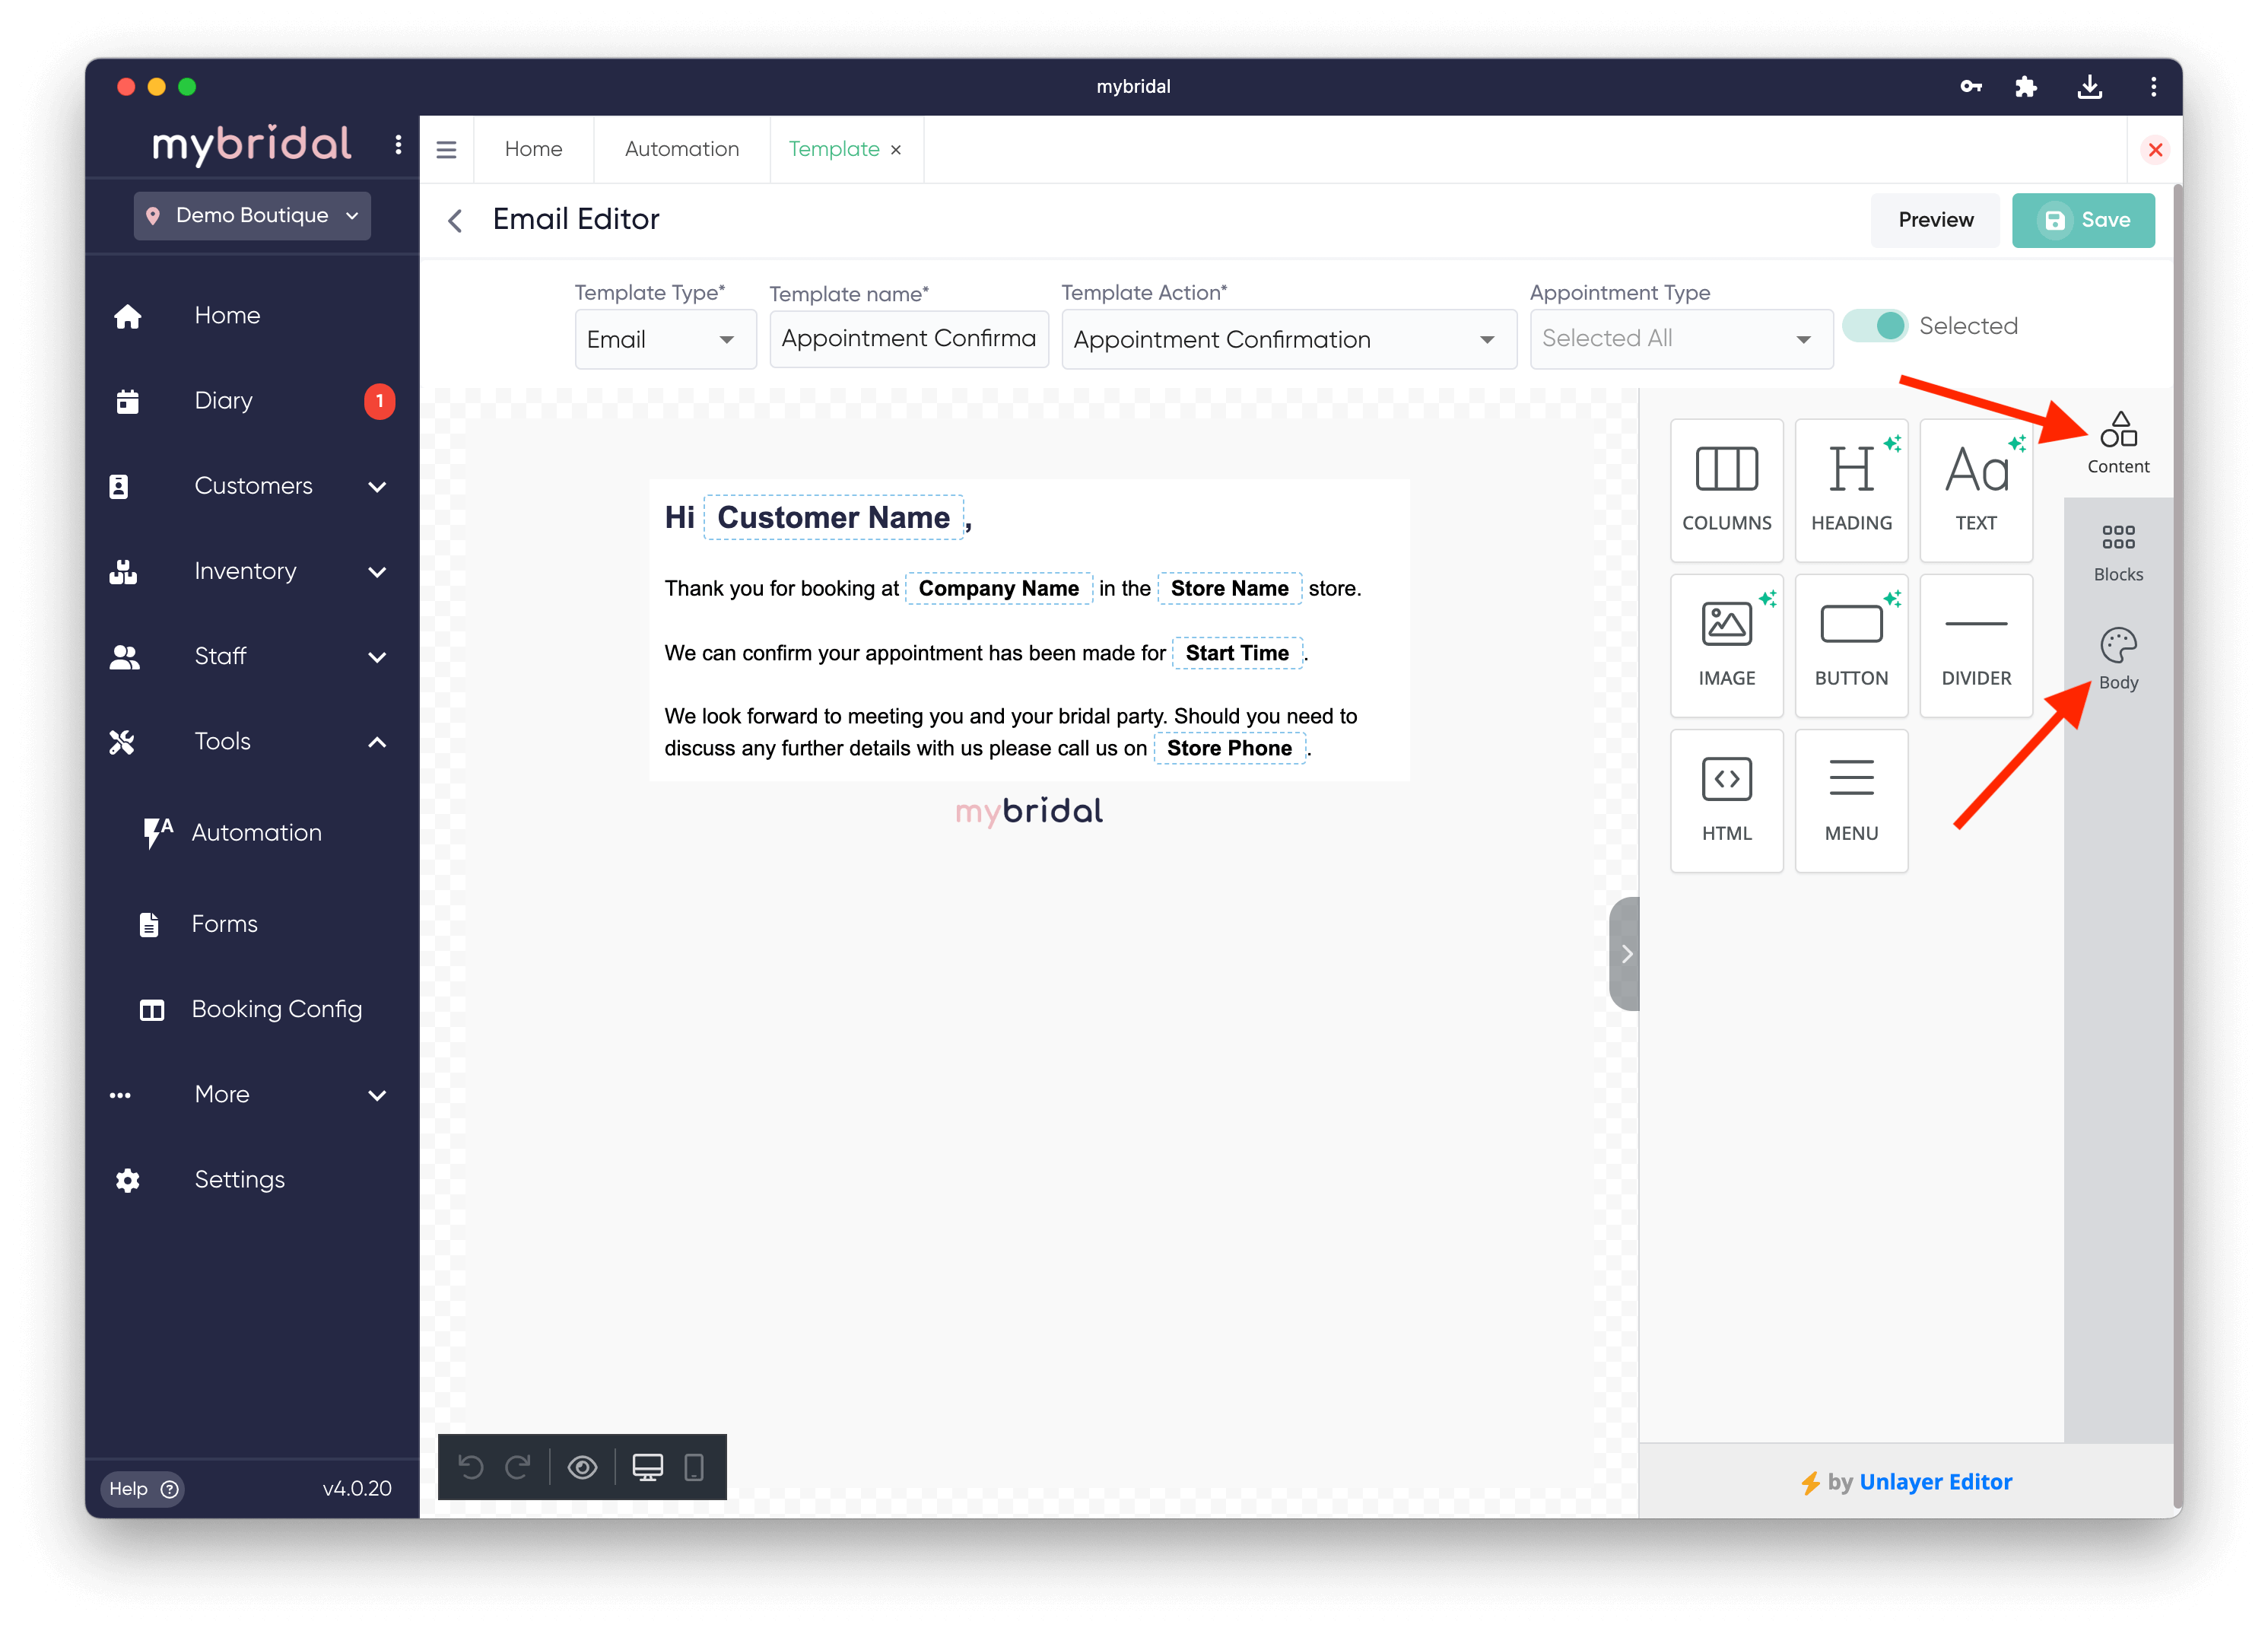
3. Make your amendments, or create your own content.
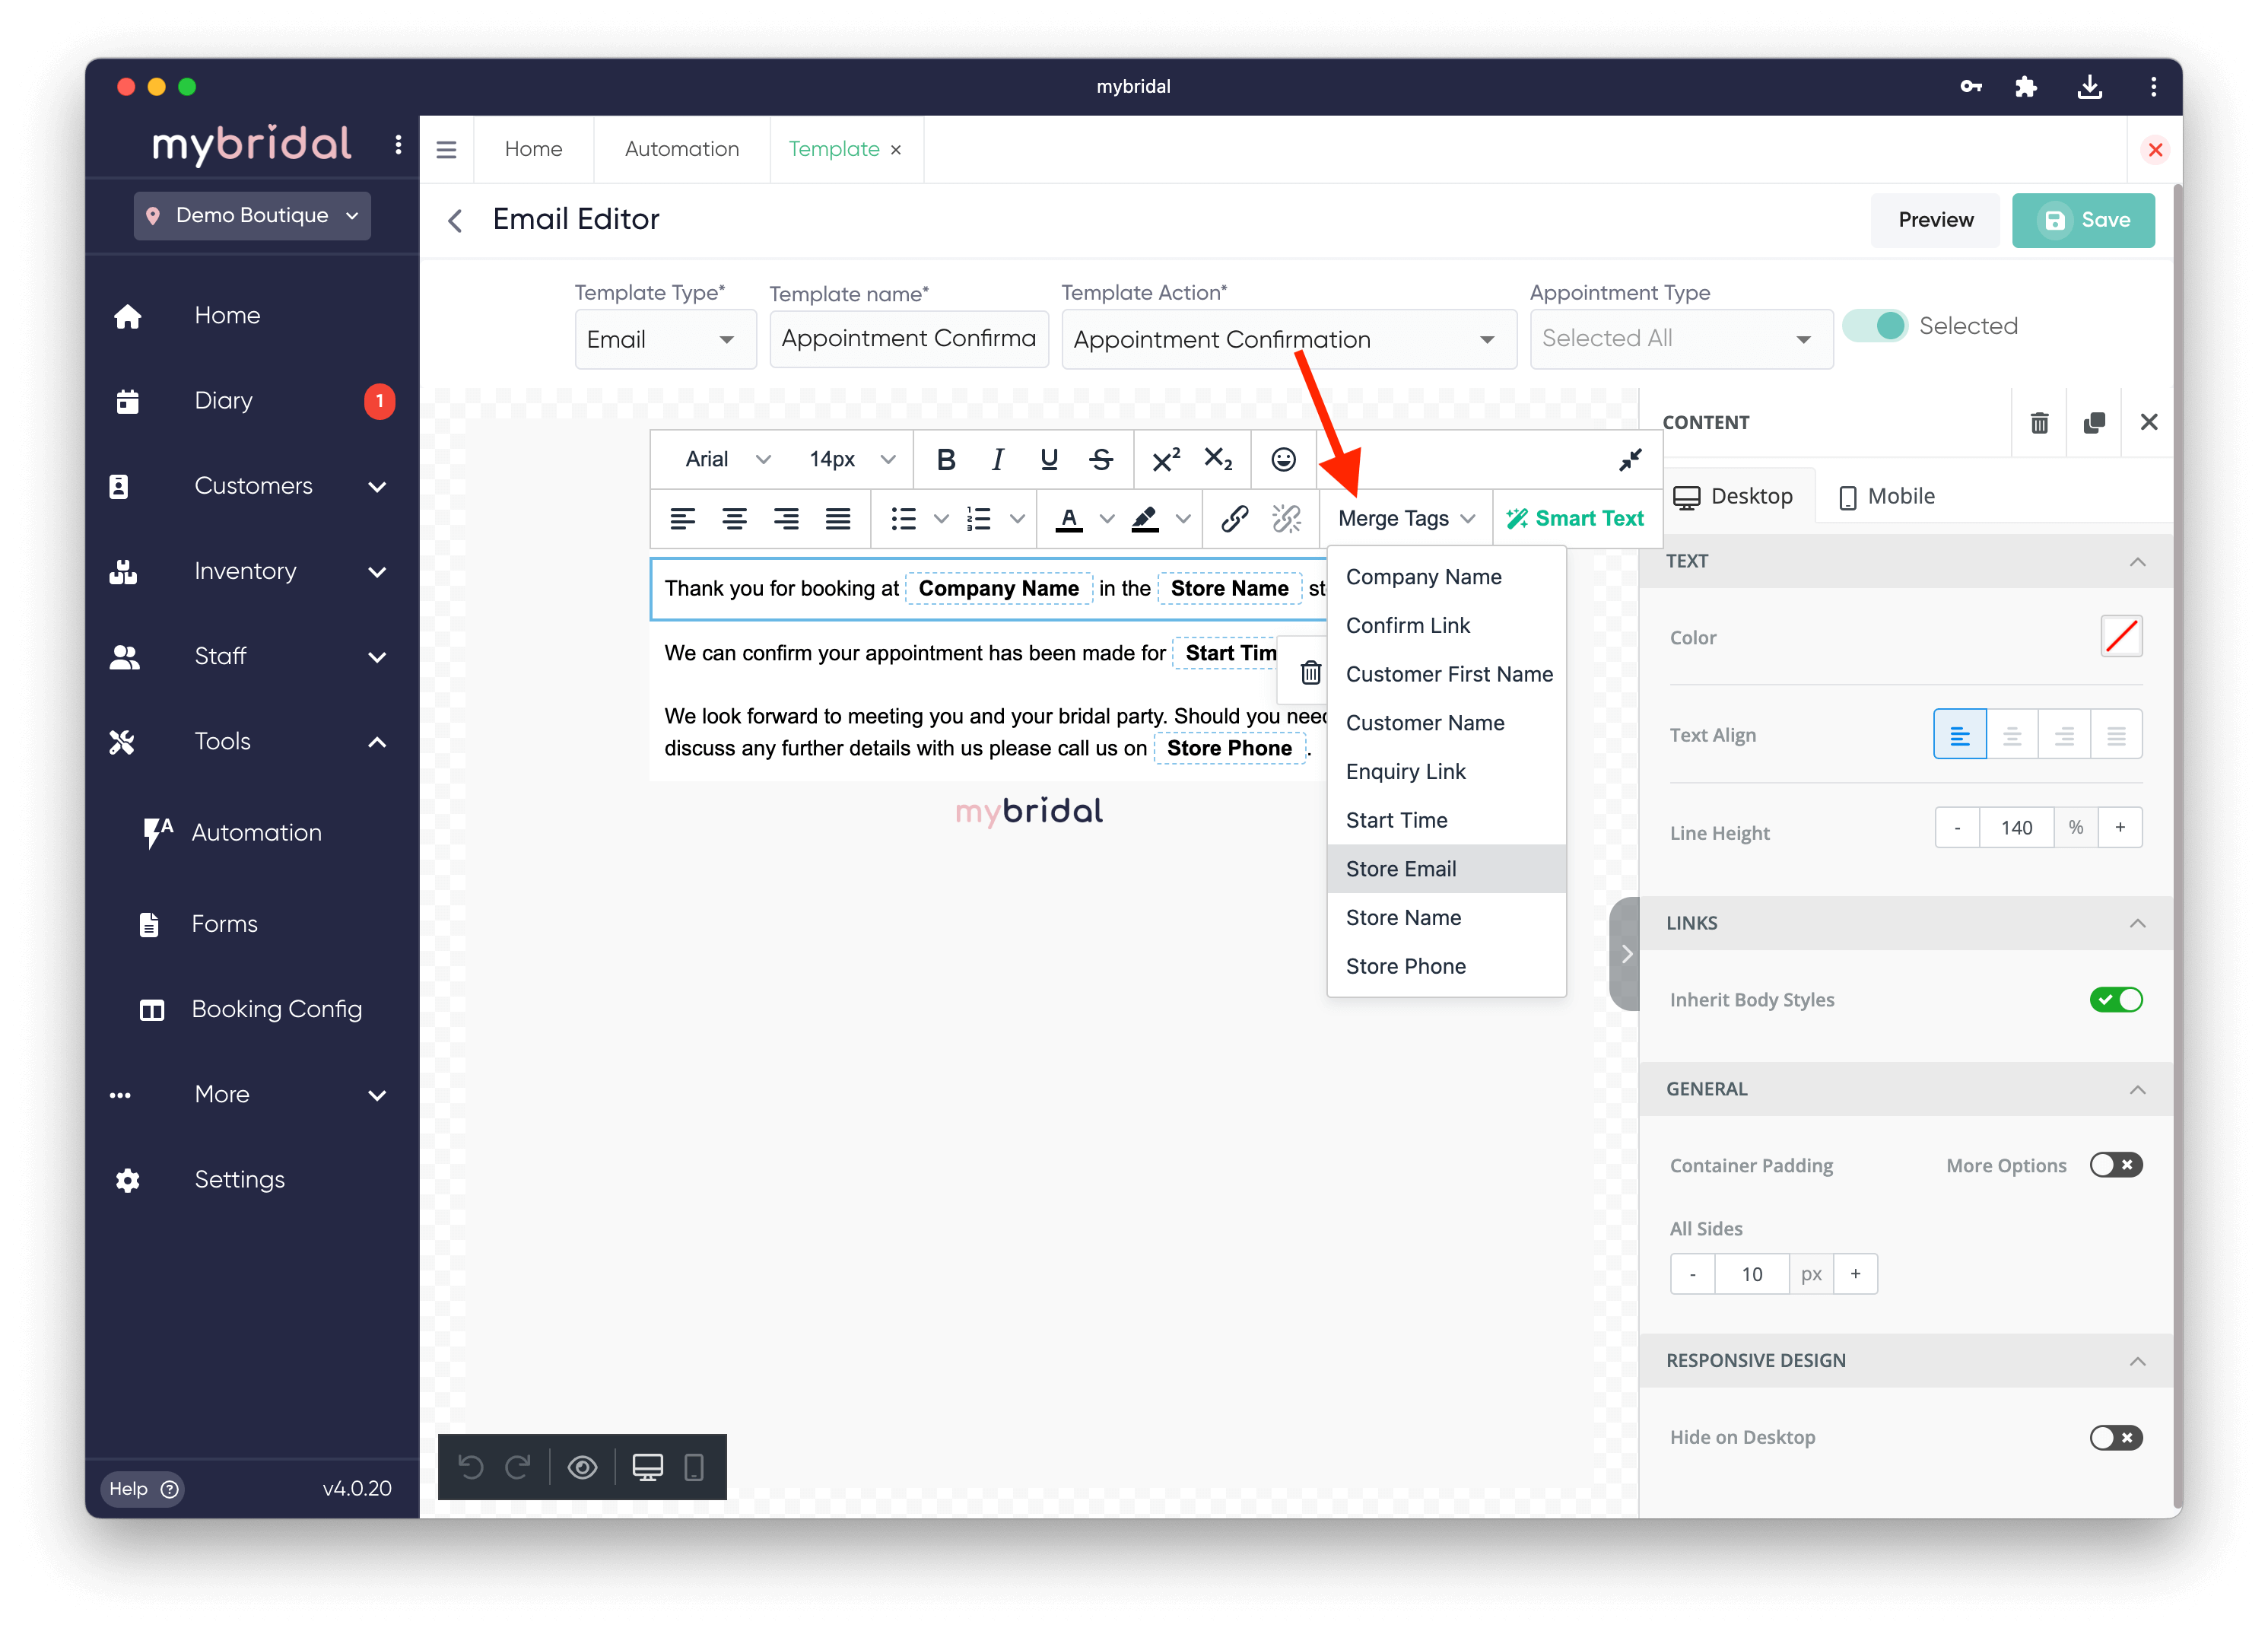
For emails you can change the existing text by clicking on it and typing. This will open a window which allows you to change the text style and formatting. You will see merege tags which allow you to pull in information such as a brides name or first name, your company name etc. You can also click on the content tab to drag any additional features you would like in your email such as page dividers, images or custom code using the menu on the left side. Clicking on the body tab will open up font and colour options. The email editor is quite extensive and you can design your email to look however you would like.
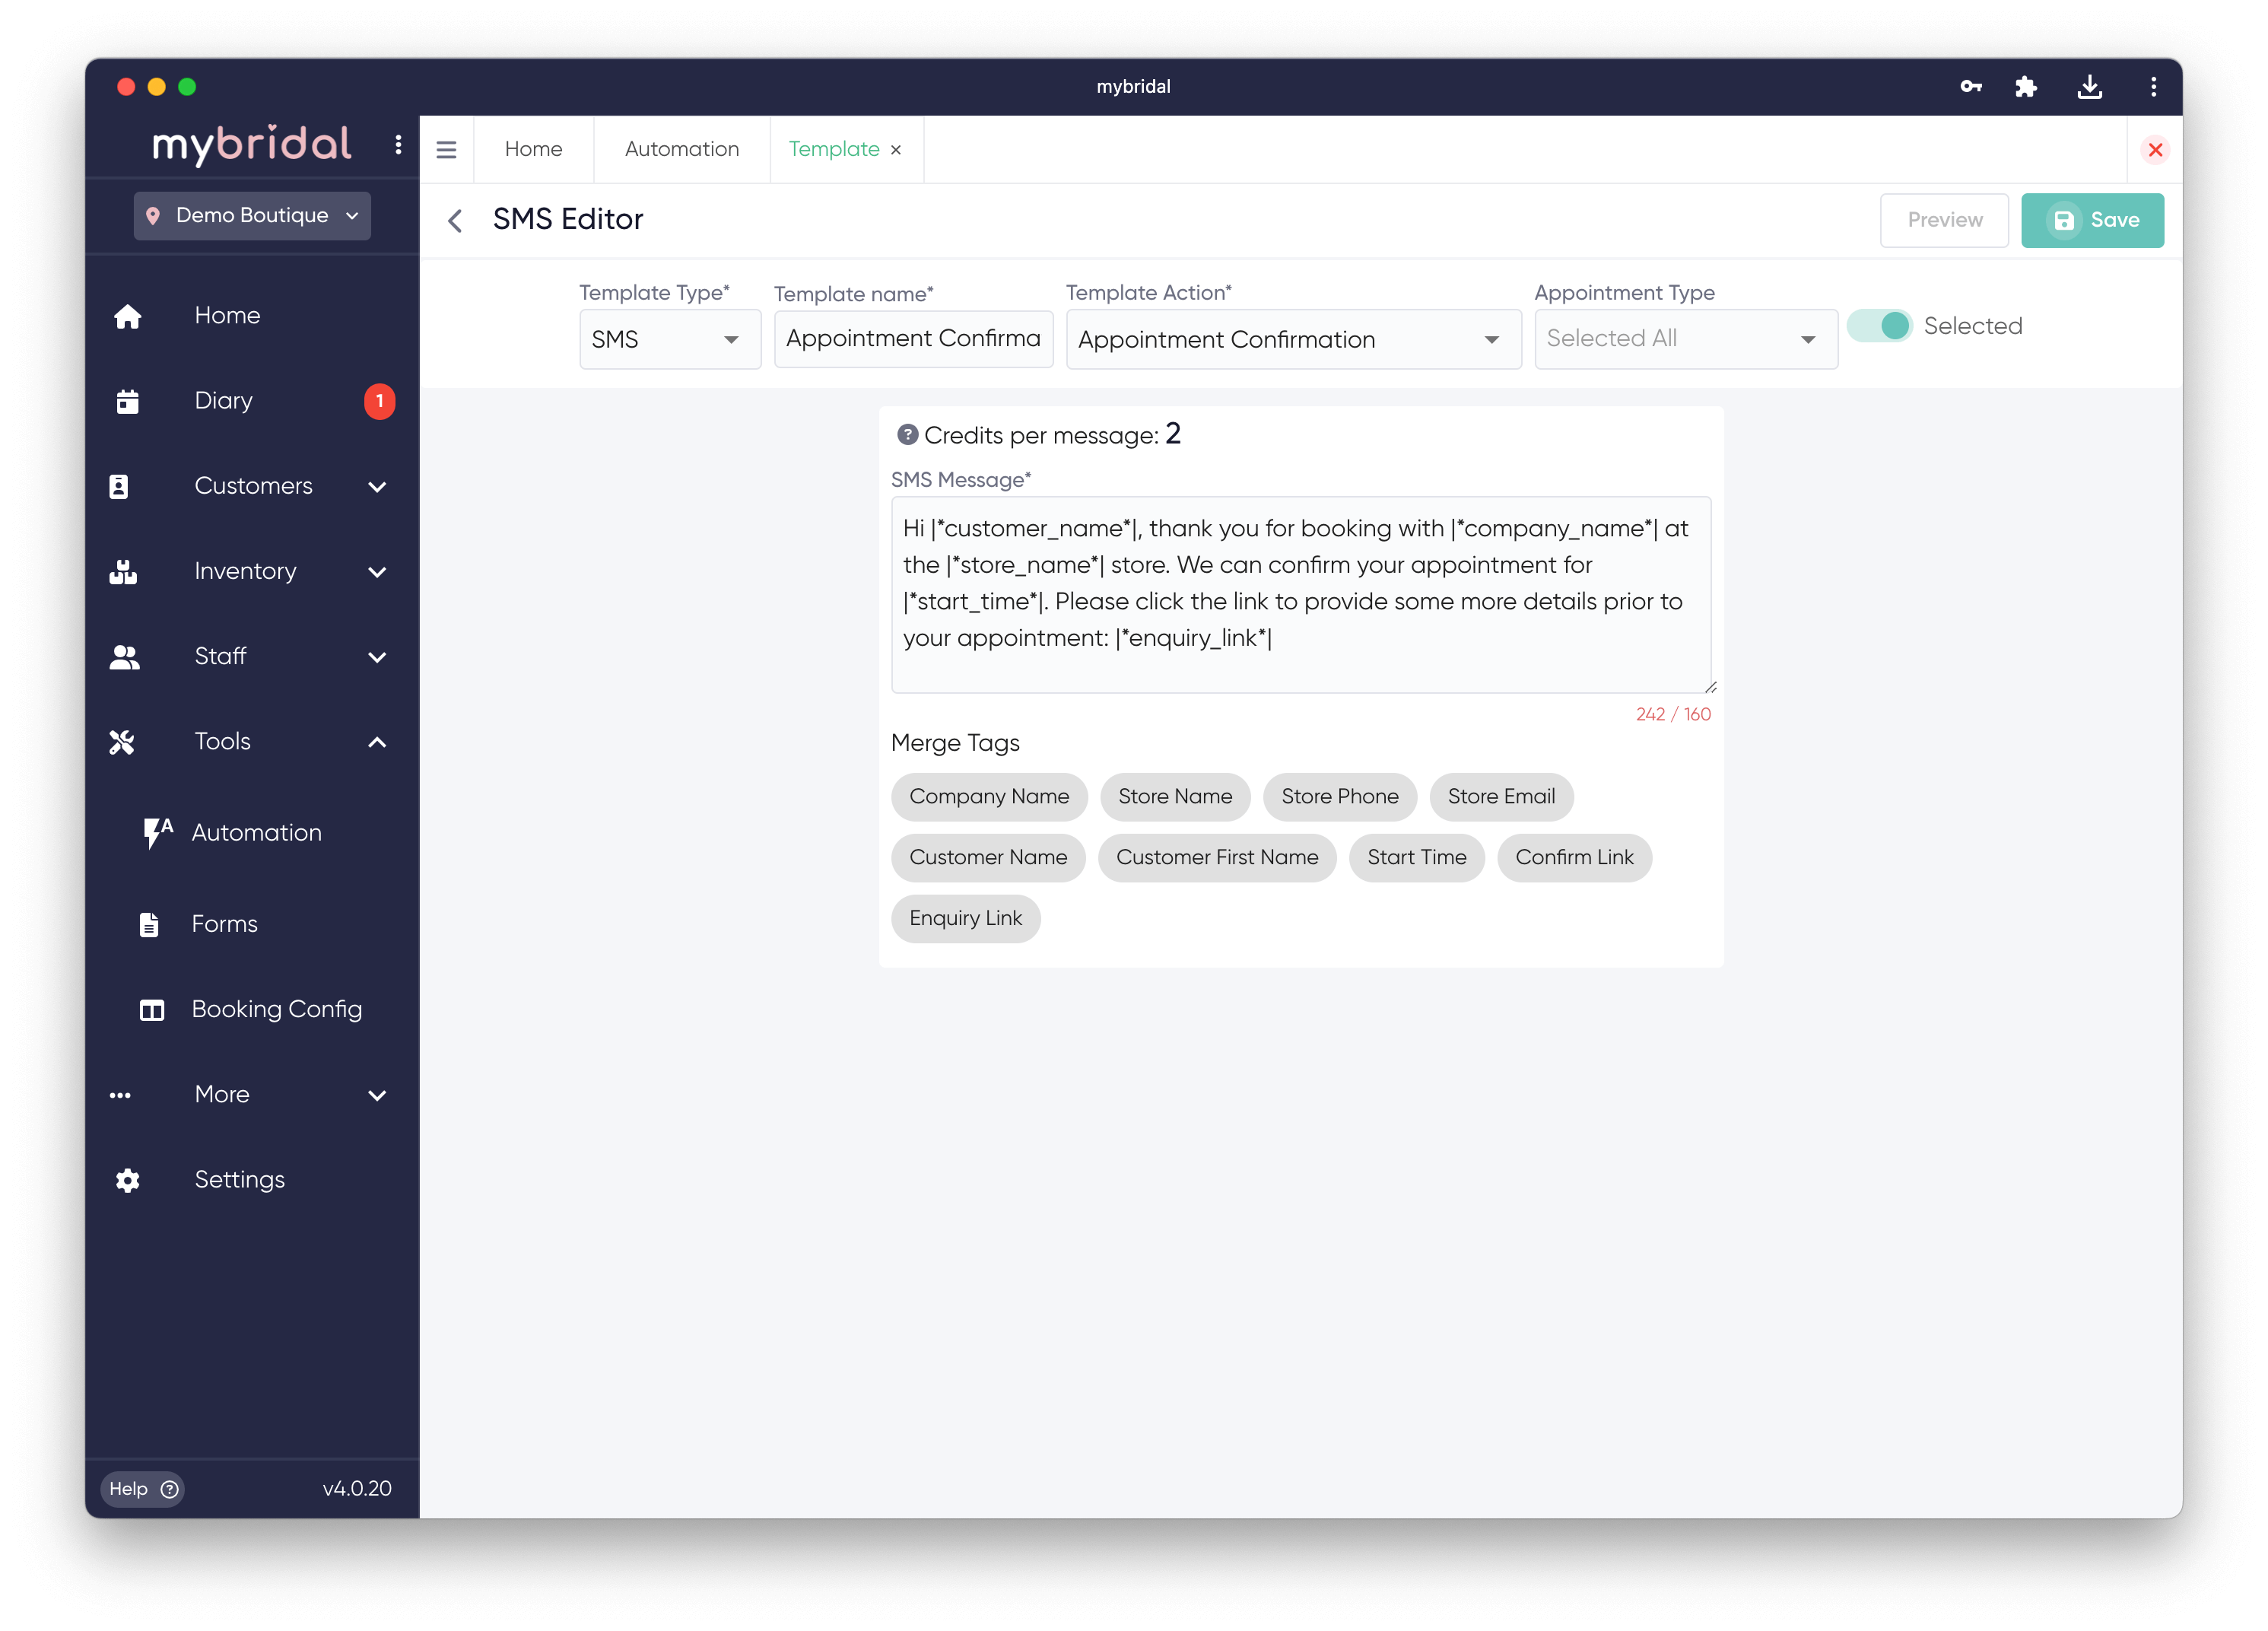
The SMS editor is much more simple and you just type your message or click on any merge tags you want to include such as the store name, customer name or enquiry form link. These will create custom code so the texts will pull through information such as the stores email address or the customers name. One thing to bear in mind when creating the SMS template is how many credits per message are used which is displayed above the message. You can always purchase more text credits through the system by visiting settings > plan if you run out.
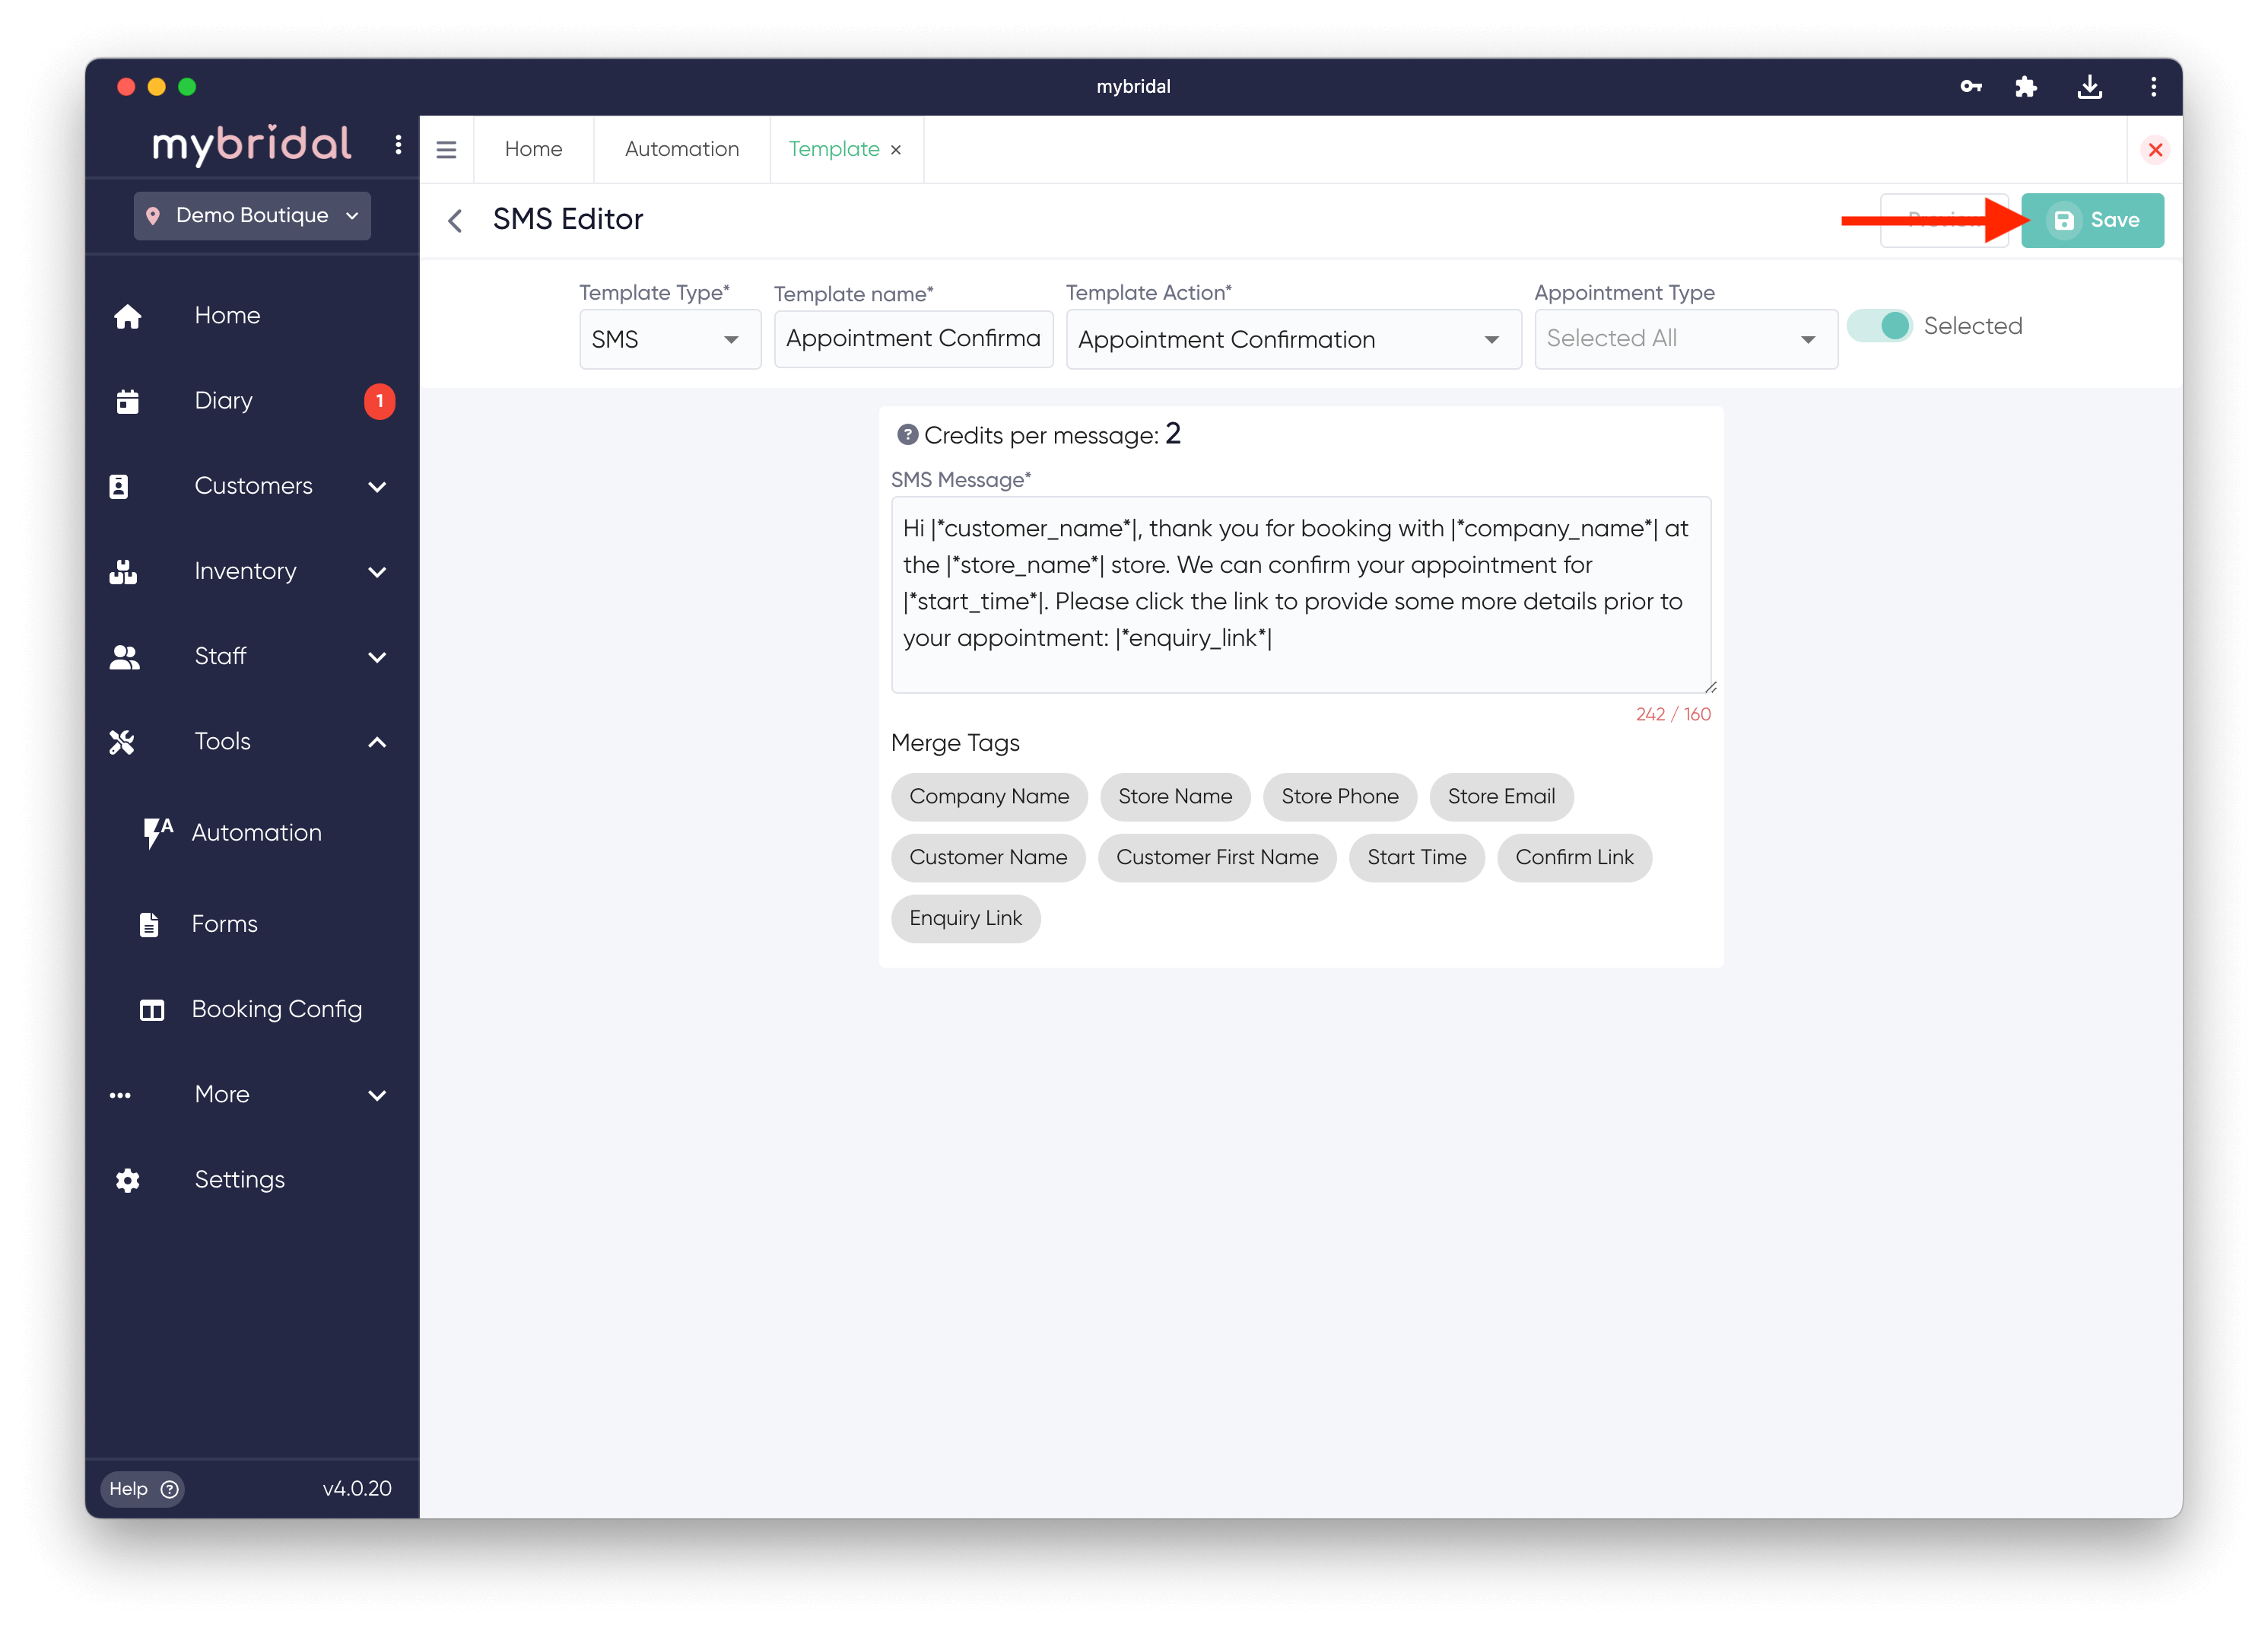
4. Save your template.
You can do this by clicking the icon in the top right corner of the screen.
Congratulations, you have now created your very own template! This will be visible in the My Templates area of the templates page.
You may now want to set up an autoflow to create rules to send your email and SMS templates automatically. These can be sent at scheduled times such as when an appointment is created, the day before an appointment is due or when a sale is added. Please read the 'Creating a New Autoflow' guide to learn more about this.