If you would like your customers to fill in an enquiry form prior to them attending their appointment you can add a button into your appointment confirmation email which they can click to complete the form.
To do this you need to visit tools > automations > templates.
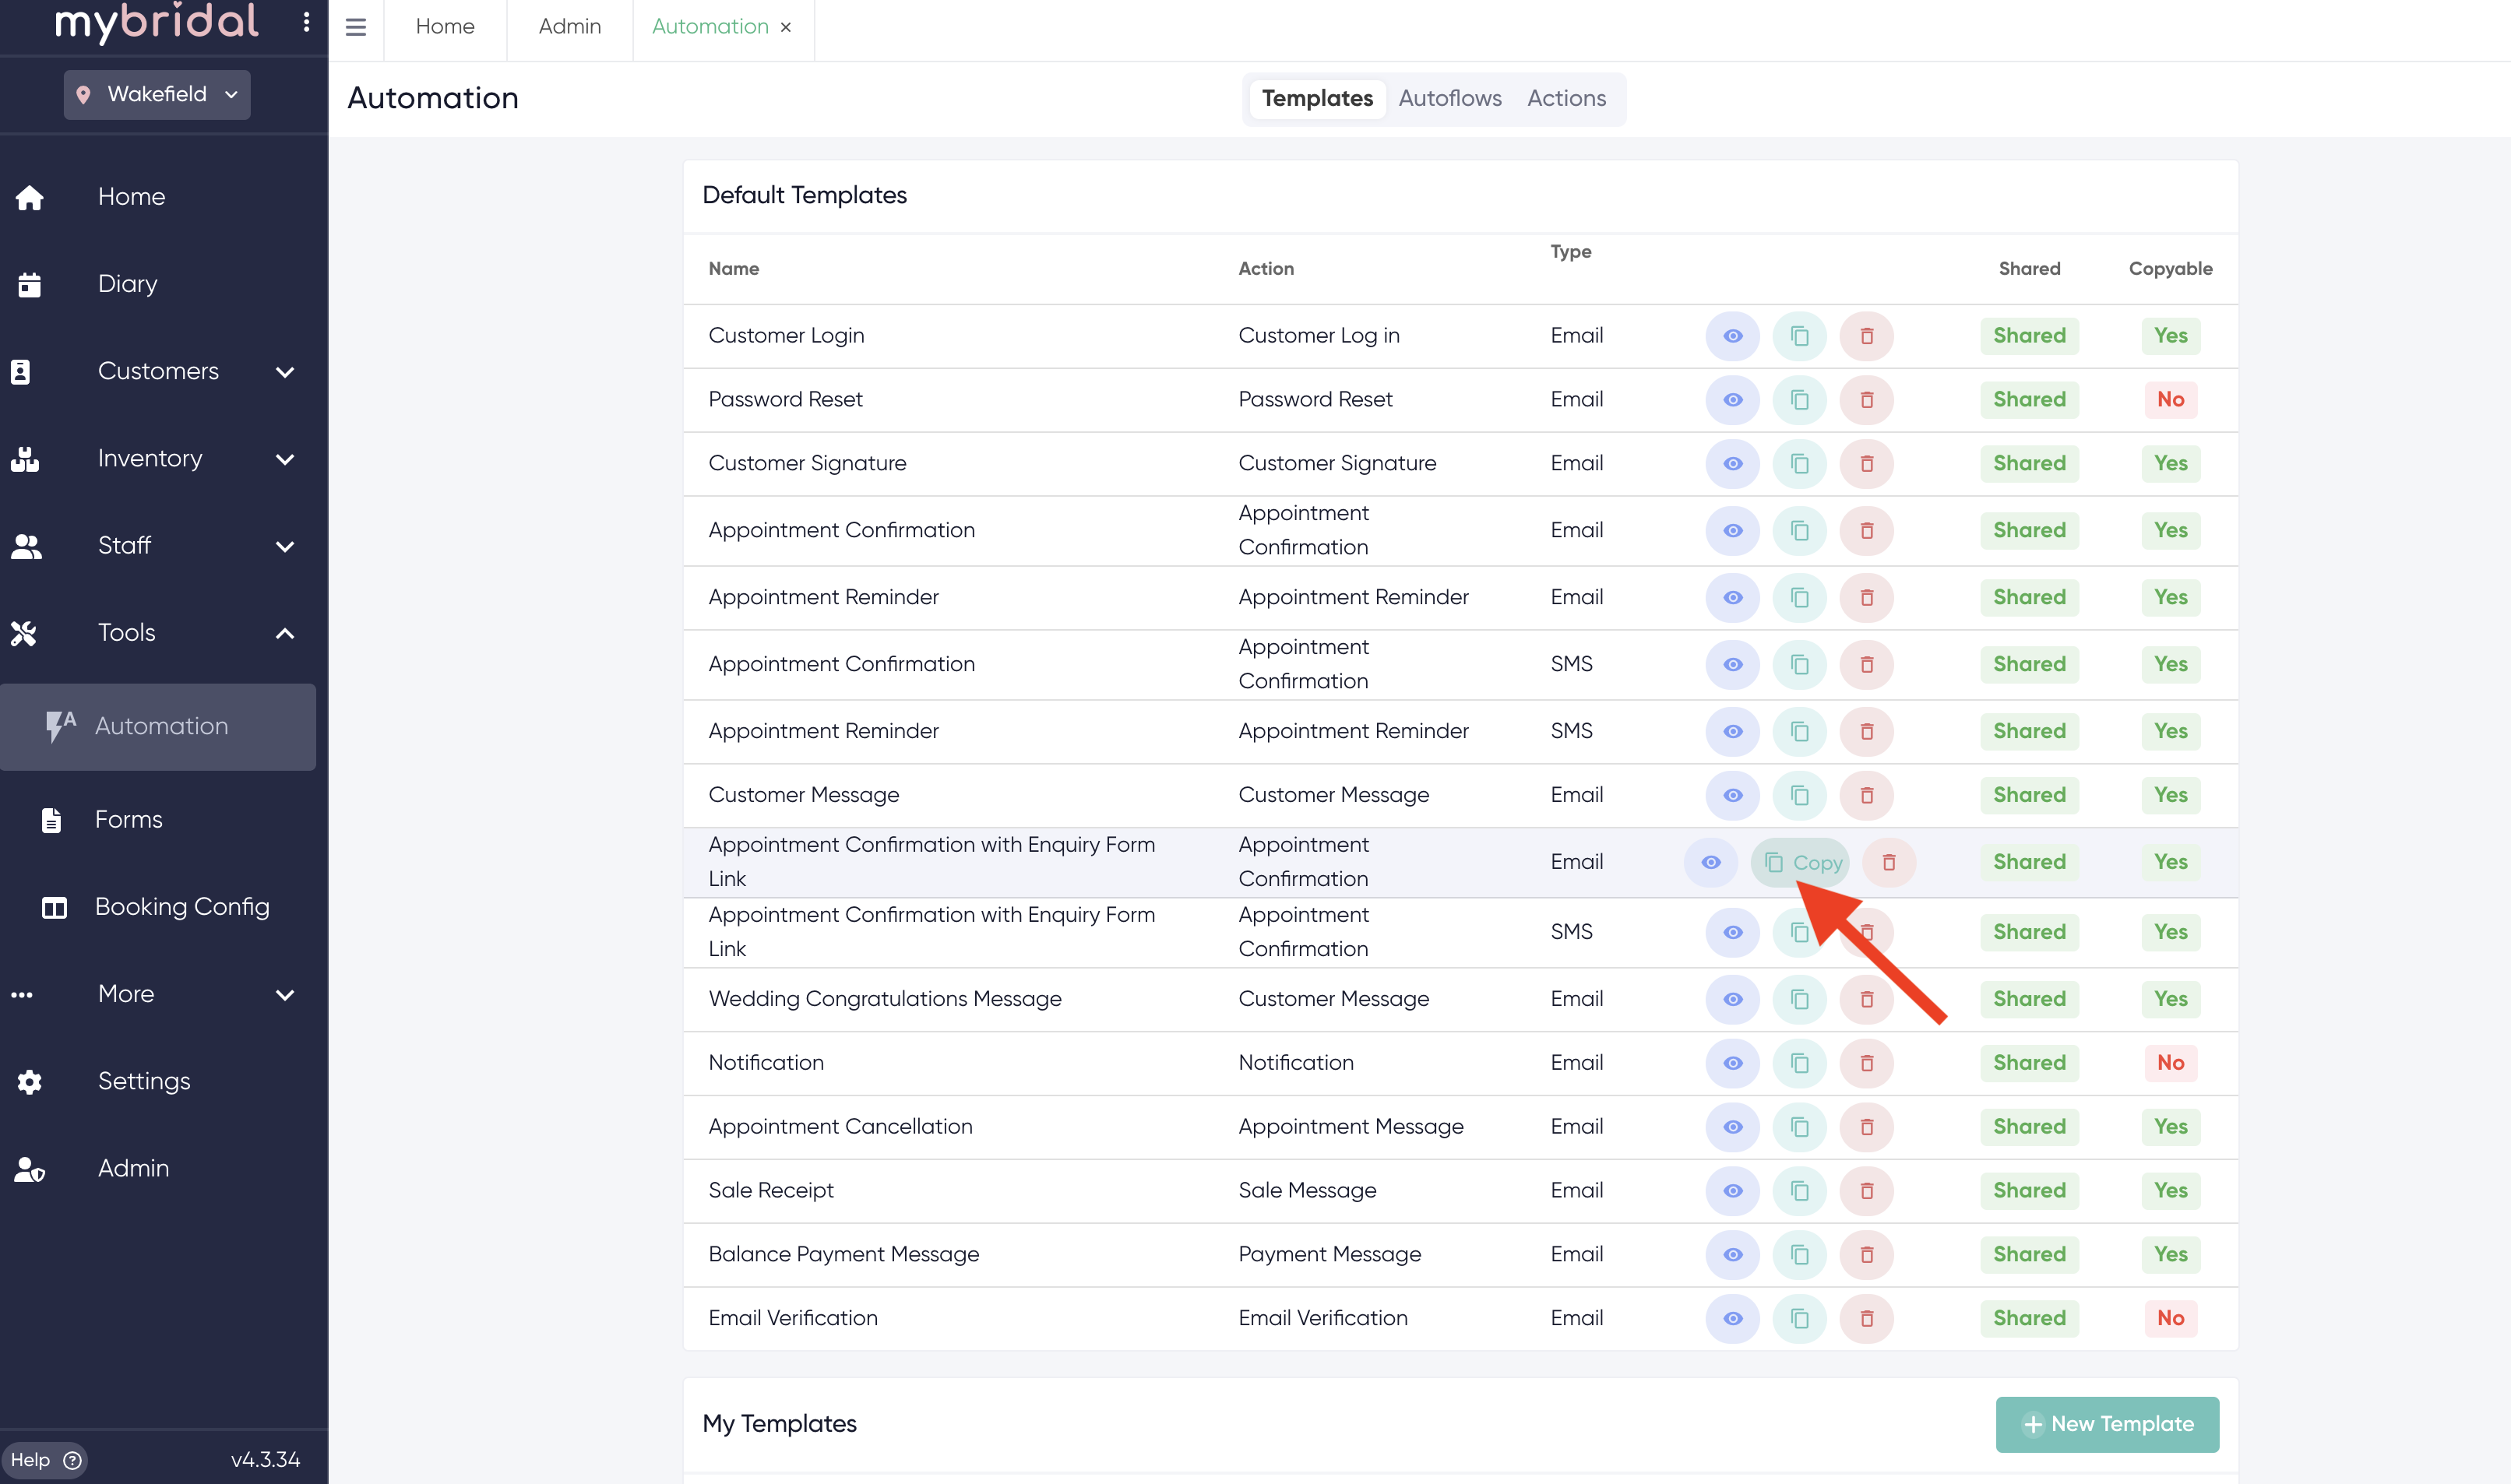
You will see a list of all our default message templates which are different standard templates created by mybridal that you are free to use.
You can view the existing appointment confirmation with enquiry form email by clicking on the blue eye icon which will open up a preview so you can read the content. If you are happy with this message as it is then you do not need to edit it.
If you want to edit the content of this message at all or if you want to assign it to send to certain appointment types only such as first bridal appointments but not collections etc then you need to exit the preview and then click on the 'copy' button located next to the eye icon.
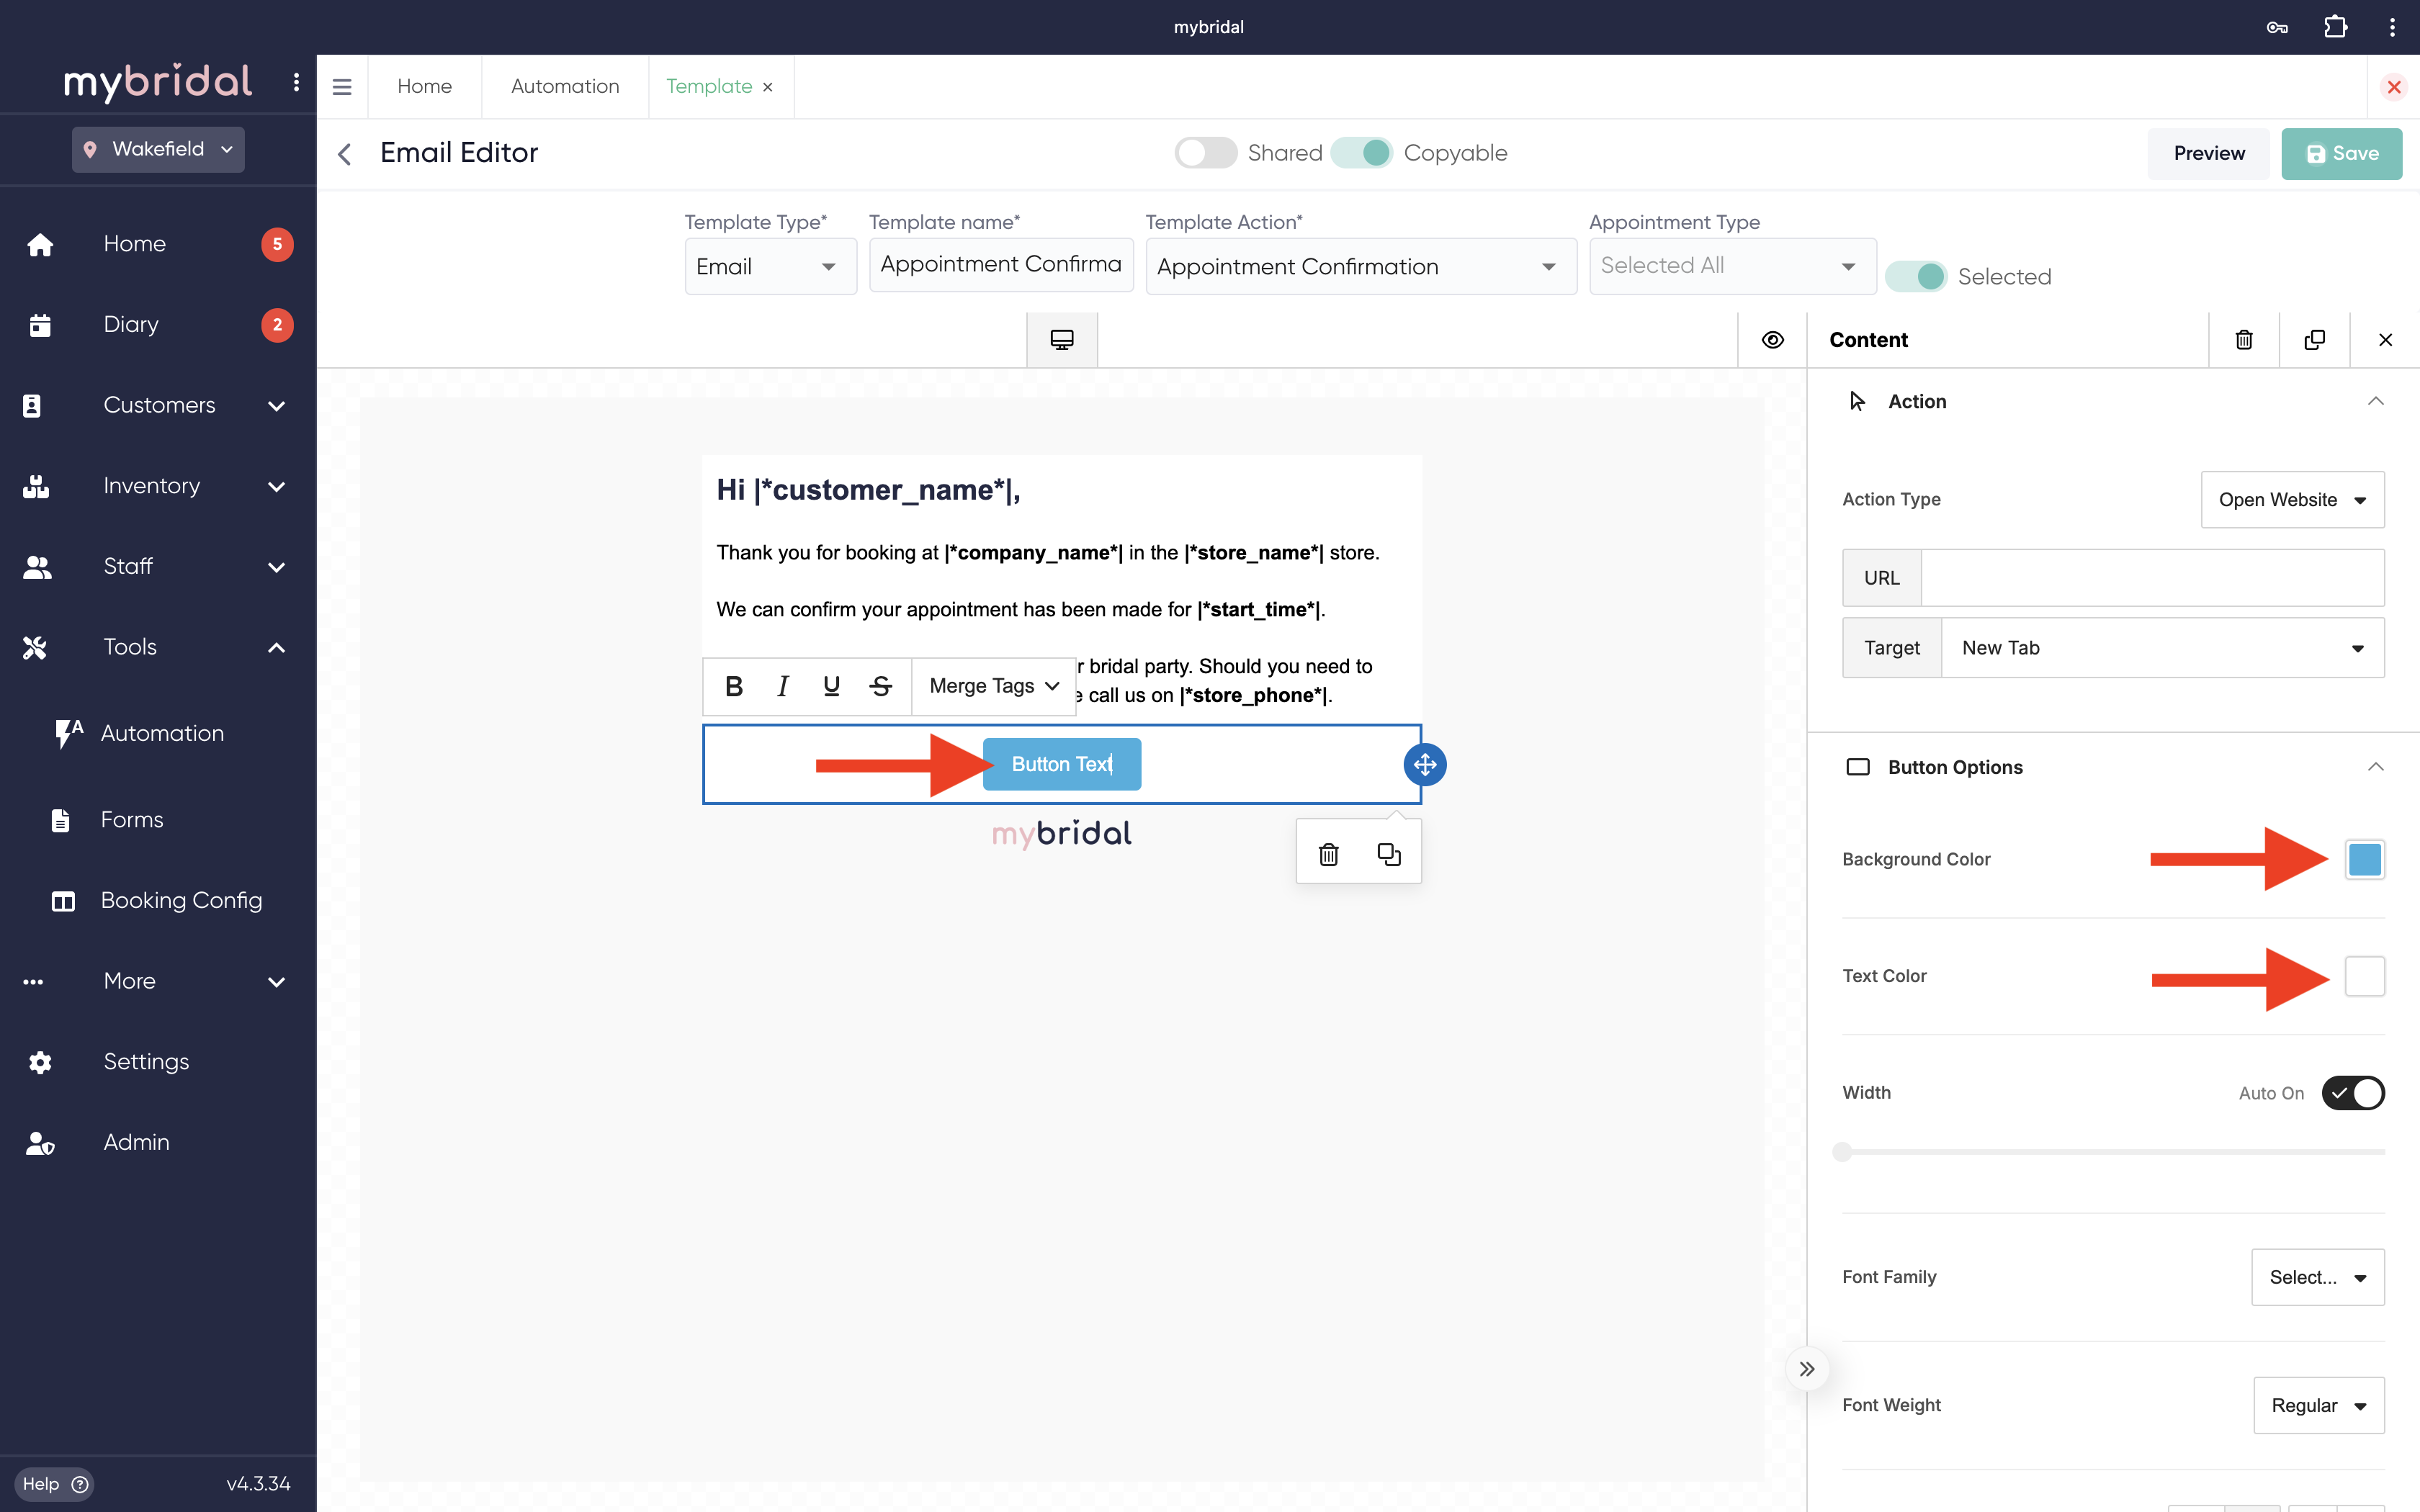
This will open up the message in the editor. You can click on the body of the text to change the content, swap the logo for you own, add images and change the background colour etc - you can make the message your own!
If you click on the enquiry form button you will see the URL says |*enquiry_link*|. This means when your customer clicks the button it takes them directly to the enquiry form to complete it.
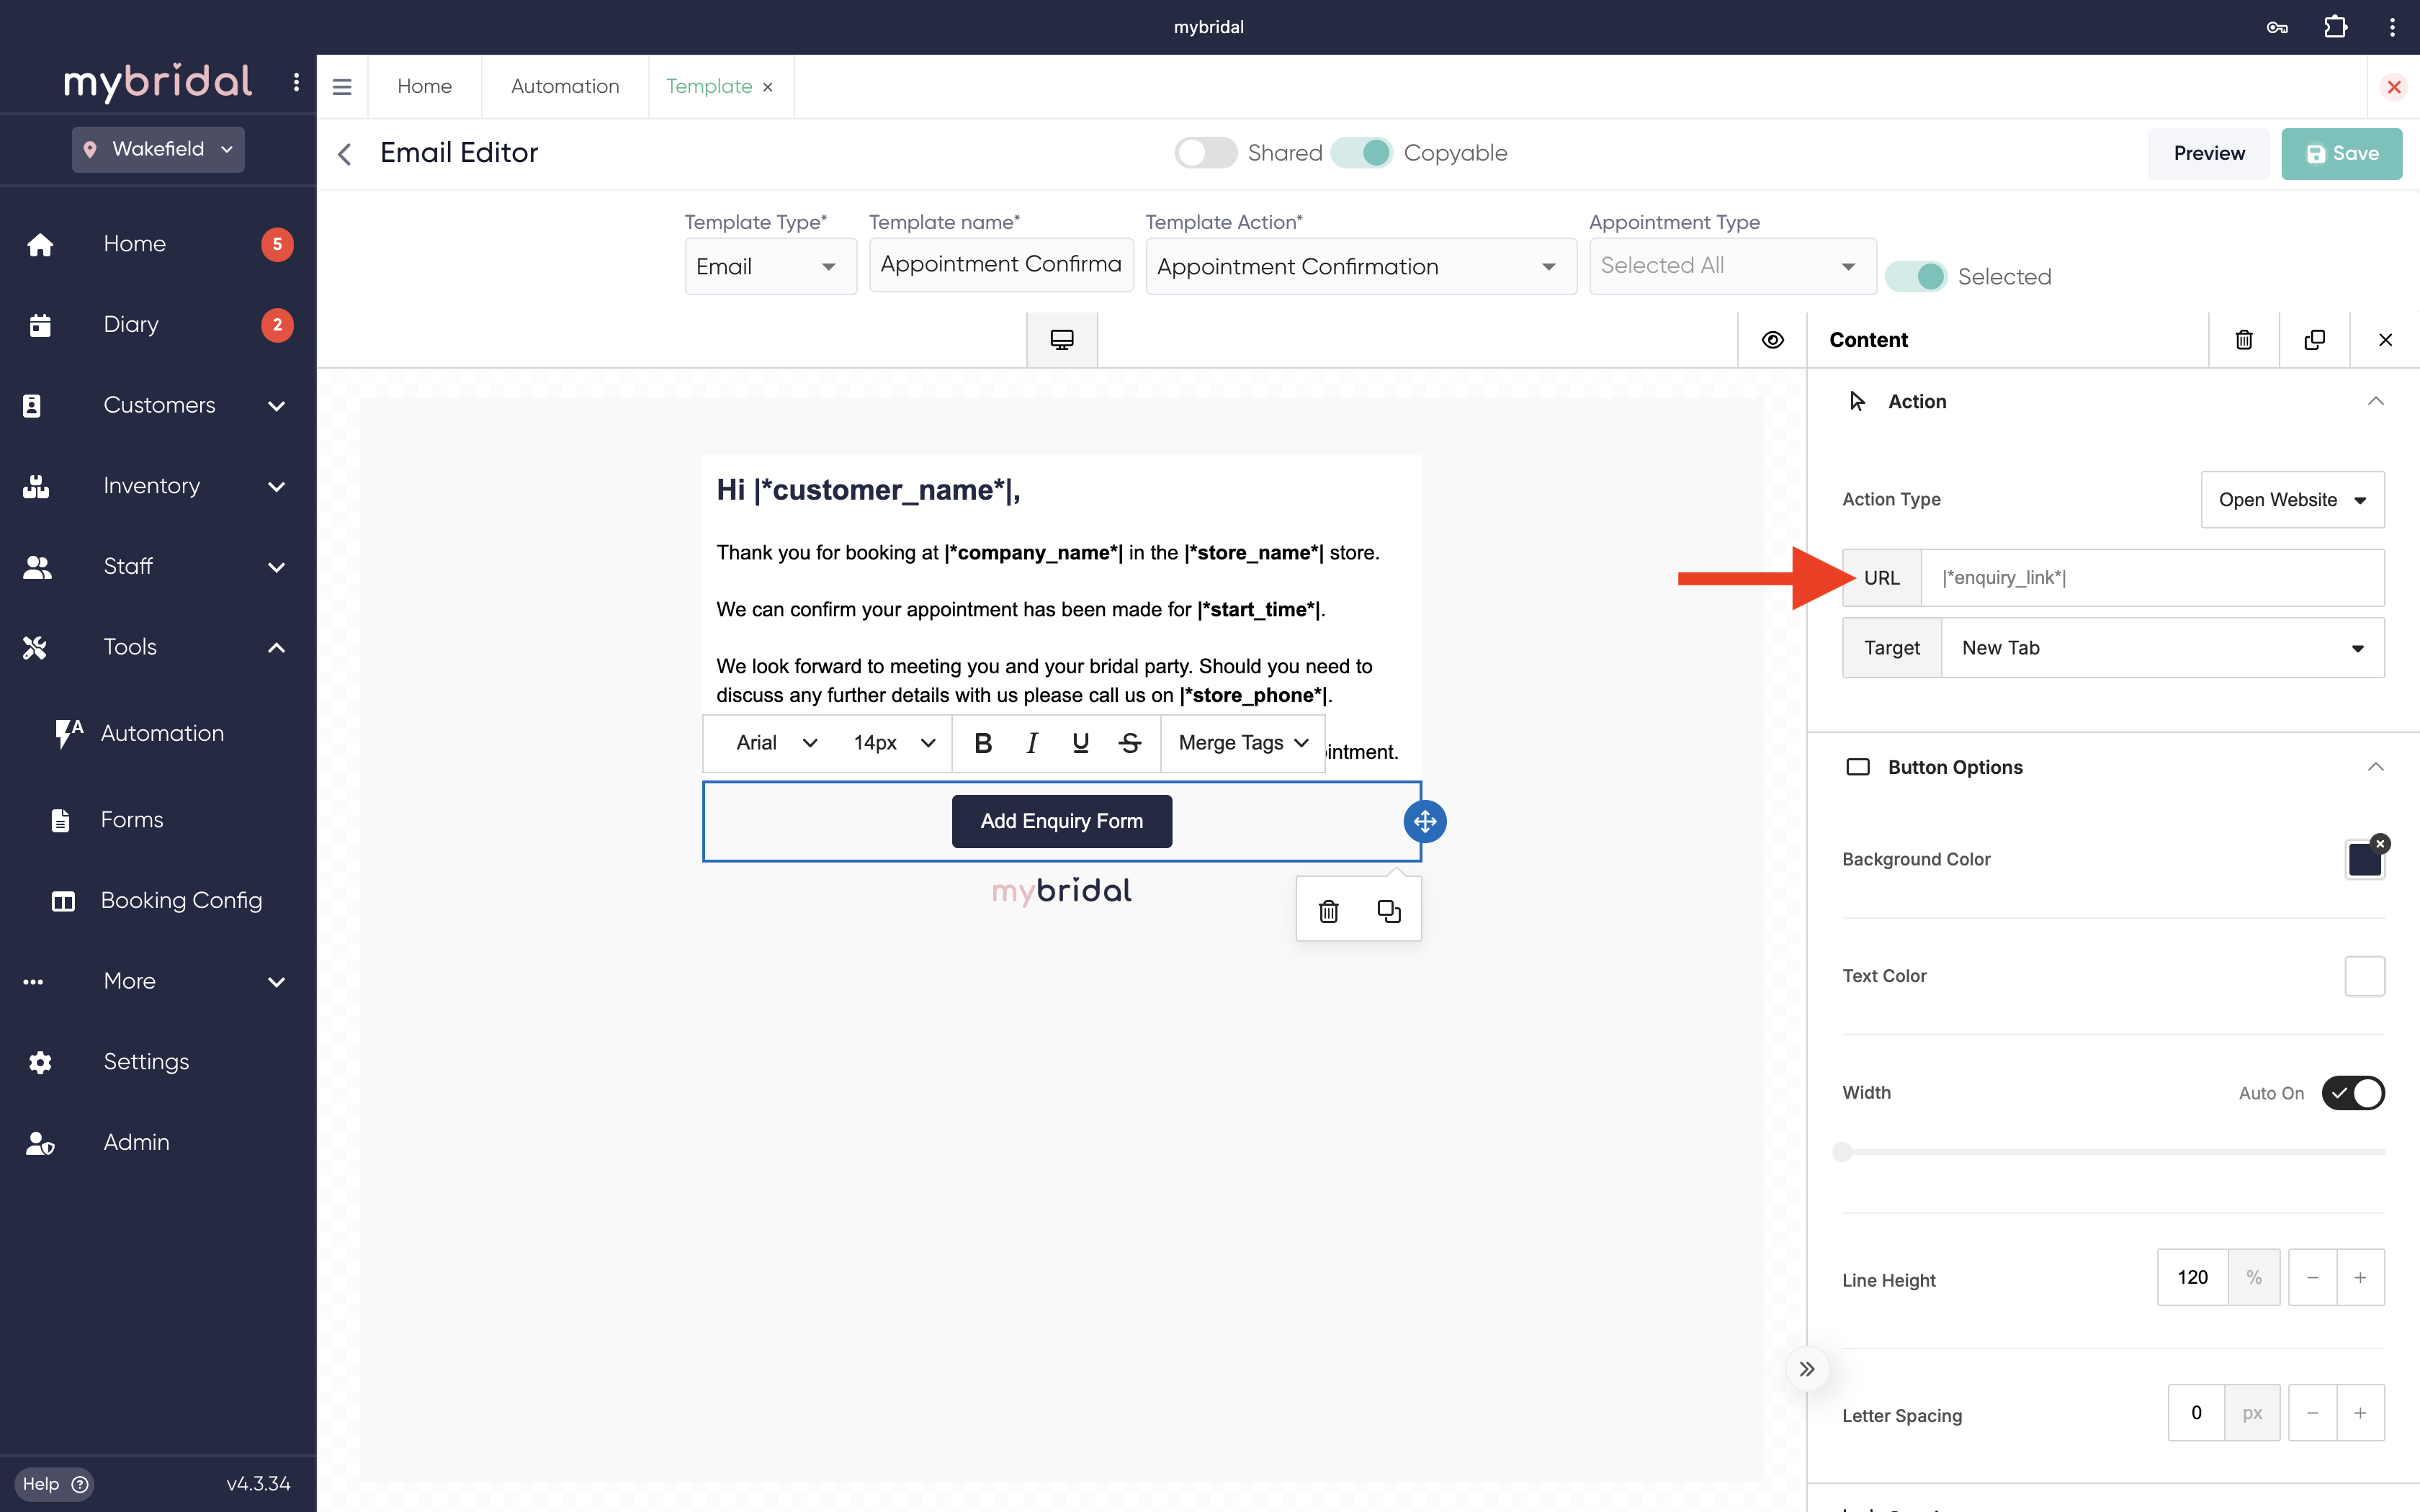
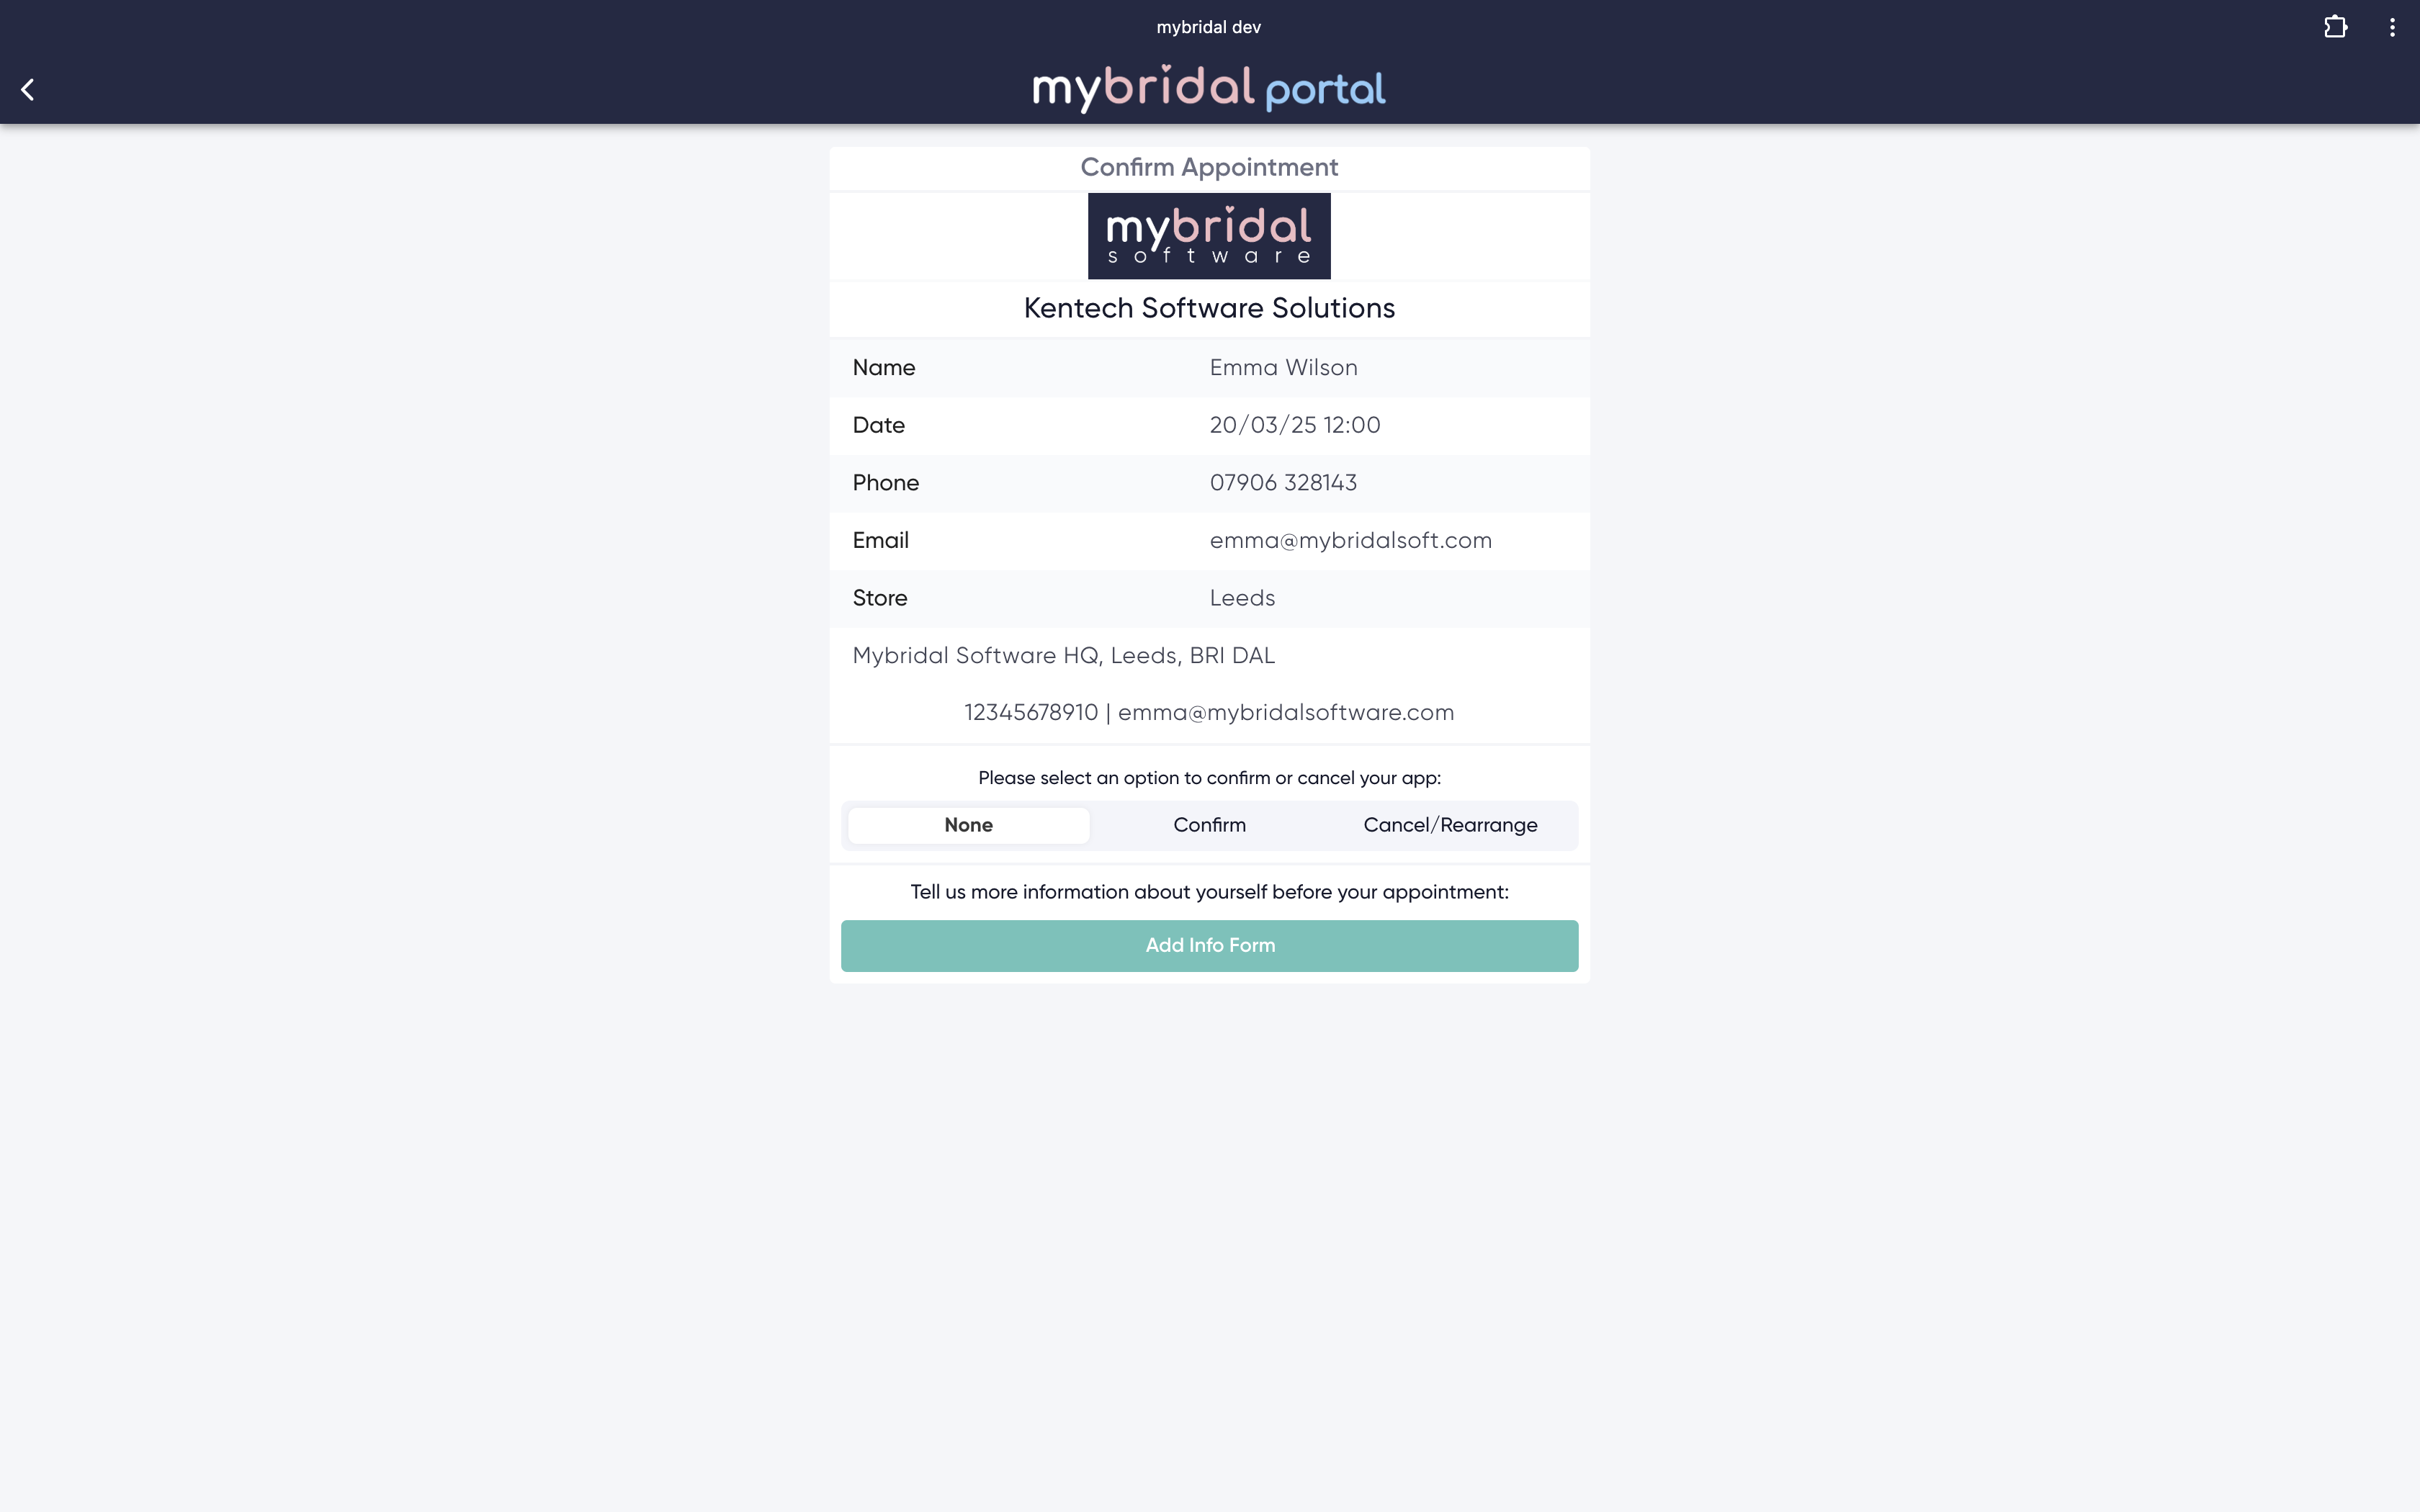
If you want to add into your appointment confirmation message the ability for your customers to cancel / request to re-arrange their appointment you can swap the URL to say |*link*| instead and it will take your customers to the page below instead of directly to the enquiry form. You can learn how to edit the content of this page by clicking here.
You also can select exactly which appointment types you want this message to send to by using the 'appointment type' filter at the top. If you are going to use this then you will want to create a 2nd appointment confirmation message (without the enquiry form link) and then select all the opposite appointment types.

If you have already got a message built and just want to add in the enquiry form link you can do this by clicking the button option in the right side bar and then dragging into the body of the message.
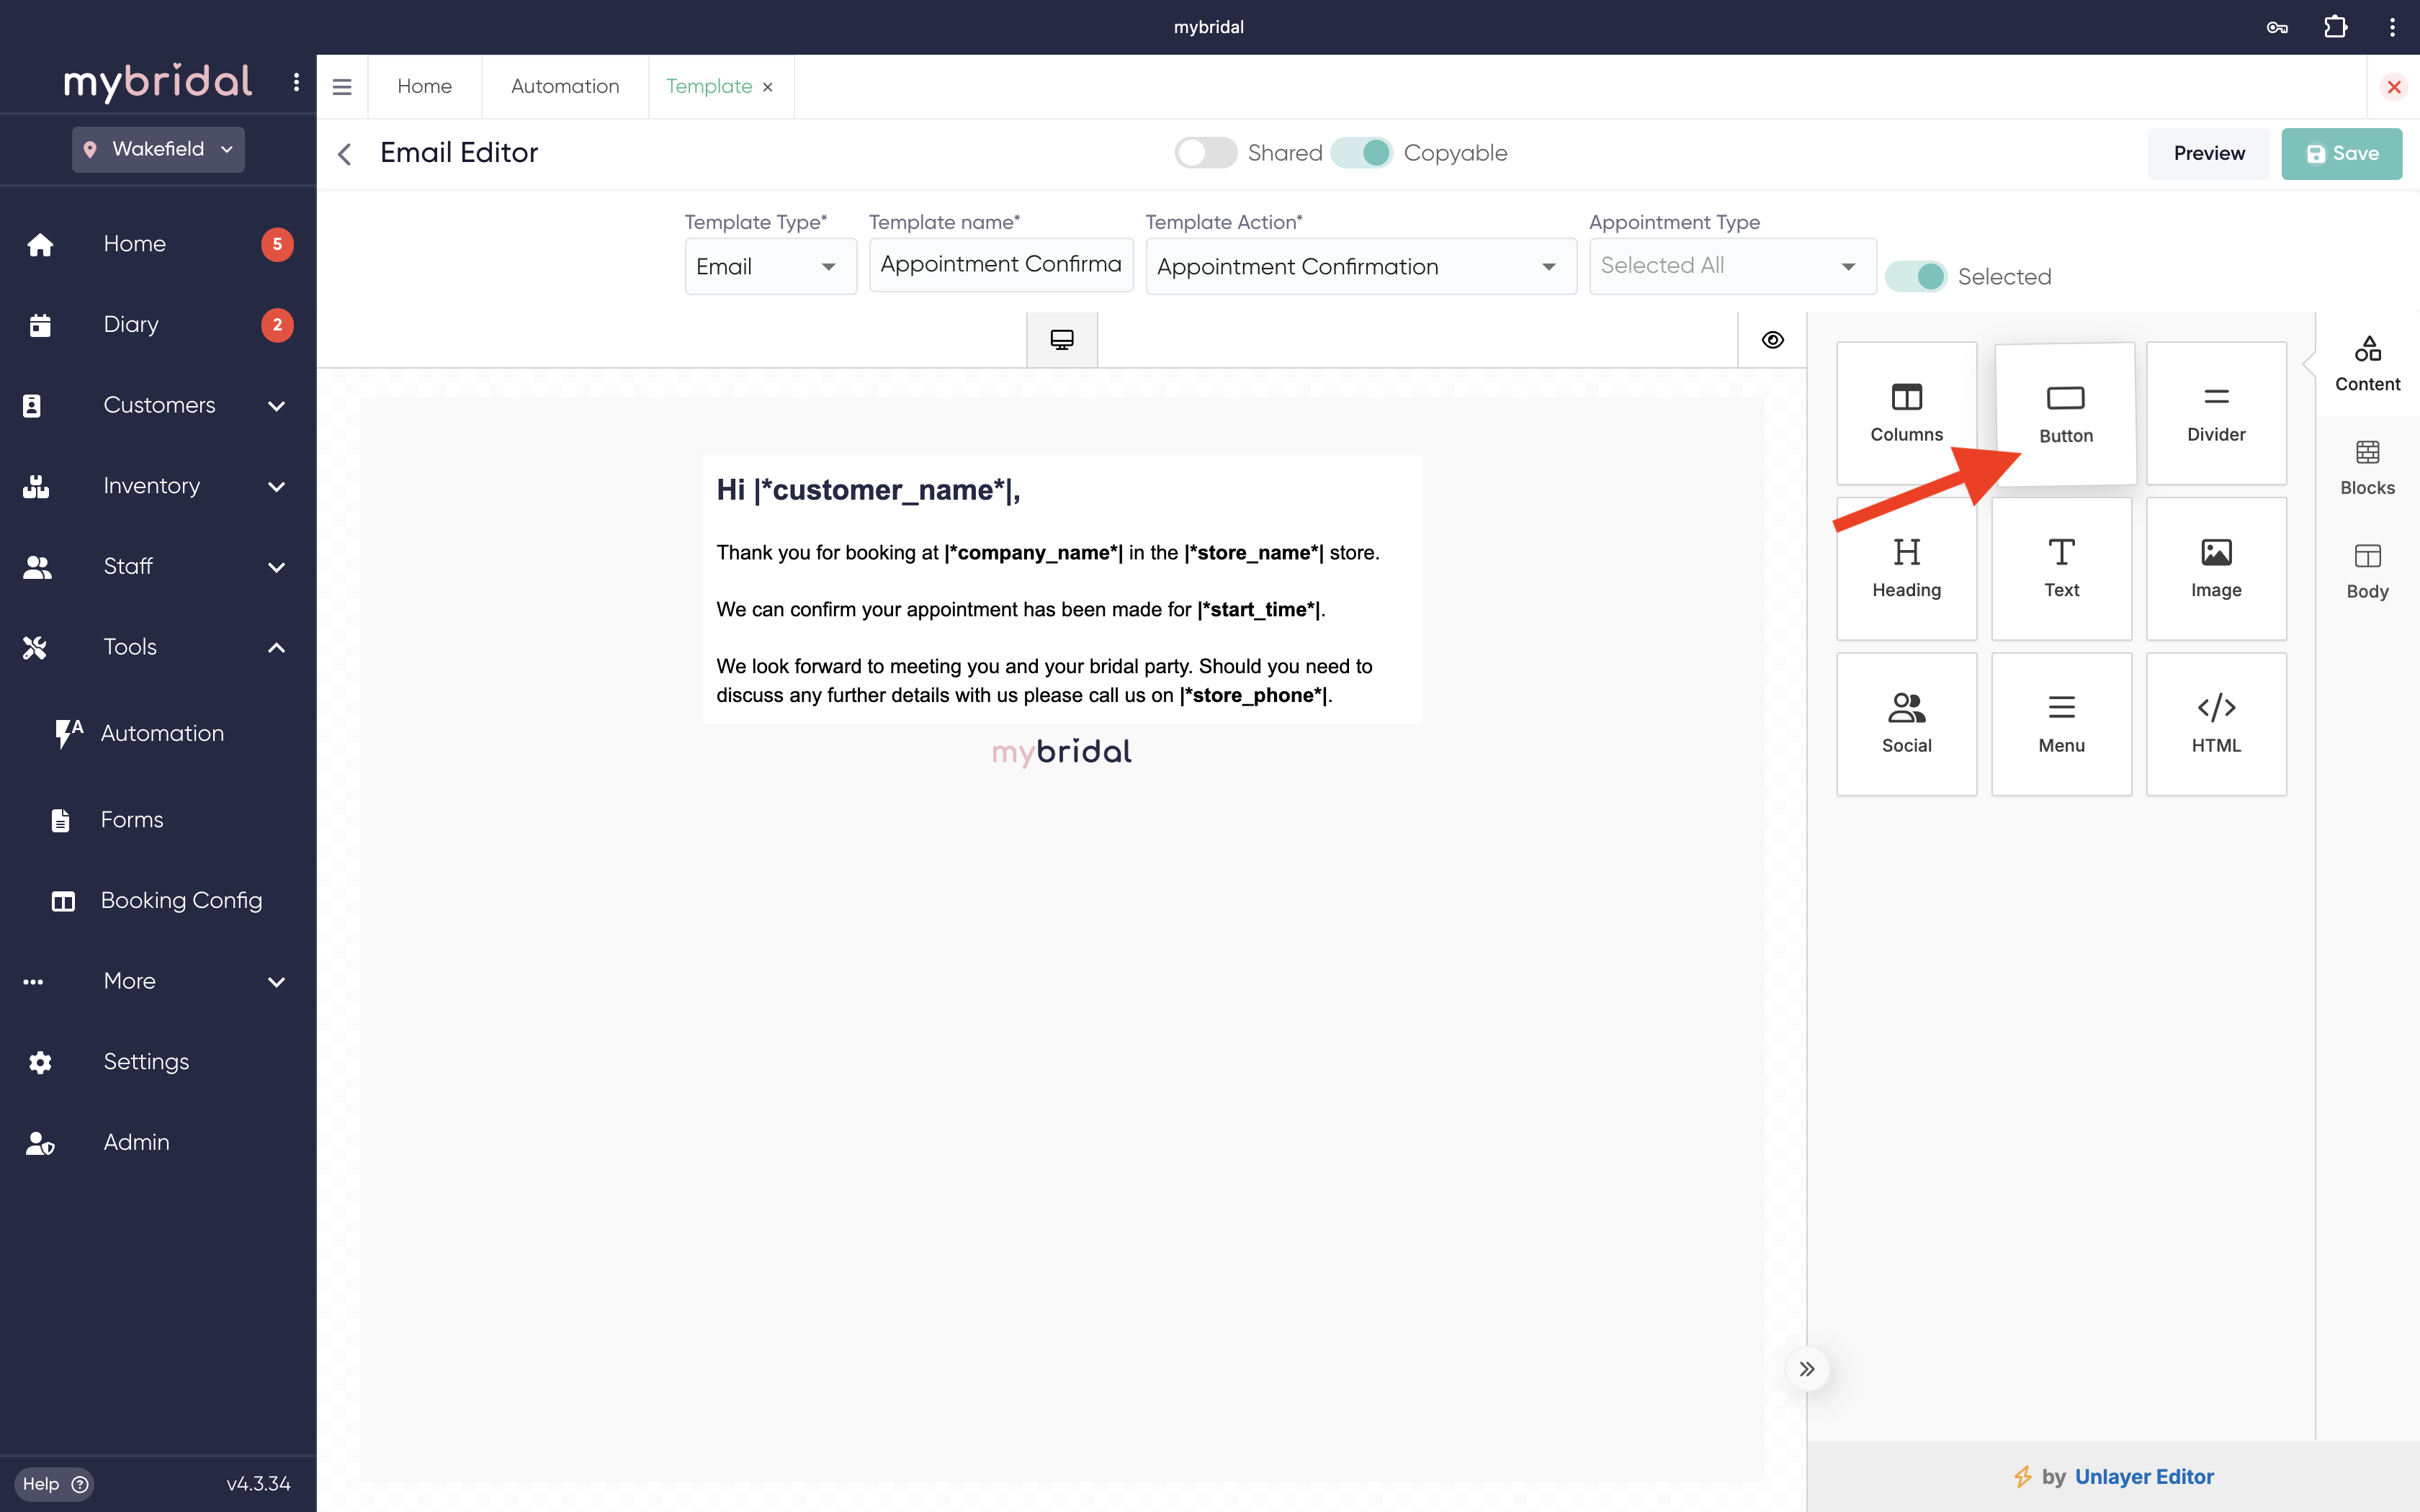
You can then click on the button itself to change the text on it and it will open up options in the right side bar to change the colour. You also set the buttons URL here and you will want to set this to either |*enquiry_link*| or |*link*| as discussed above.
Once you are happy with your message you can save it and then go to tools > automations > autoflows > add it to a new autoflow using the appointment added trigger or if you already have an autoflow for an appointment confirmation message then click on this to edit it and use the drop down option to swap to your new appointment confirmation message you have just built. You will need to add an autoflow action for any message templates created so if you have created 2 appointment confirmation messages (one with enquiry forms and one without) then you will need to add actions for them both. You can learn more about autoflows by clicking here.