Autoflows are created when triggering events happen. Examples of triggering events could be an appointment being created, an appointment itself or a customer (new sale) being added just to name a few. The information in this guide will talk you through how to apply autoflows relating to appointments such as booking confirmation messages, appointment reminders and appointment messages. The same rules are applied can be applied for other autoflows whenever you notice the pop up in the system.
When certain triggering events happen you will see the autoflow pop up menu. The most noticeable times you will see this will be when you manually add an appointment to the diary and when you add a new customer (new sale). The image below shows the autoflow pop up for when an appointment is added and is illustrated with descriptions of what each component means.
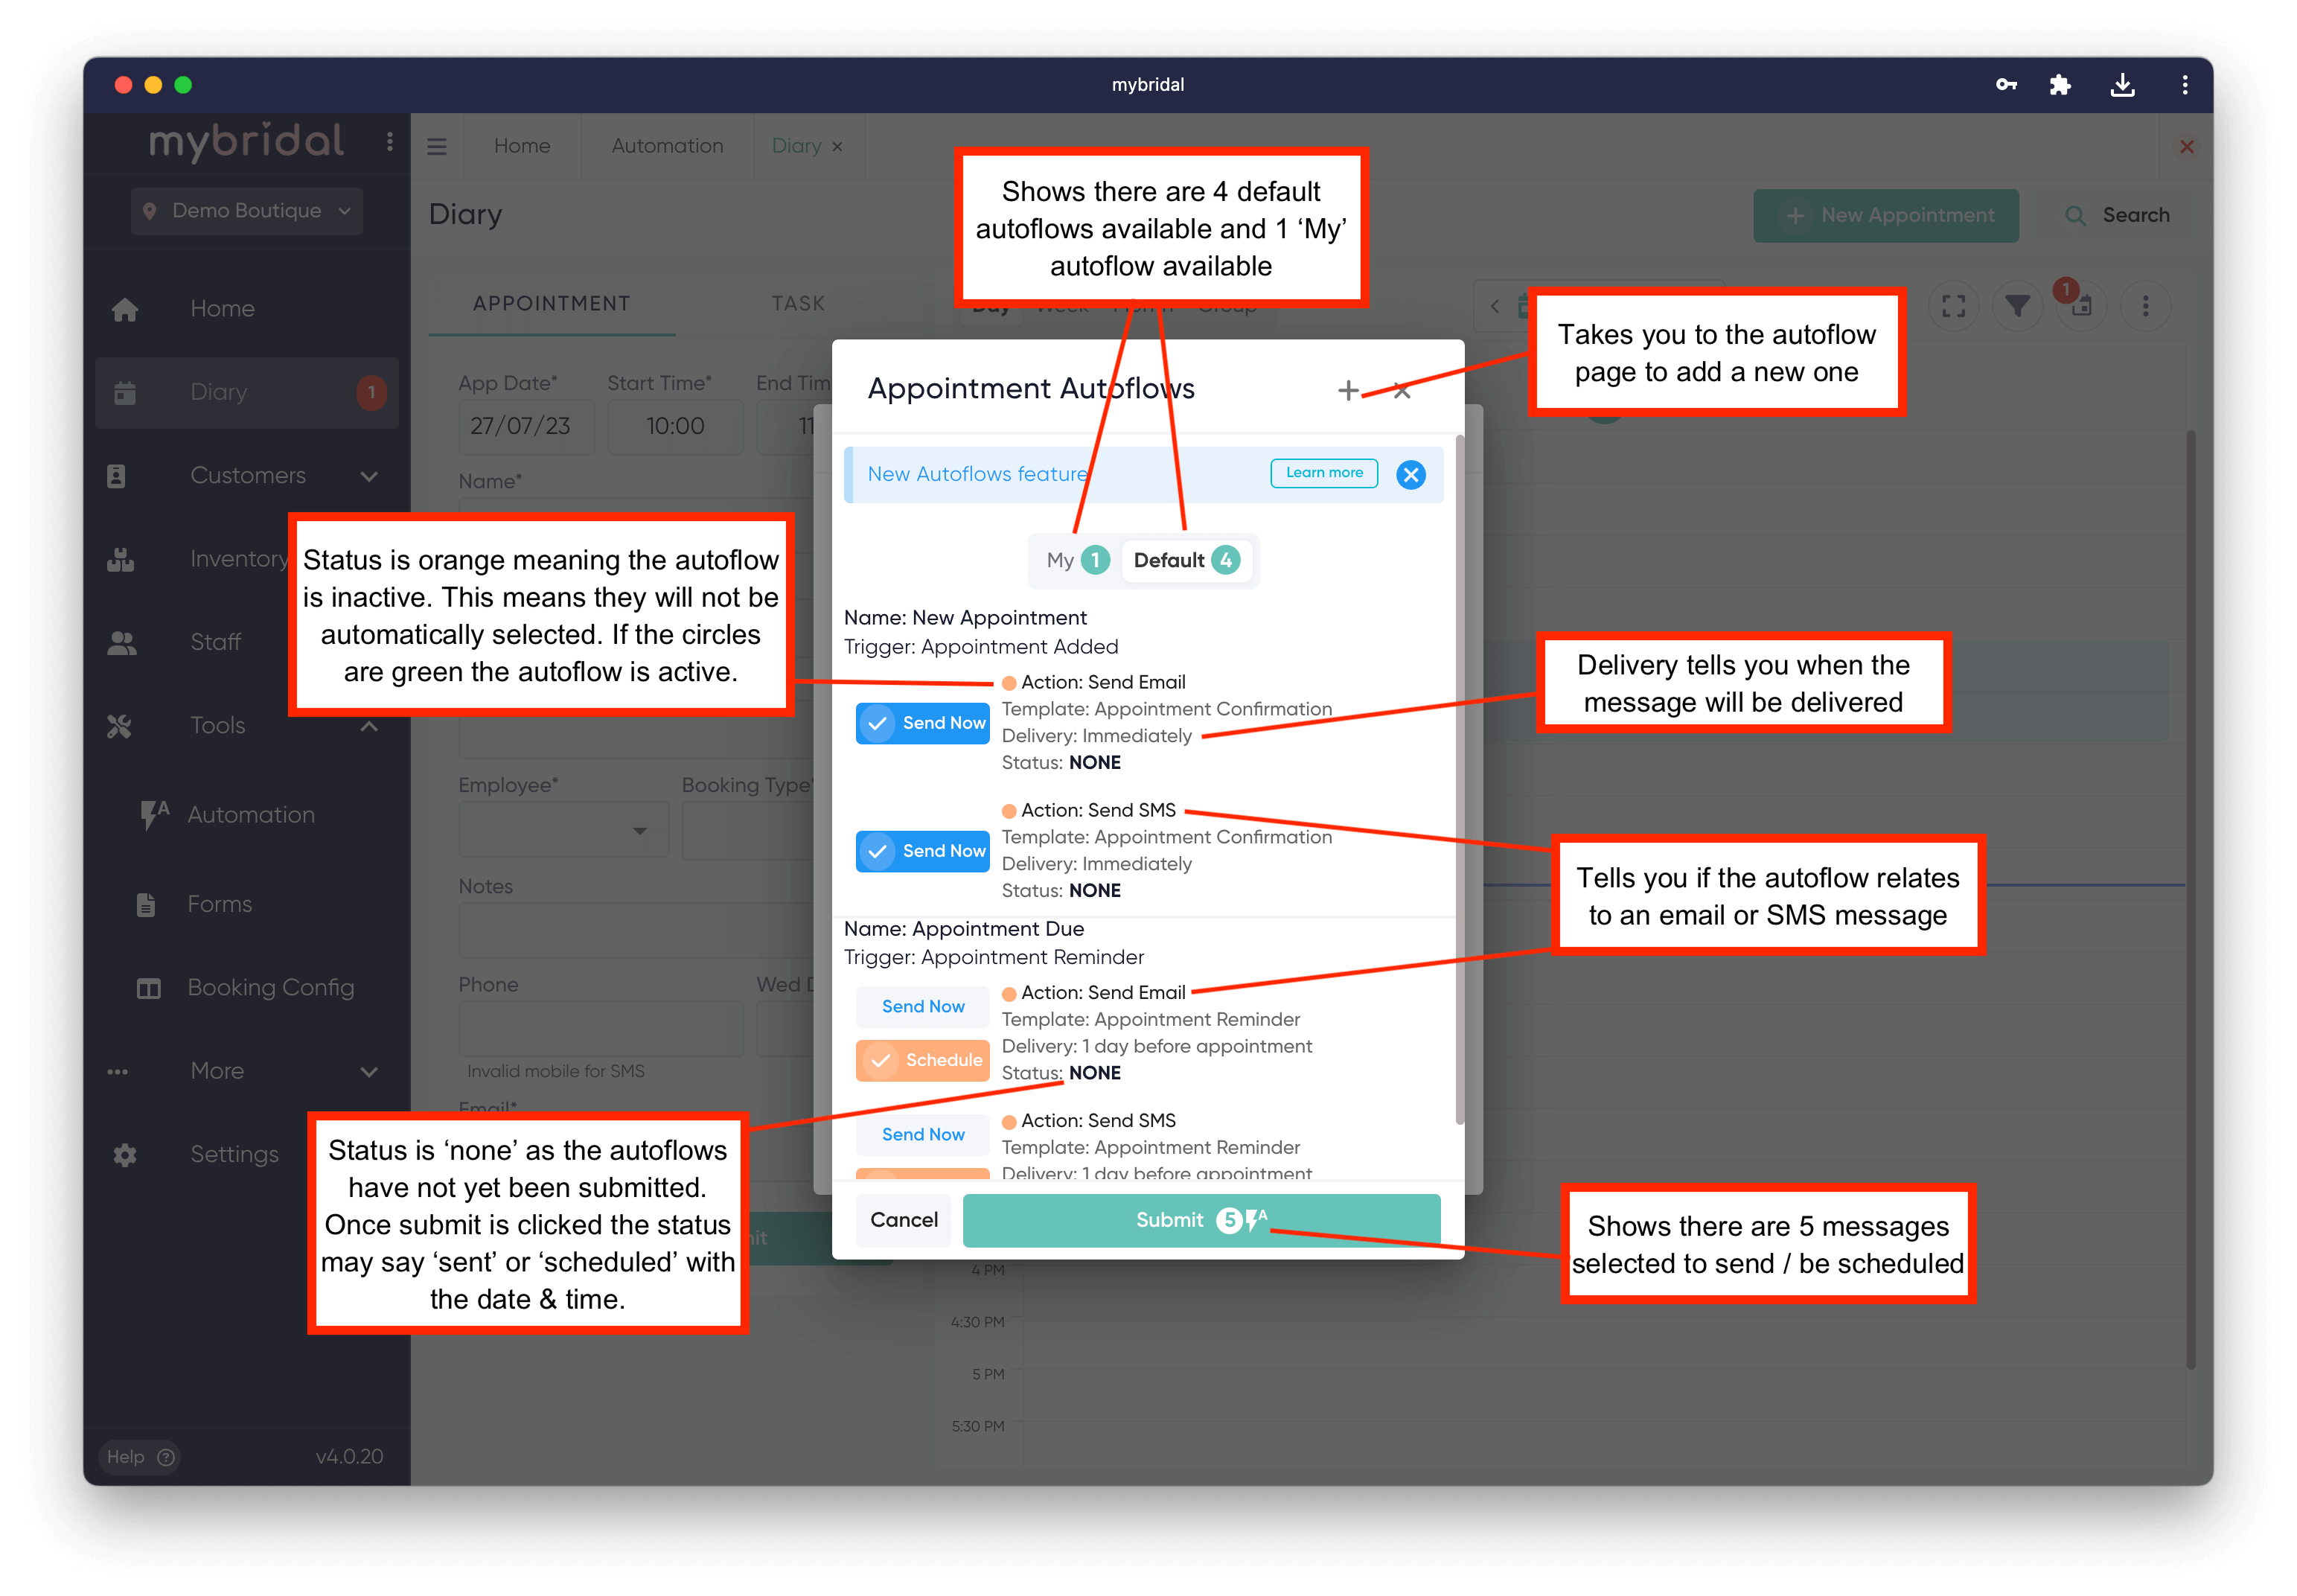
The autoflows pop up will show any available autoflows related to the action that has just happened. You can click between My and Default autoflows using the bar at the top of the pop up. Any autoflow which is set to 'active' in the autoflow settings will have a green action status and automatically be selected to send and any which are 'inactive' will show as an orange action status. You can override this by clicking on the send button to unselect / select an autoflow if you wish.
You can also see information about when the autoflow is set to send and the status of the message. This is set to 'None' as no messages have yet been sent or are scheduled to send. When you are happy with the autoflows being triggered you can click submit. Any autoflows set to send messages immediately will do so and any due to send messages in the future will now be scheduled.
*Note* If you use our online booking system for customers to book appointments through your website and have it set up so appointments are automatically added to your diary, then any active autoflows will send automatically when they book an appointment. For example if a bride goes onto your website and books an appointment for Saturday at 12pm and you have an appointment confirmation autoflow active to send immediately, then as soon as they complete the booking they will receive an email confirming their booking for Saturday at 12pm.
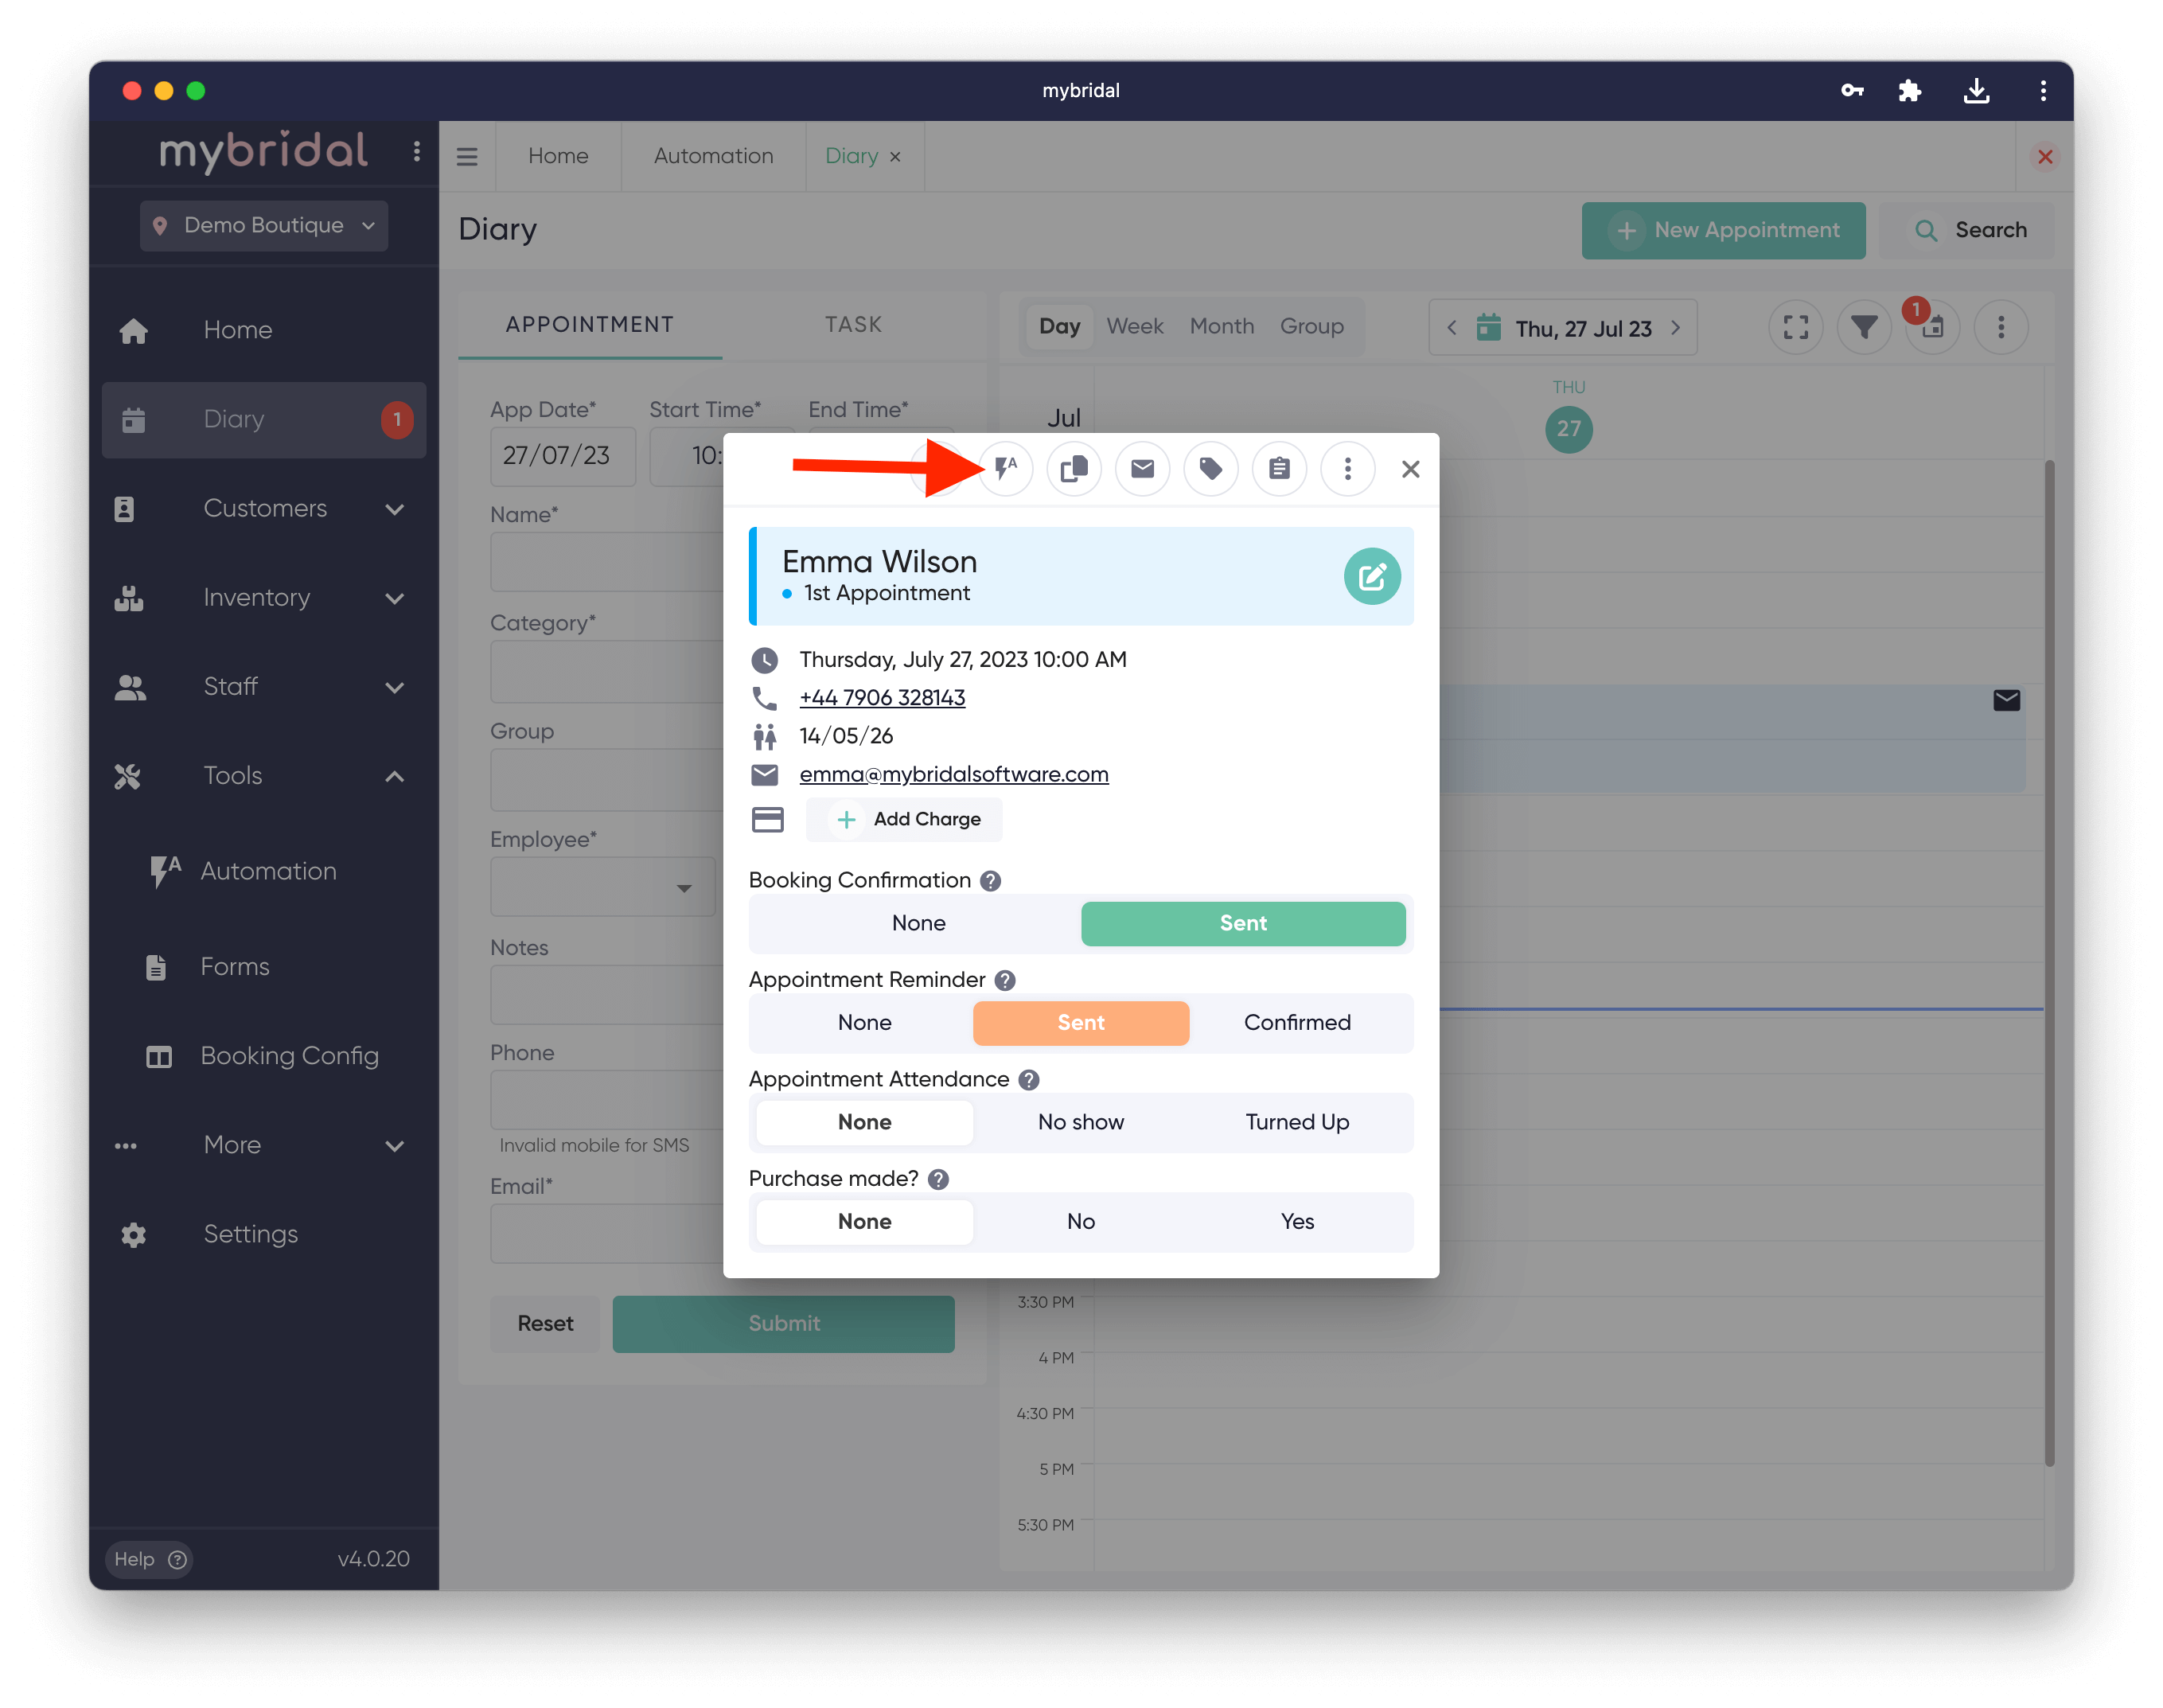
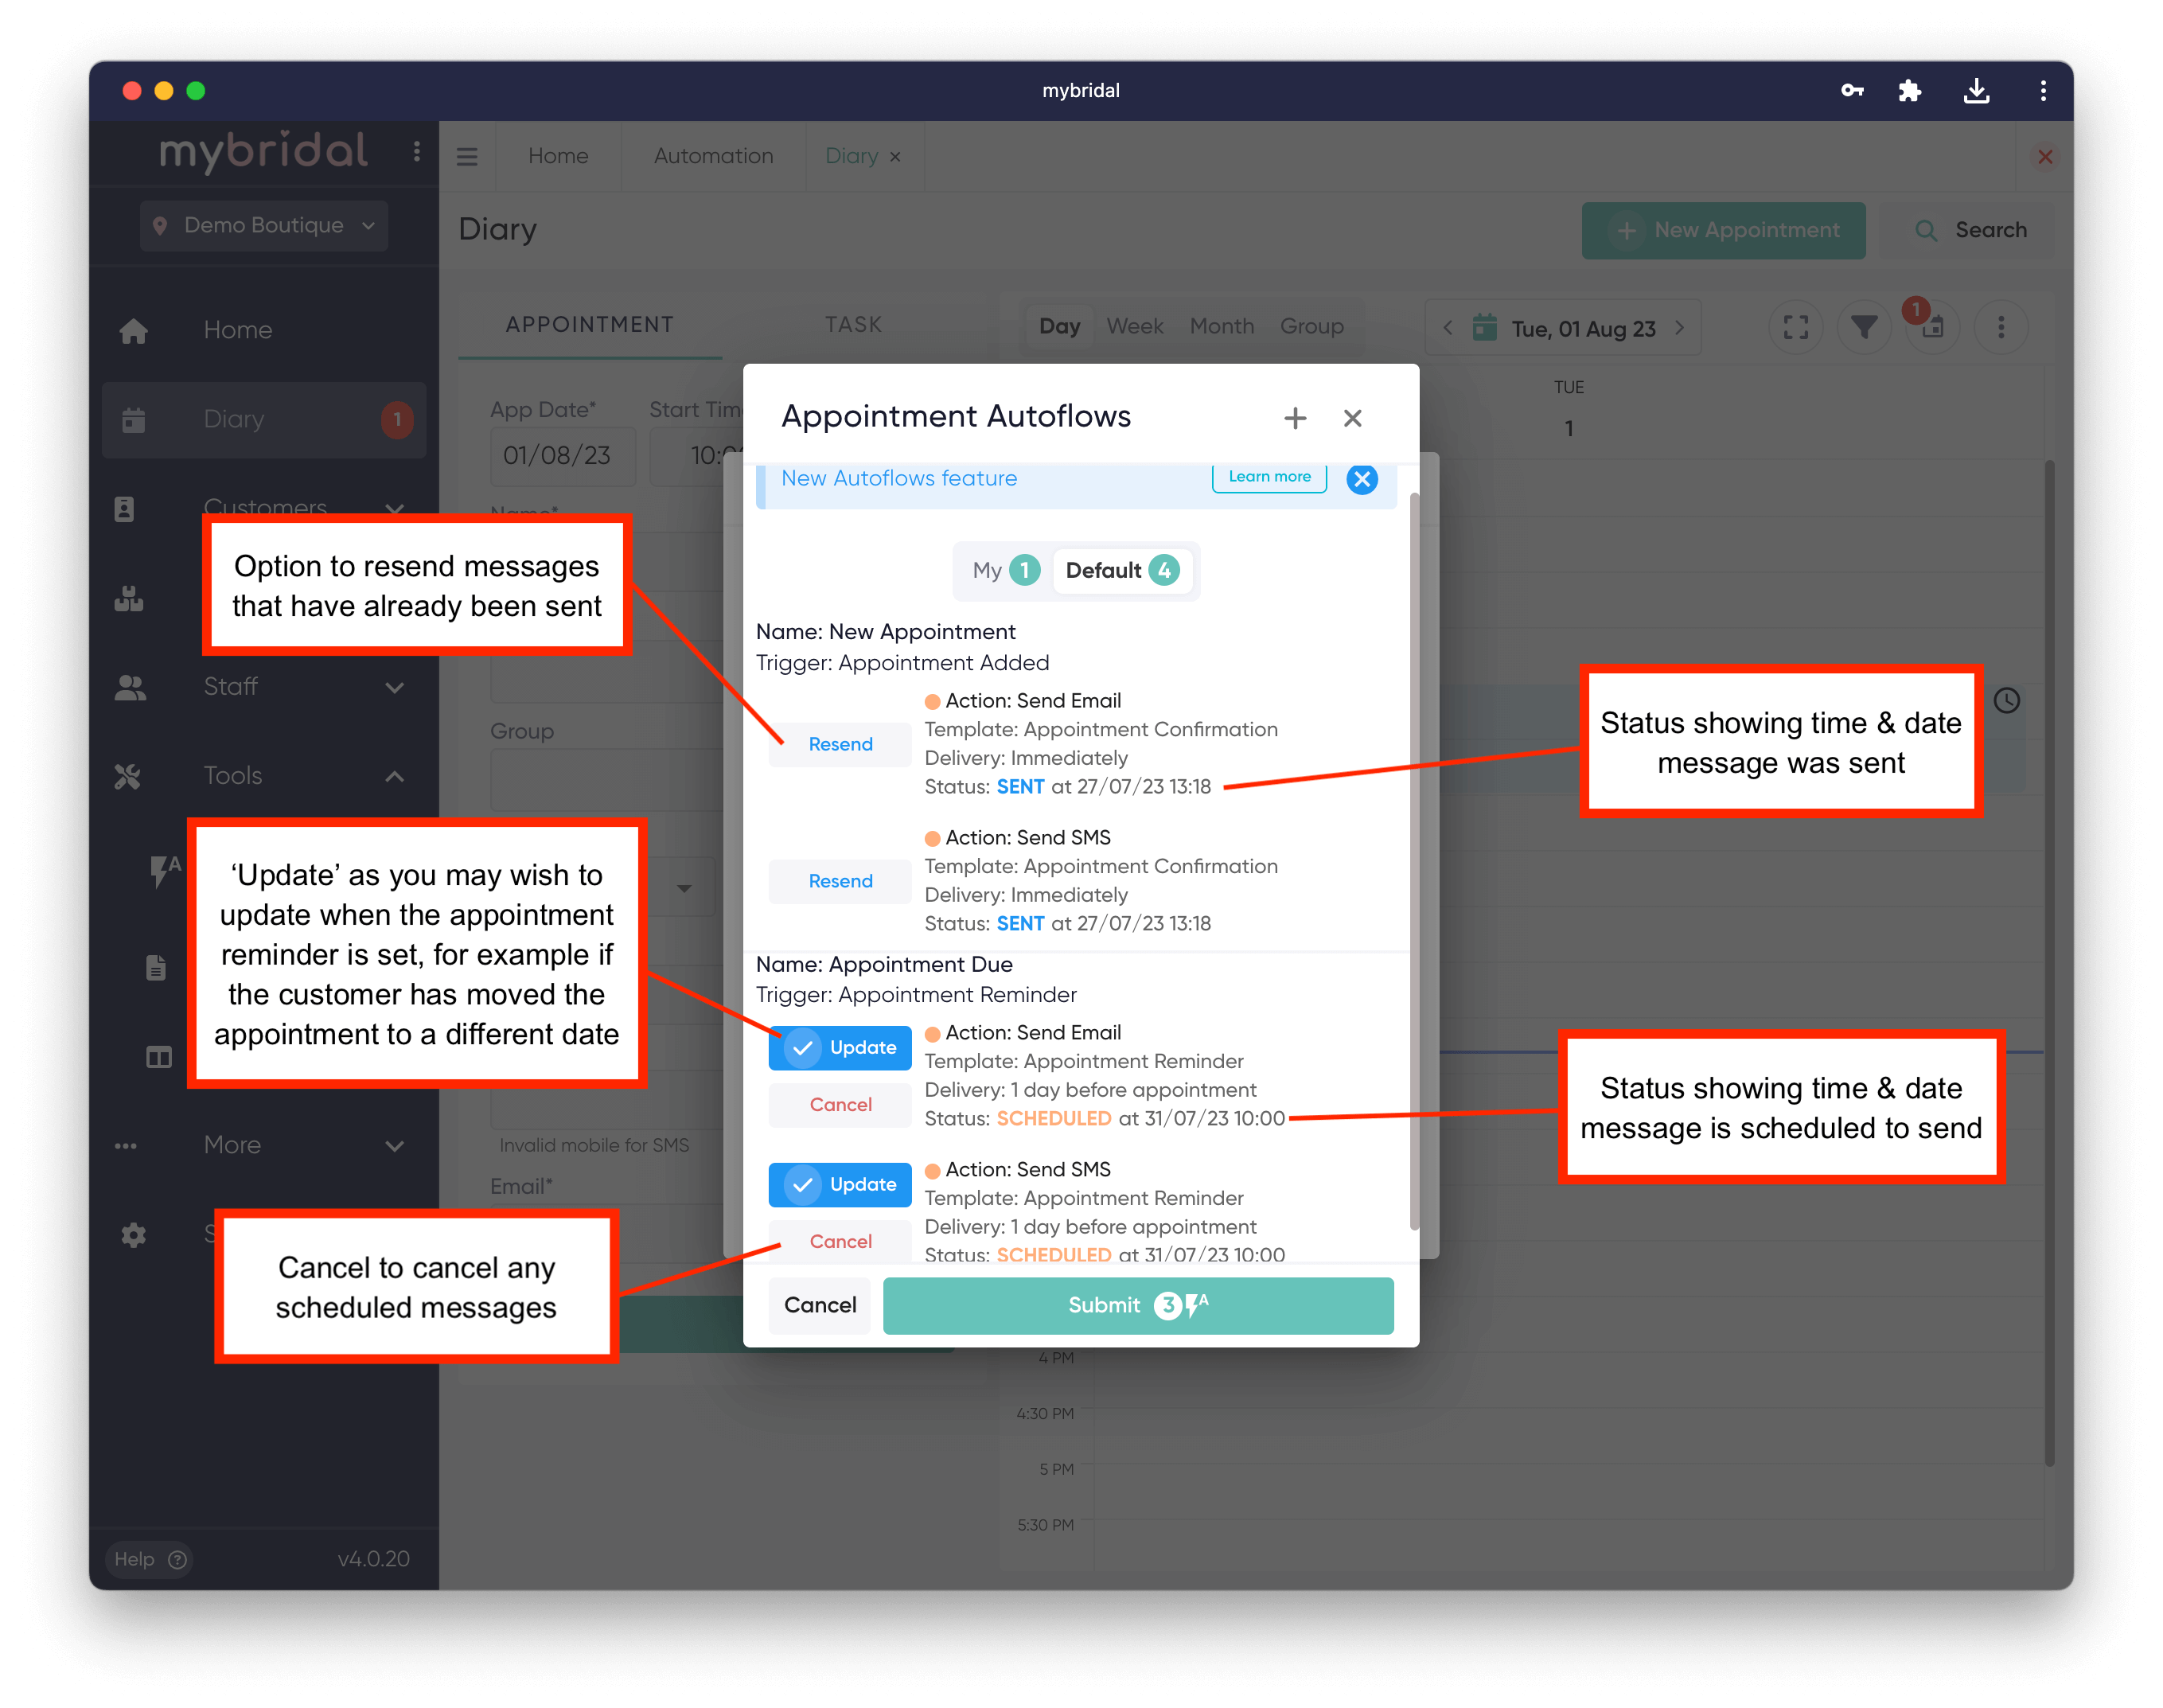
Once you have clicked submit and the autoflows have been activated you can view them by clicking the autoflow icon which will open up the autoflow pop up again.
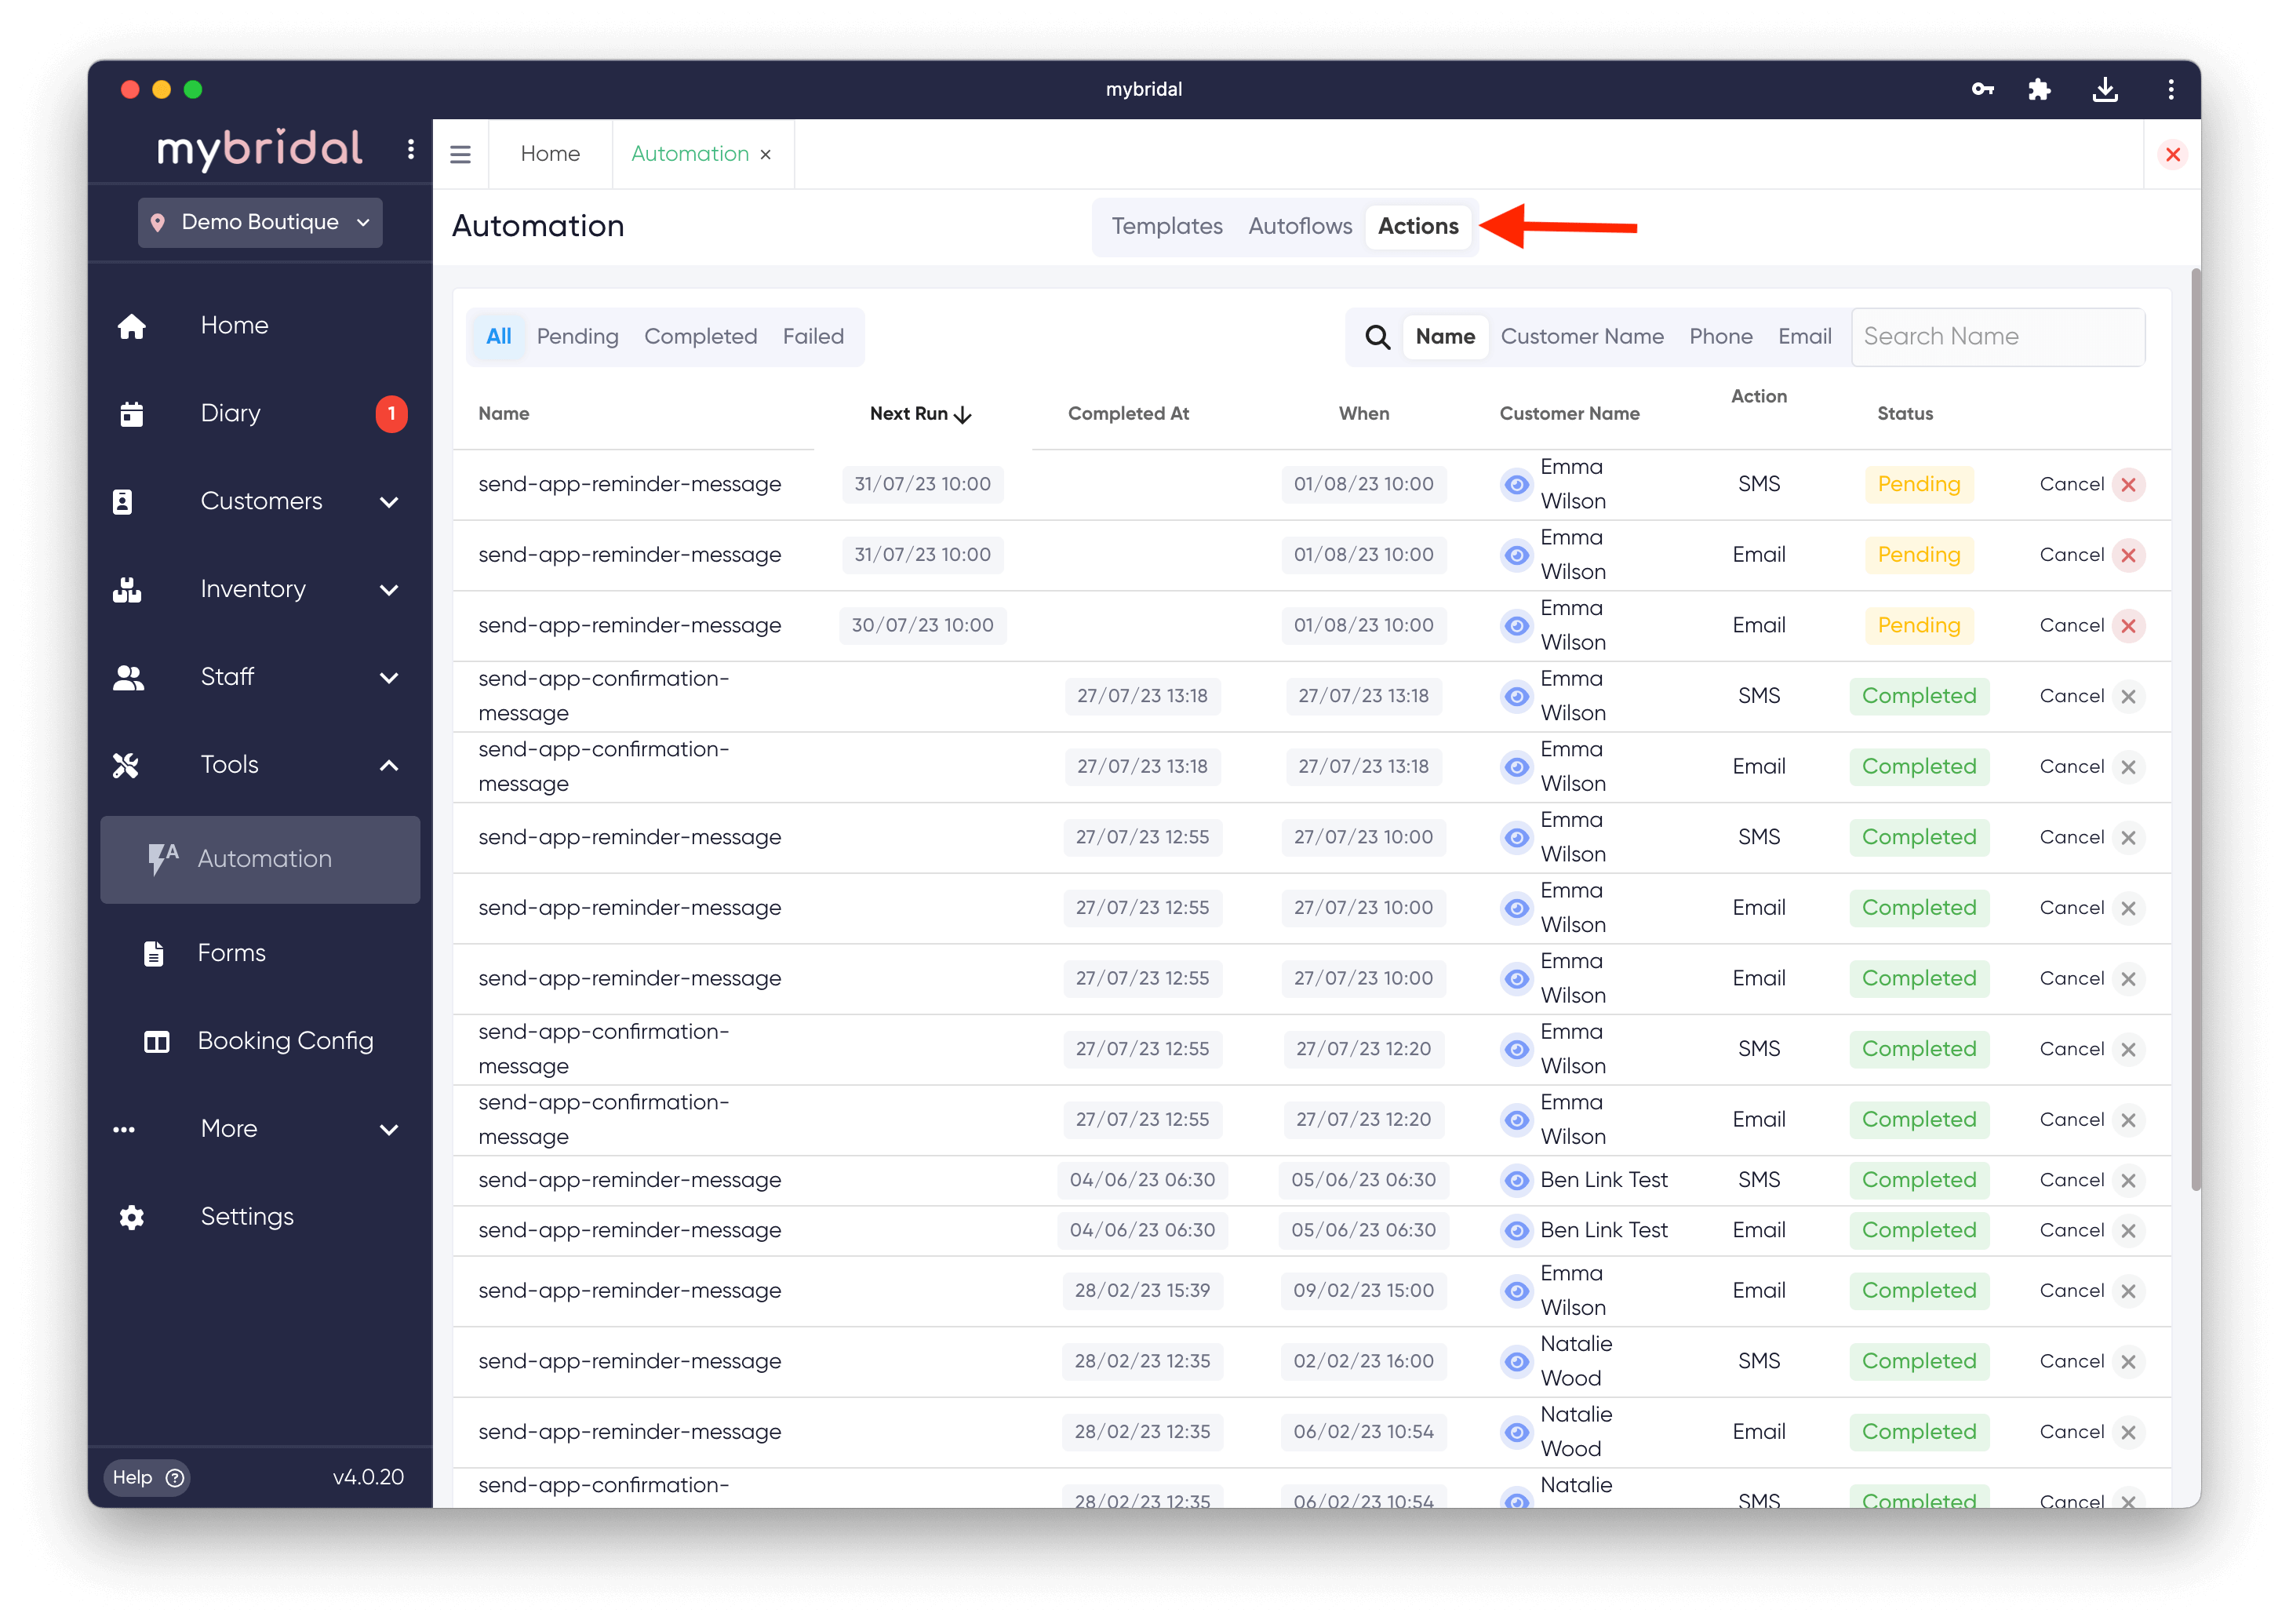
You can also view a full database of all completed and scheduled autoflows. You can access this by visiting tools > automation > actions. This will list the name of the autoflows, what time and date they were completed or due to run, the customer they relate too, whether they are an email or SMS, and whether it has been completed or is pending. If they status is pending you can chose to cancel them if you wish. By clicking on the blue eye icon you are taken to the relevant customer area or appointment for each autoflow and can then make changes or view further information about that autoflow by opening the autoflow pop up. If a message has a 'failed' status you can hover over where it says failed and it will tell you a reason. A common example is insufficient SMS credits.