The standard online booking system you can embed on your website / link to allows you to choose what days of the week you are open, what hours you are open for, and how many people can be seen in your store at once.
If you feel you need a more detailed configuration to set up the booking system exactly how you want, you can do this using the Advanced Booking System settings. This allows you to create a diary of exactly what appointments you want to show as available on the booking system at any given time.
It may be that you have 2 changing rooms, one of which can host bridal appointments and the other 2nd appointments, prom and bridesmaids. You may want to add a closed period in the day for a school run. You might want to set your appointments up so they start at an exact time such as 10, 12, 2 etc. The new booking system settings allow this to all be configured.
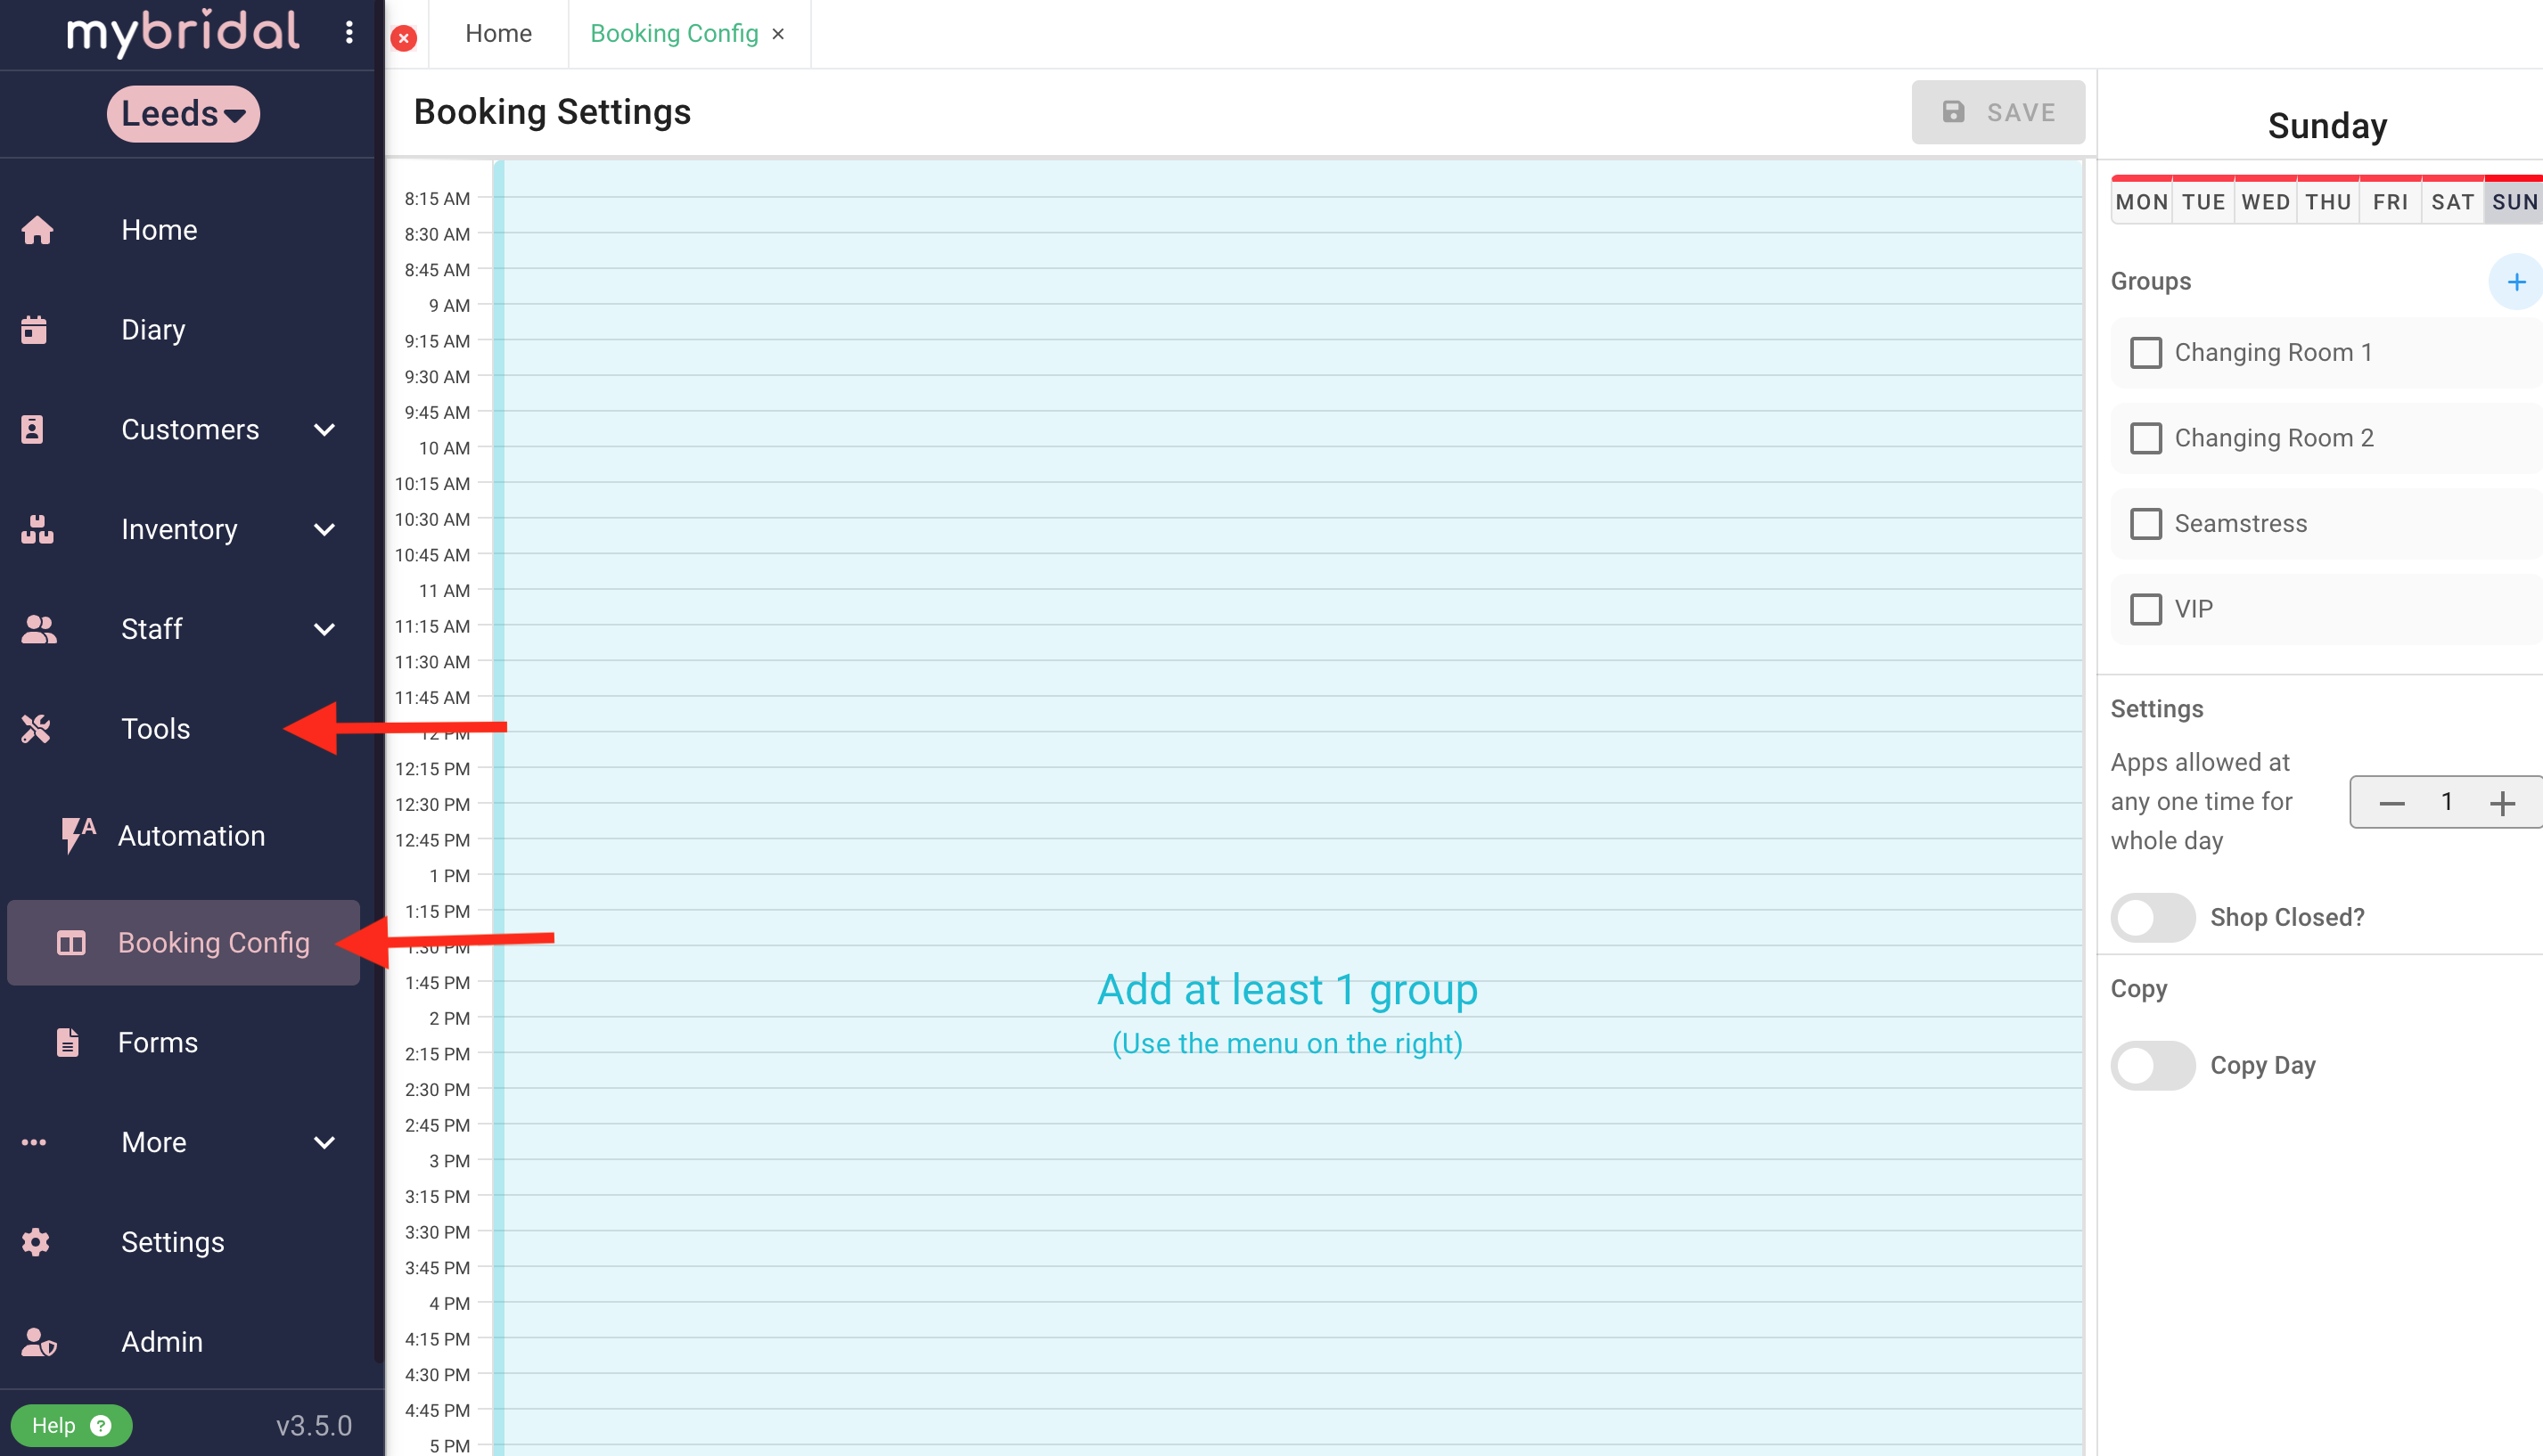
You can access advanced booking system settings by visiting tools > booking config.
The video guide below will talk you through how to use the advanced booking system settings and how to configure them to suit your stores exact requirements.
Once you are happy with your settings hit 'Save' and mybridal will then use these settings for the online booking system to show availability of different appointment types at different times and days.
How to set the 'Bookable Window'
The bookable window allows you to choose the window in which a customer can book an appointment. This can be used to stop last minute appointments sneaking in, or to prevent appointments being booked years in advance.
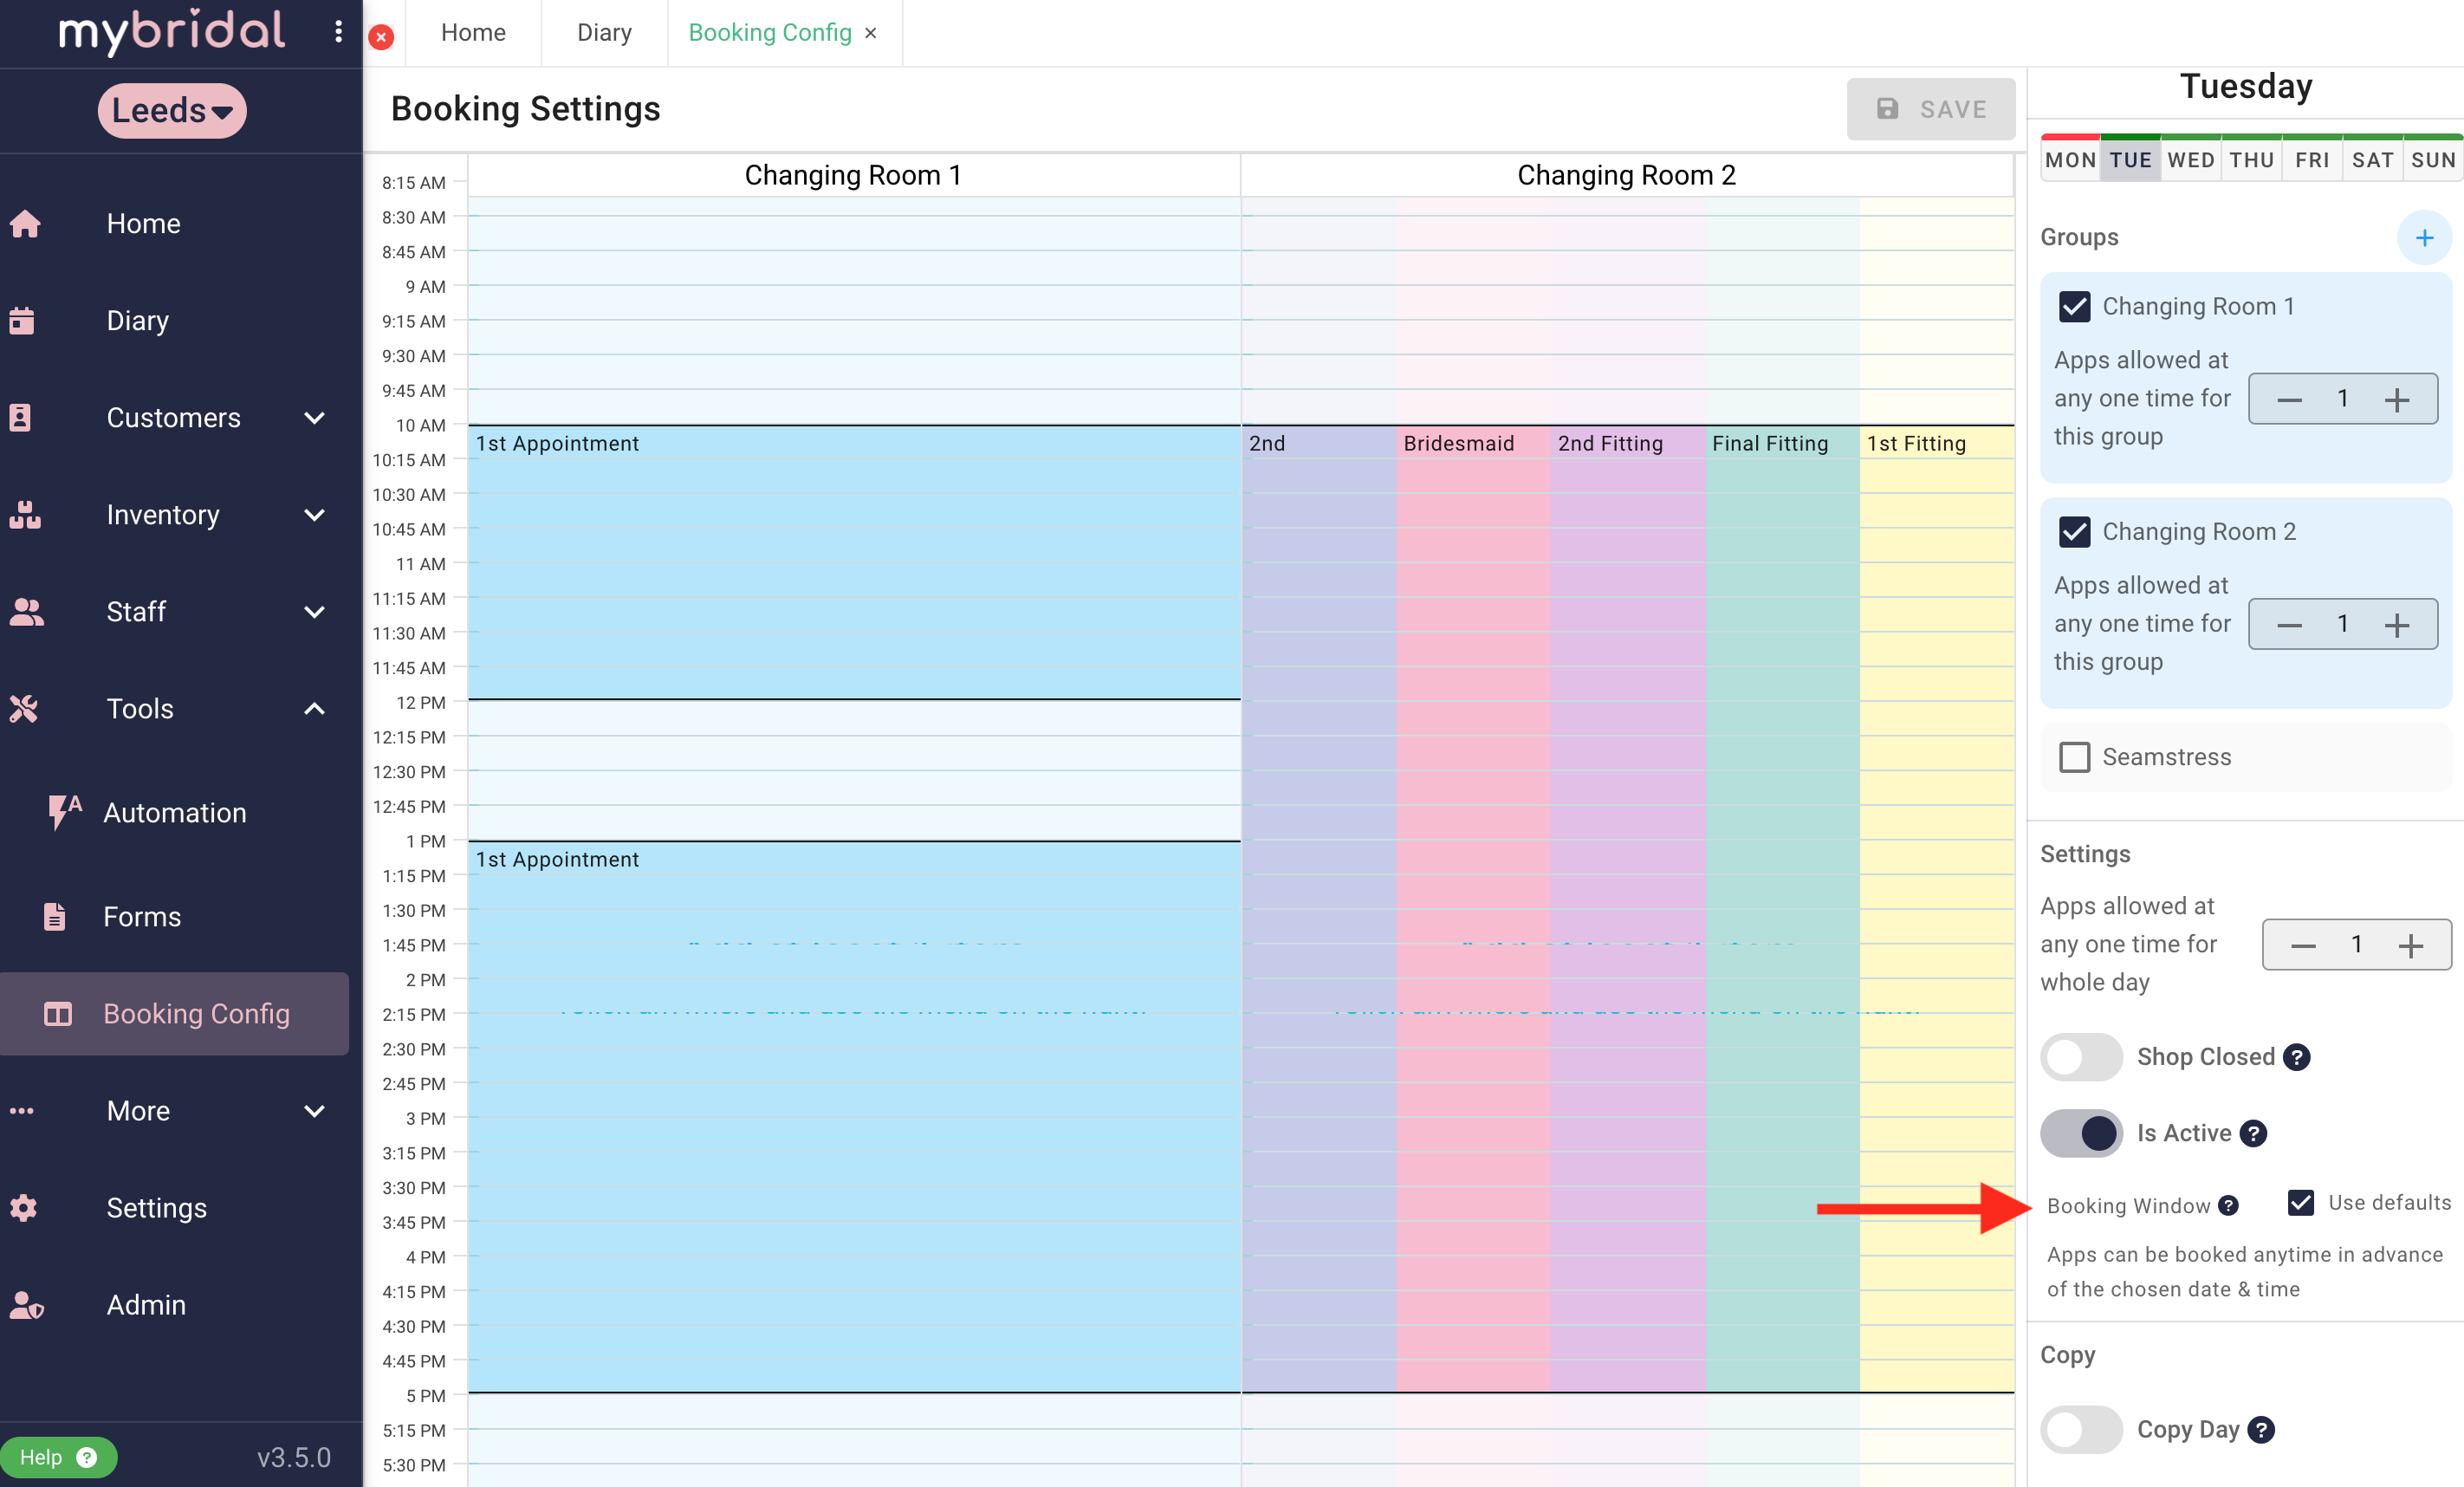
You can find the settings for the bookable window as shown below. The default will be automatically selected meaning no restriction applies and your customers can book appointments at any point running up to the appointment date and time.
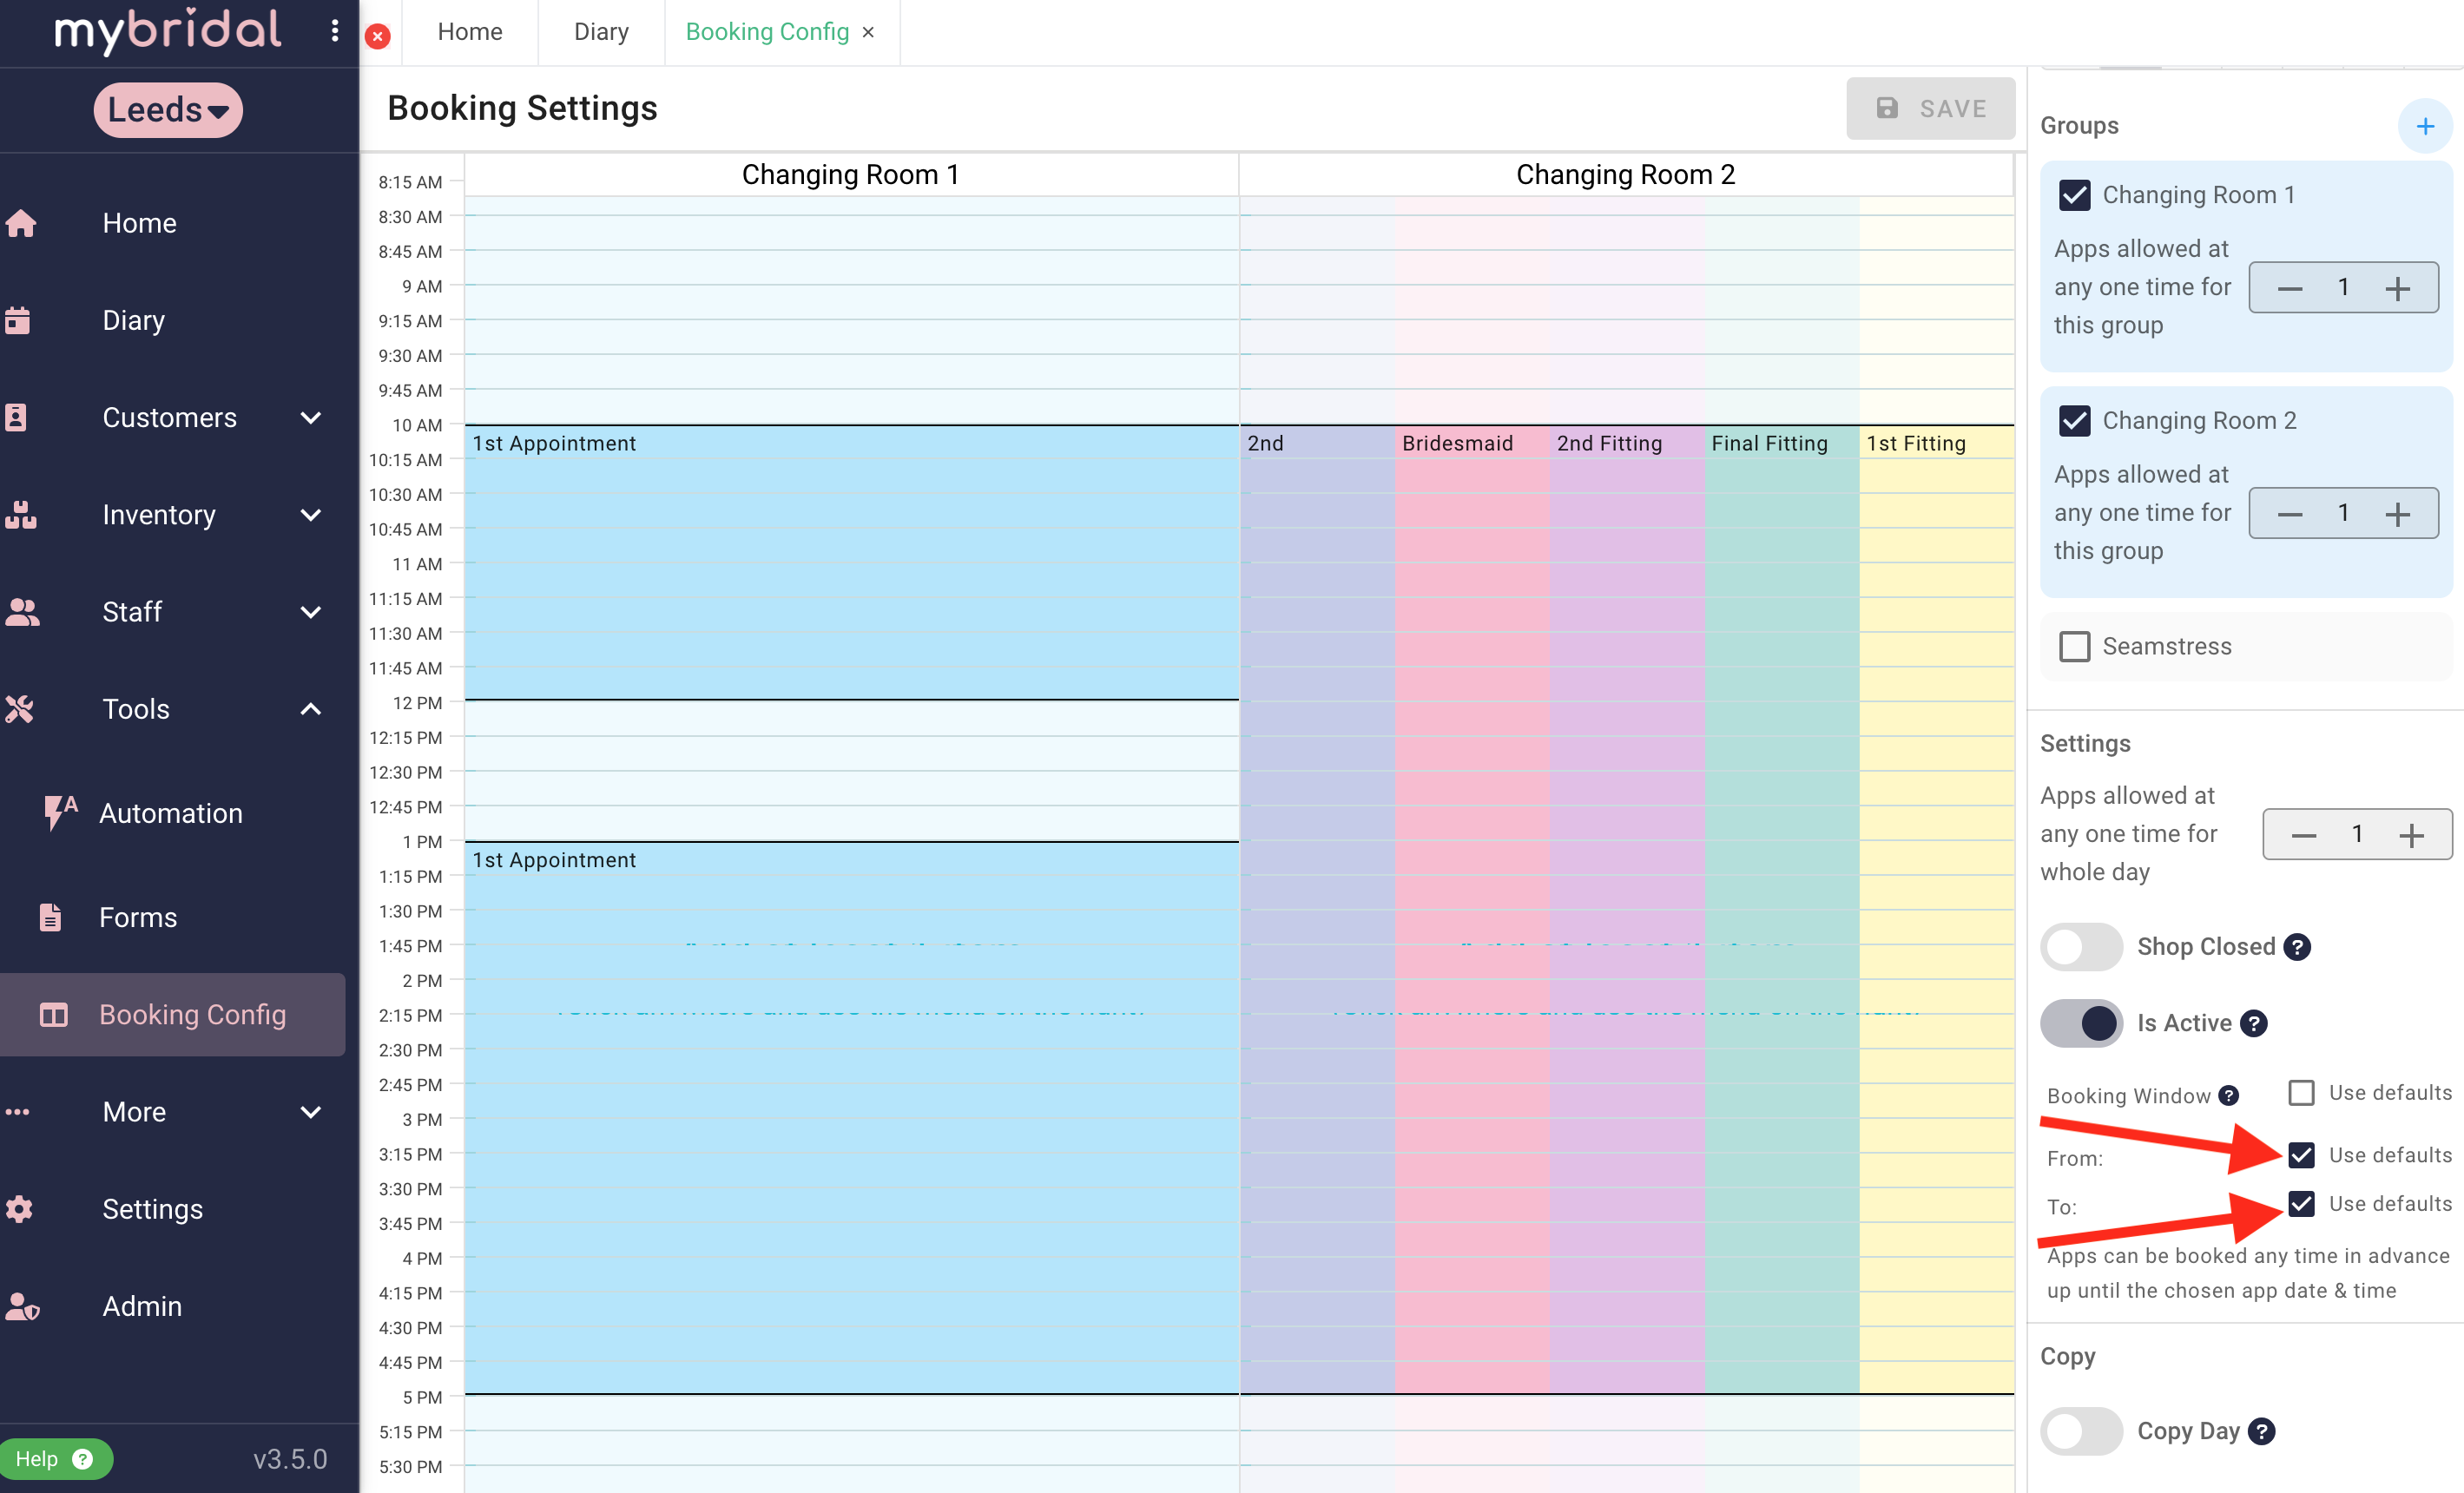
If you wish to set a custom bookable range uncheck the 'use defaults' box. You will see settings for the bookable window From and To.
If you wish to edit the From date uncheck the use defaults check box for this, and the same applies for the To date, or you can uncheck both if you want to change both.
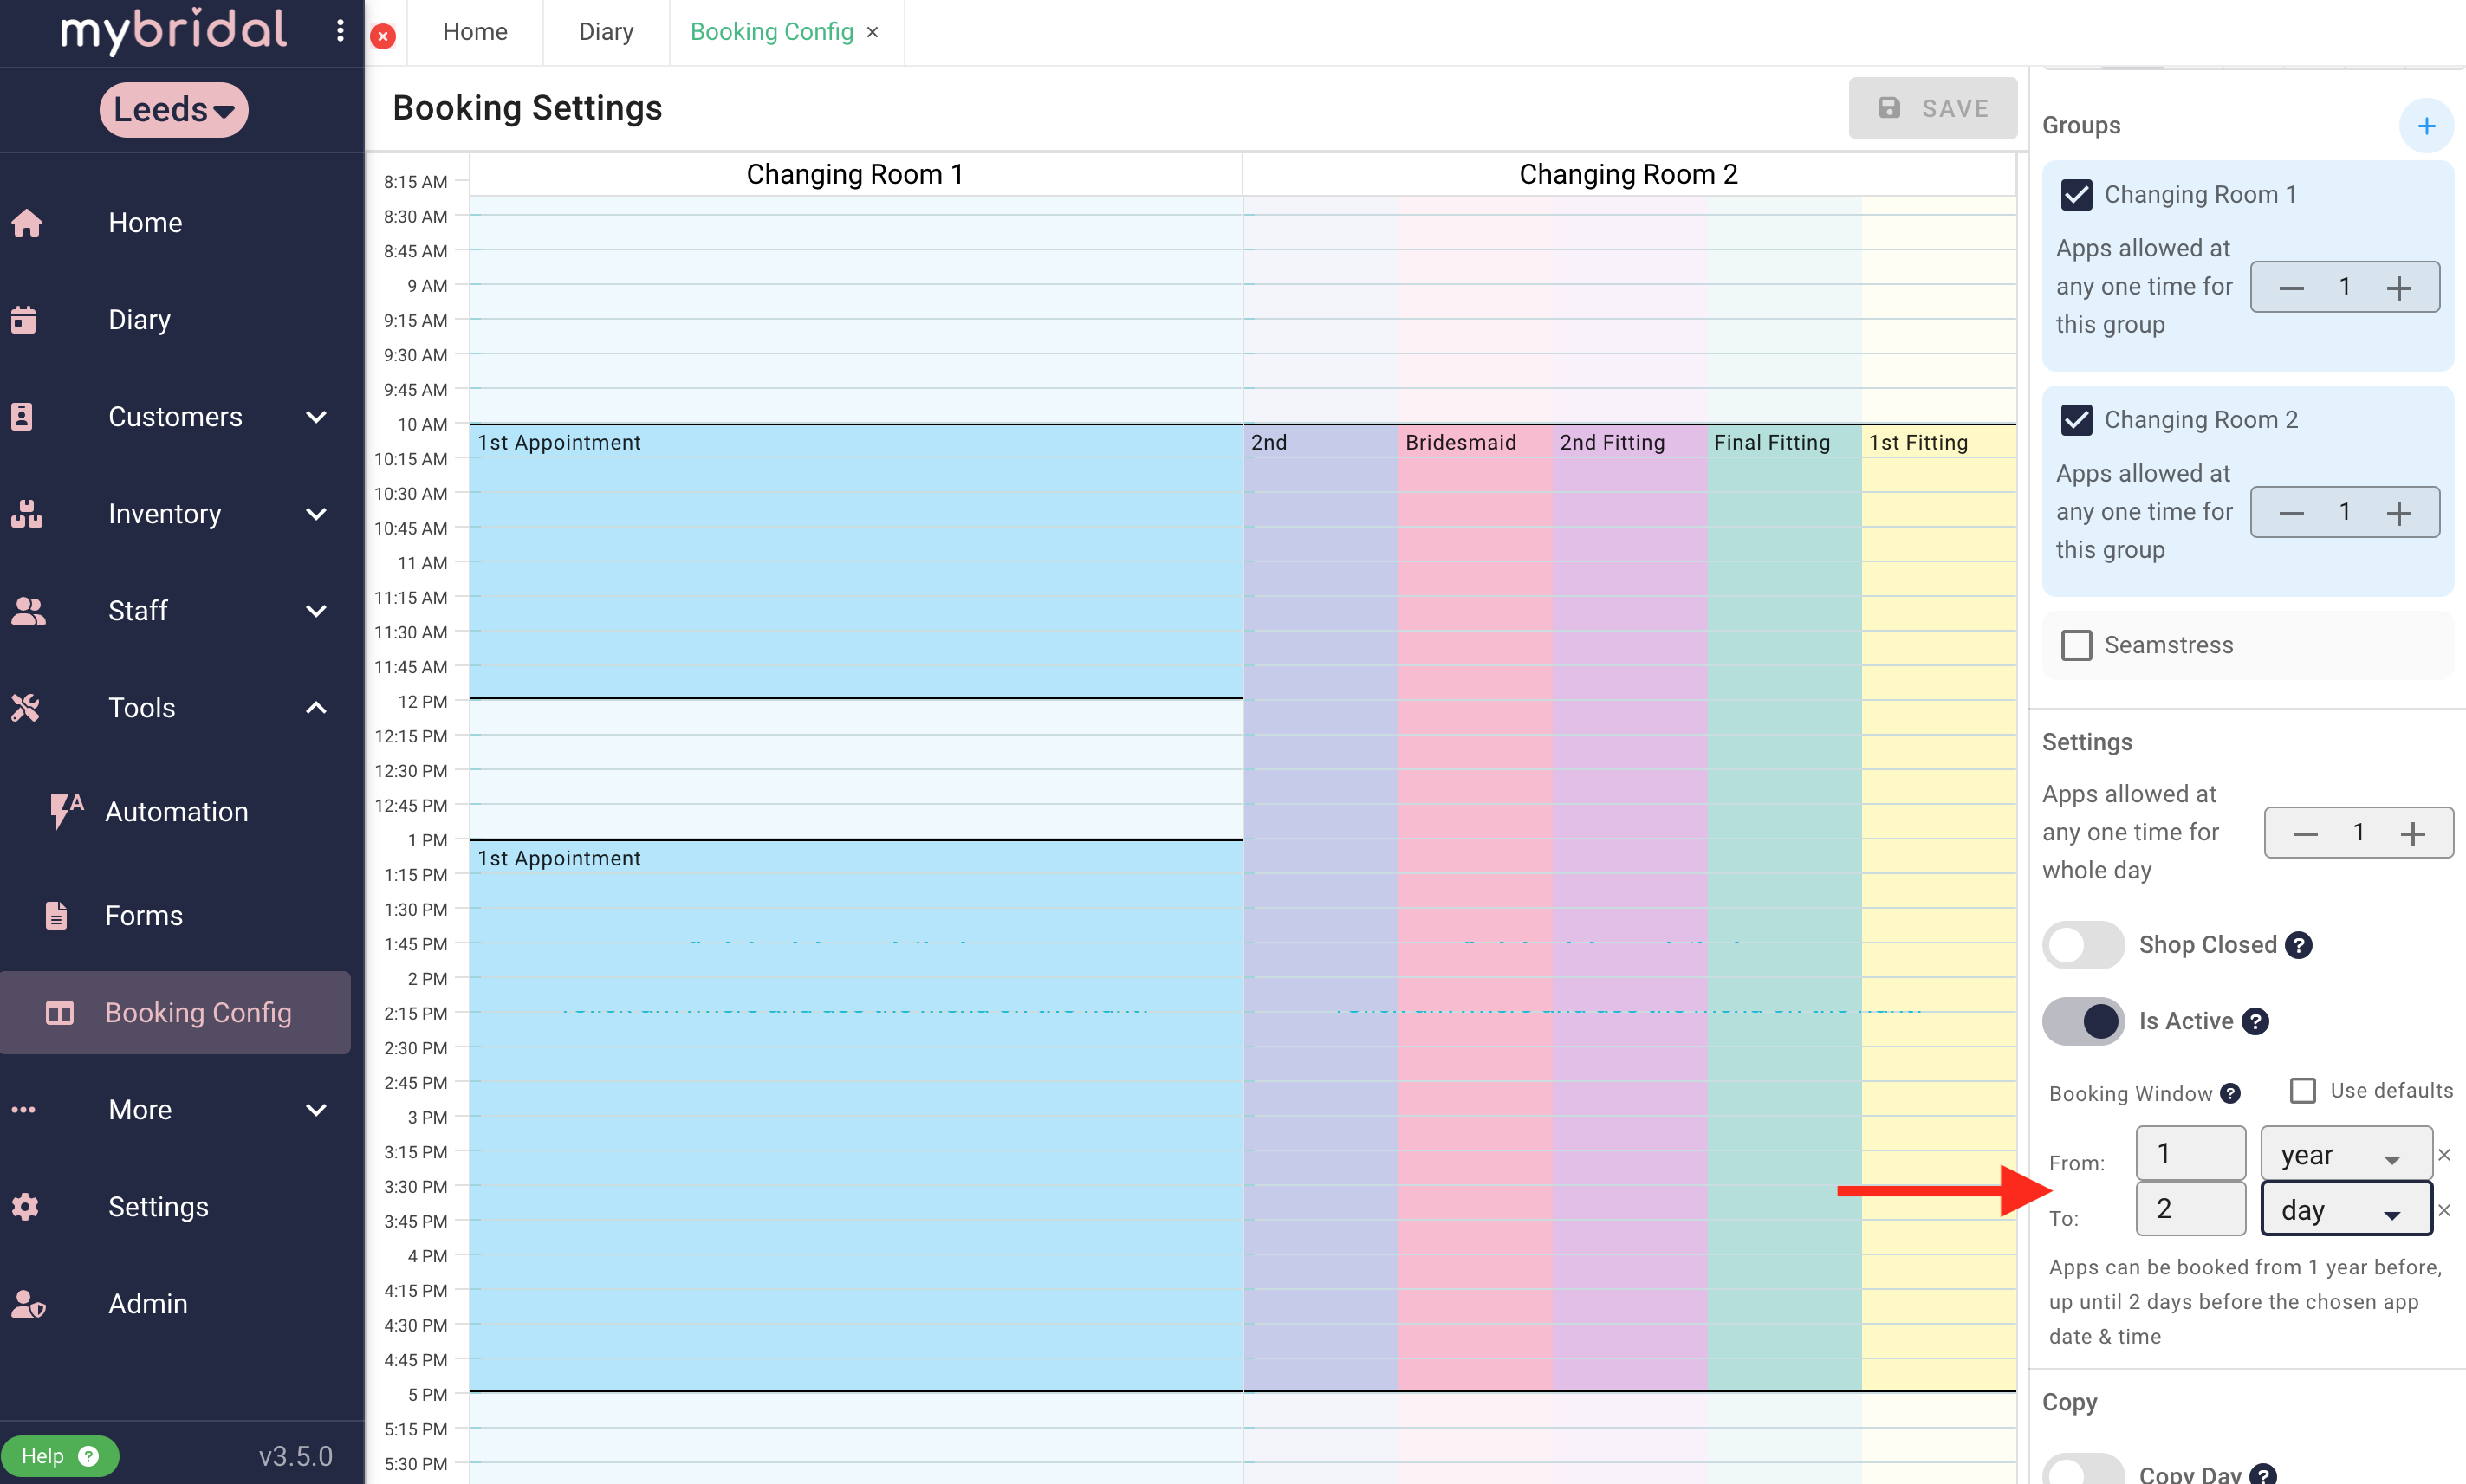
Once the boxes are unchecked you can select the timeframe you want for booking using the drop down options. The example below shows the settings which would allow your customers to book an appointment anytime between 1 year in advance of the appointment upto 2 days before the appointment. Once you are happy with the rest of your settings you can hit save at the top.